With so many fun free things to do in Colorado Springs, it’s among the best budget-friendly Colorado destinations. Whether you’re an outdoor lover, a history buff, or an art enthusiast, Colorado Springs has something for everyone to enjoy at no cost. Maximize your travel budget and plan the ultimate Colorado vacation with the top free things to do in Colorado Springs.
Old Colorado City is one of my favorite areas of Colorado Springs to explore. The historic neighborhood has tons of boutiques, art galleries, restaurants, and coffee shops lining Colorado Avenue. It’s also a popular hub for free events, like farmer’s markets, holiday light shows, and concerts—not to mention an ArtWalk offered on the first Friday of each month.
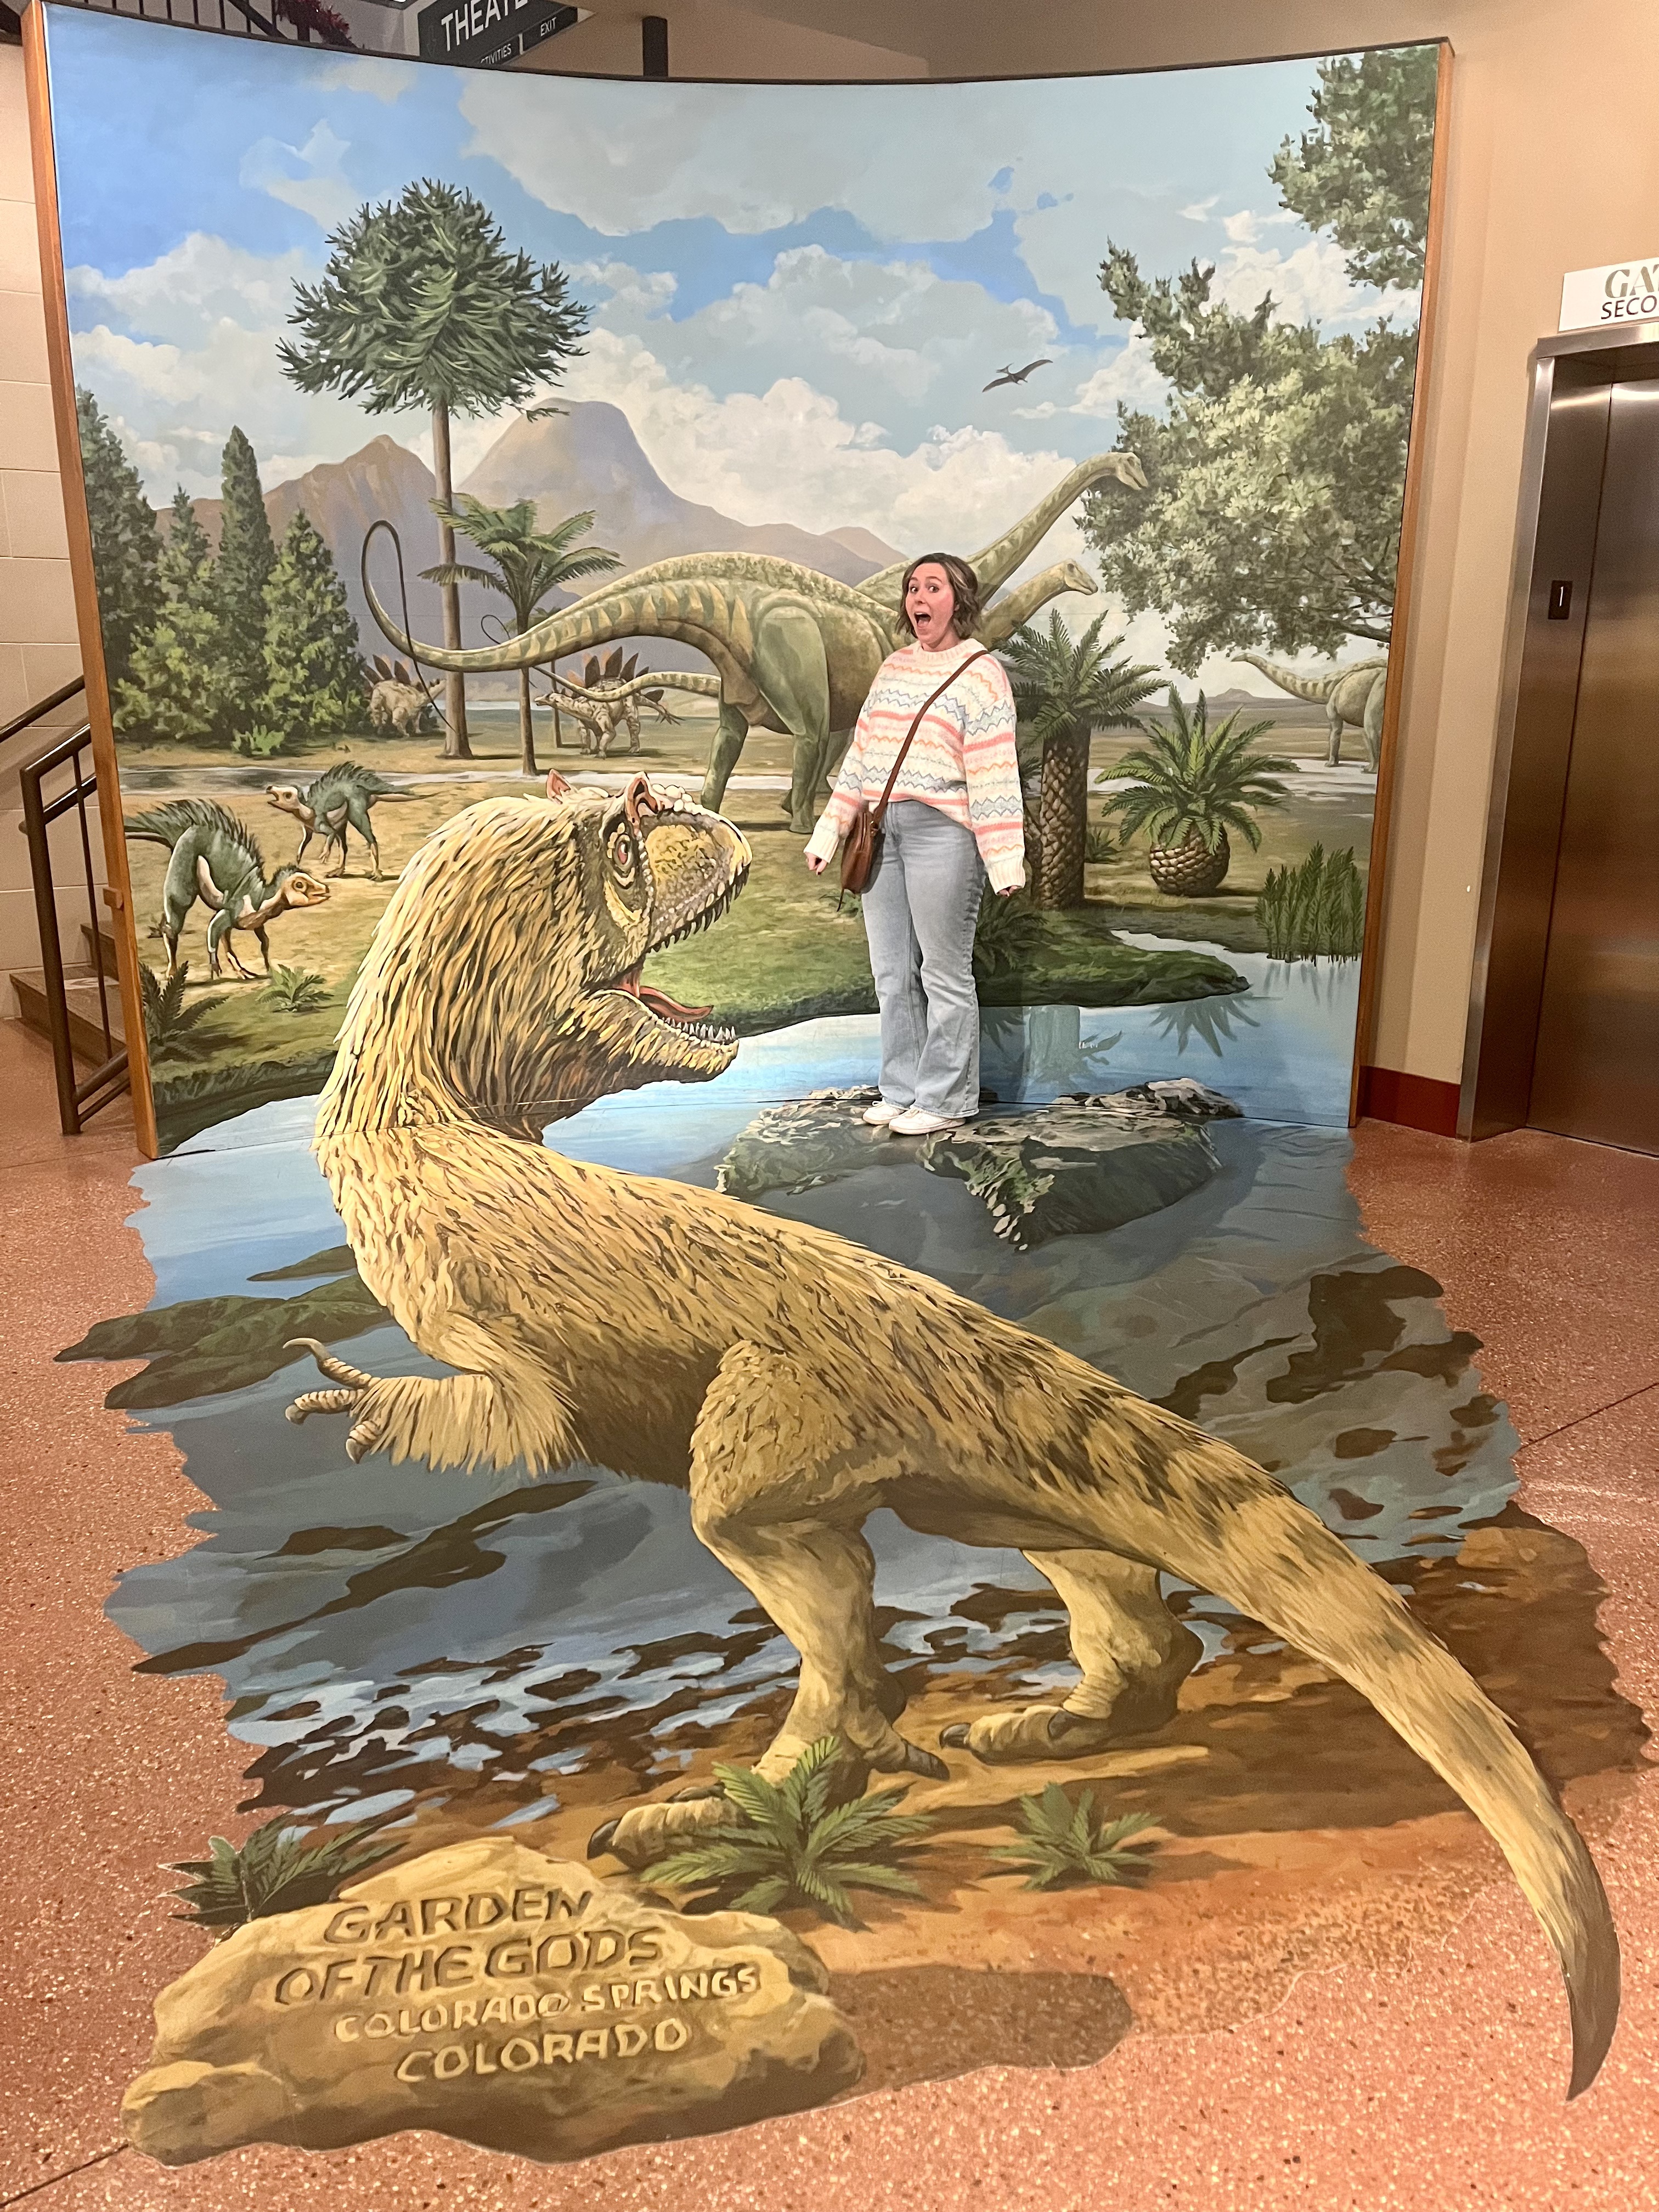
2. Stroll through Garden of the Gods
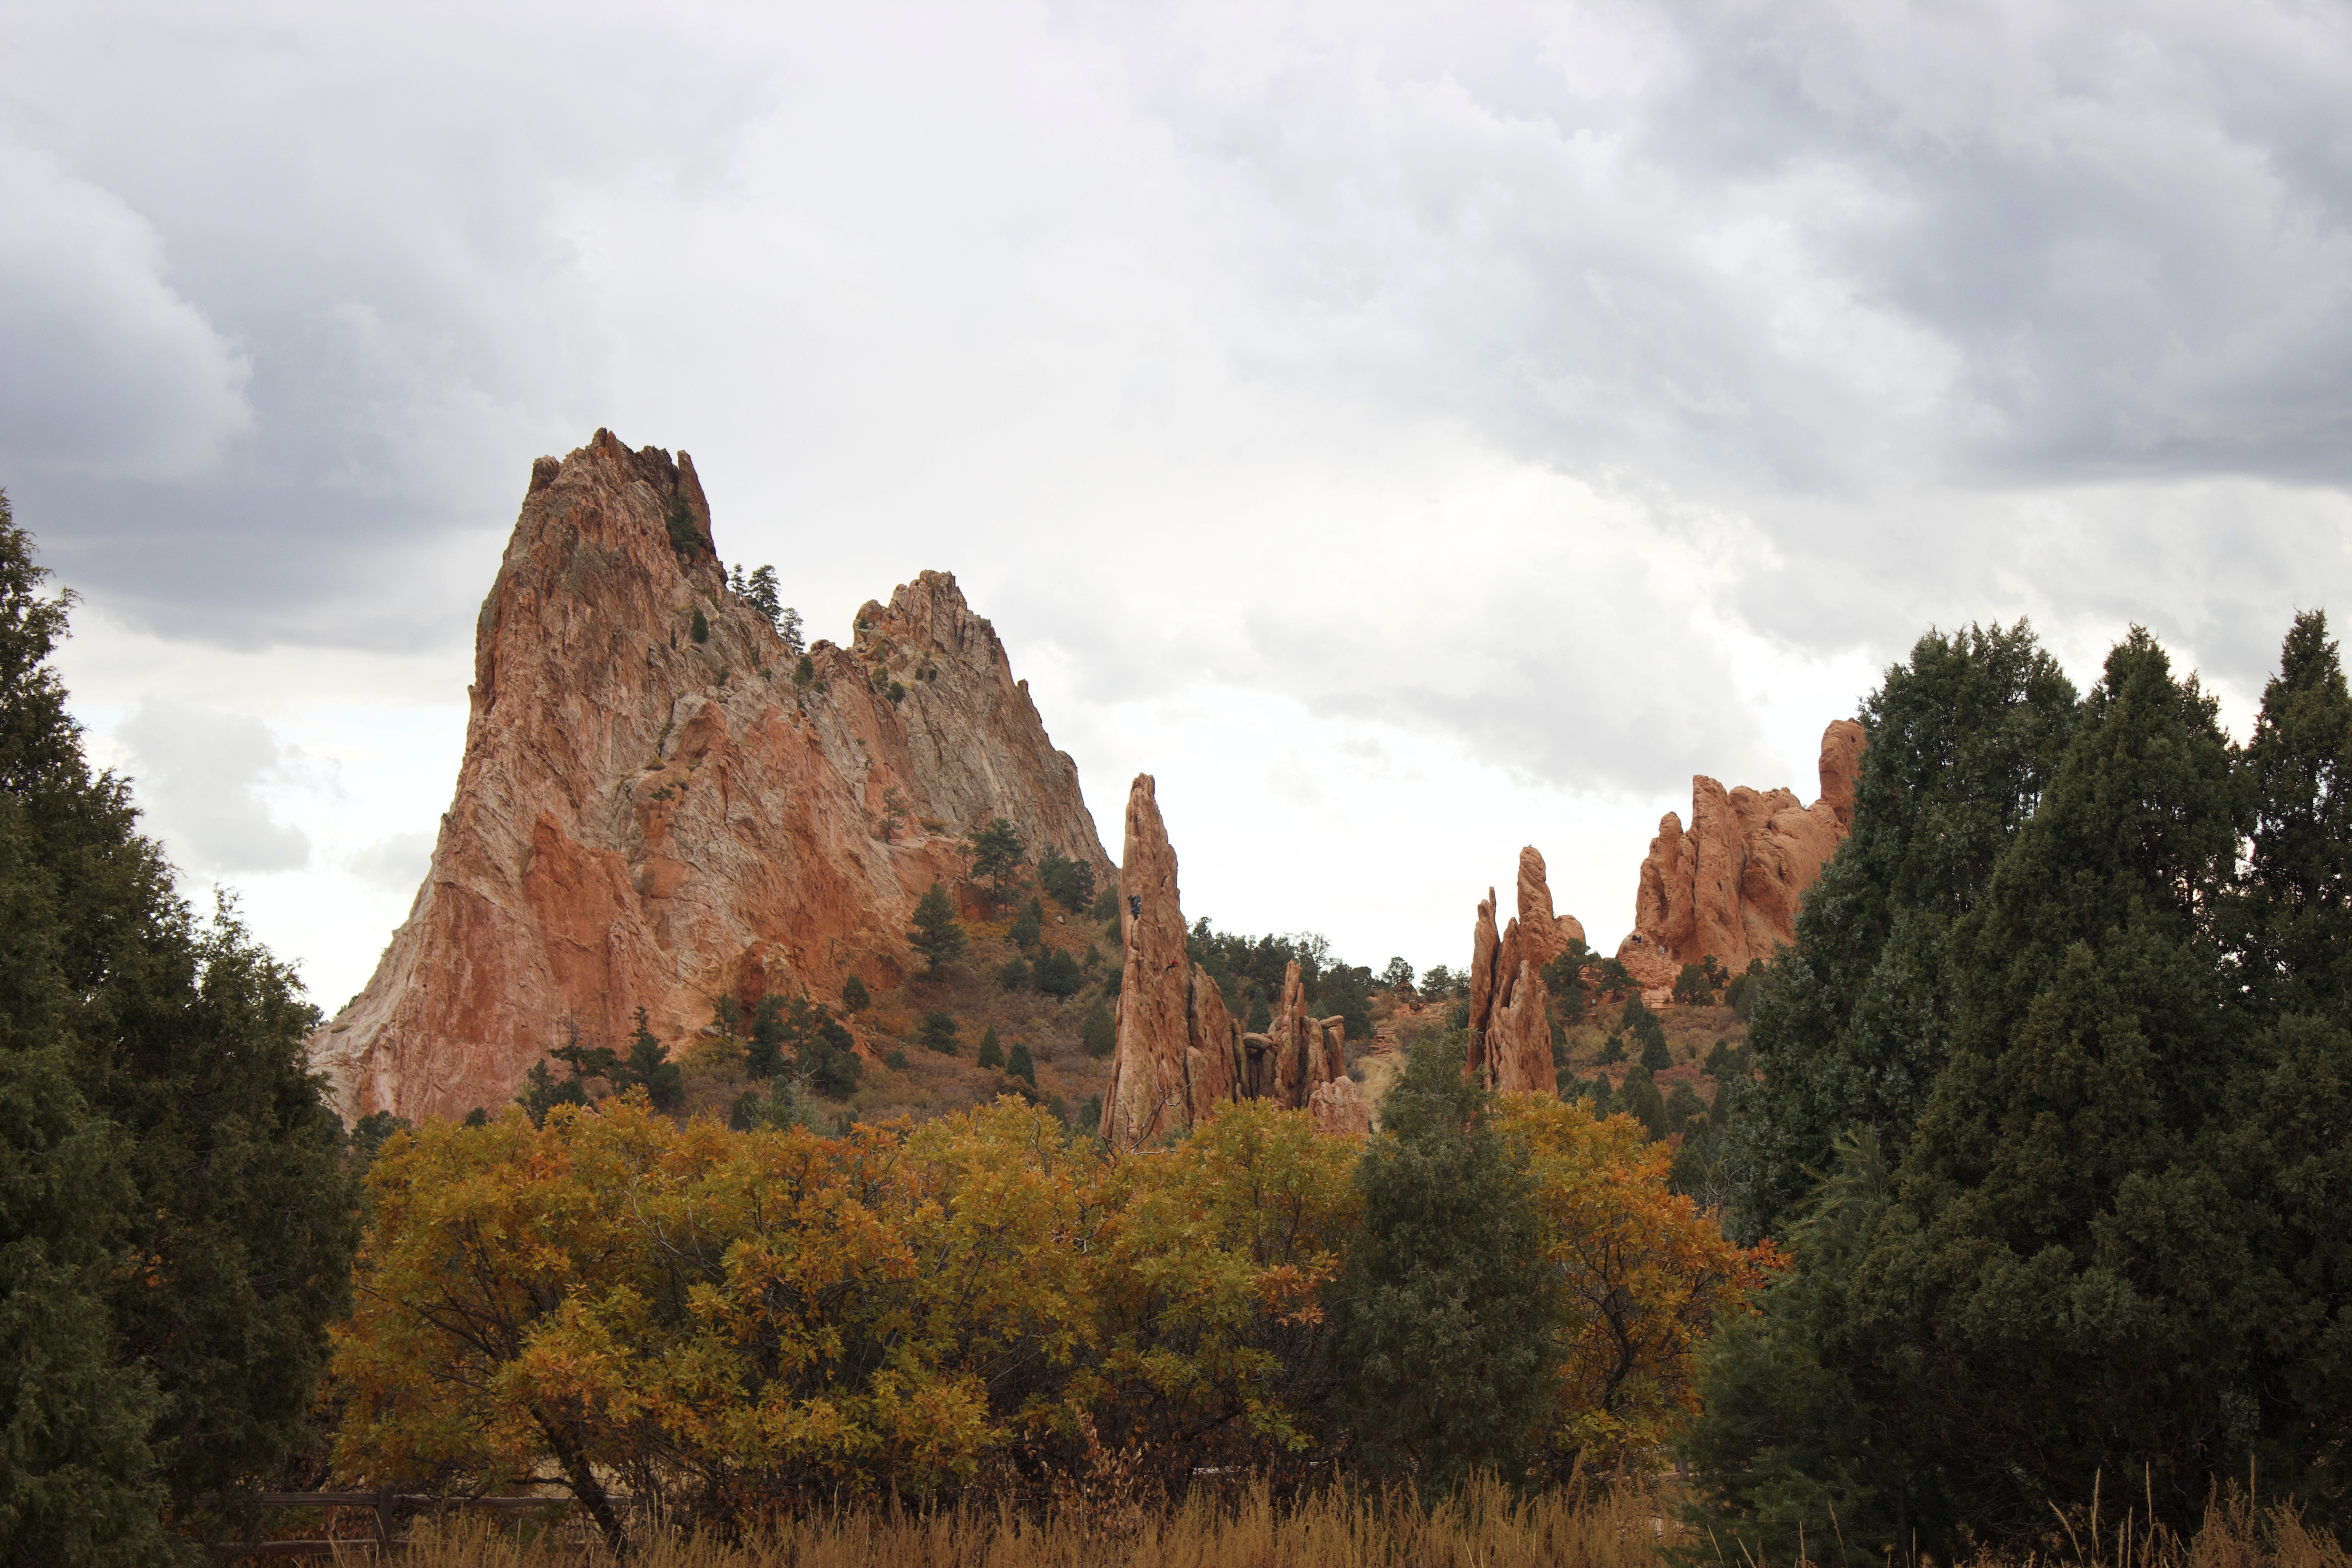
Garden of the Gods is a must-see when visiting Colorado Springs. Park entry is free, and there are trails appropriate for hikers of all experience and fitness levels. The visitor’s center is also worth seeing if you want to learn more about the garden’s history, cultural significance, geology, and native wildlife.
3. Visit a Museum
Dive into the local history of Colorado Springs at one of the many free museums located throughout town. The Peterson Air & Space Museum boasts multiple aircrafts and missiles—perfect for those interested in aviation.
Colorado Springs has many scenic outdoor areas worth exploring on foot. Red Rock Canyon Open Space, North Cheyenne Cañon Park, and Palmer Park are some of the most popular free places to go hiking. For more of a challenge, consider tackling Pikes Peak, an iconic Colorado 14er.
5. Explore Manitou Springs
About 20 minutes outside Colorado Springs lies the charming town of Manitou Springs. This quirky city features stunning mountain views and beautiful Victorian architecture.
Spend an afternoon wandering around Manitou Springs and browsing its various shops, galleries, eateries, and public parks. The Manitou Incline, a brutal hike that gains over 2,000′ of elevation in under one mile, is another free activity to add to your Colorado Springs itinerary.
I highly recommend visiting Colorado Springs during your next trip to Colorado, especially if you’re traveling on a budget!
I’m sharing the ultimate Colorado hiking guide to some of my favorite can’t-miss hikes in Colorado, ranging from easy to challenging. I recently relocated from Colorado after four wonderful years, and I was fortunate to tackle many unforgettable hikes during my time there. Colorado has trails for all ages, abilities, and experience levels, making it the ideal destination for outdoor lovers. Check out these essential Colorado hikes next time you’re in the Centennial State!
Easy
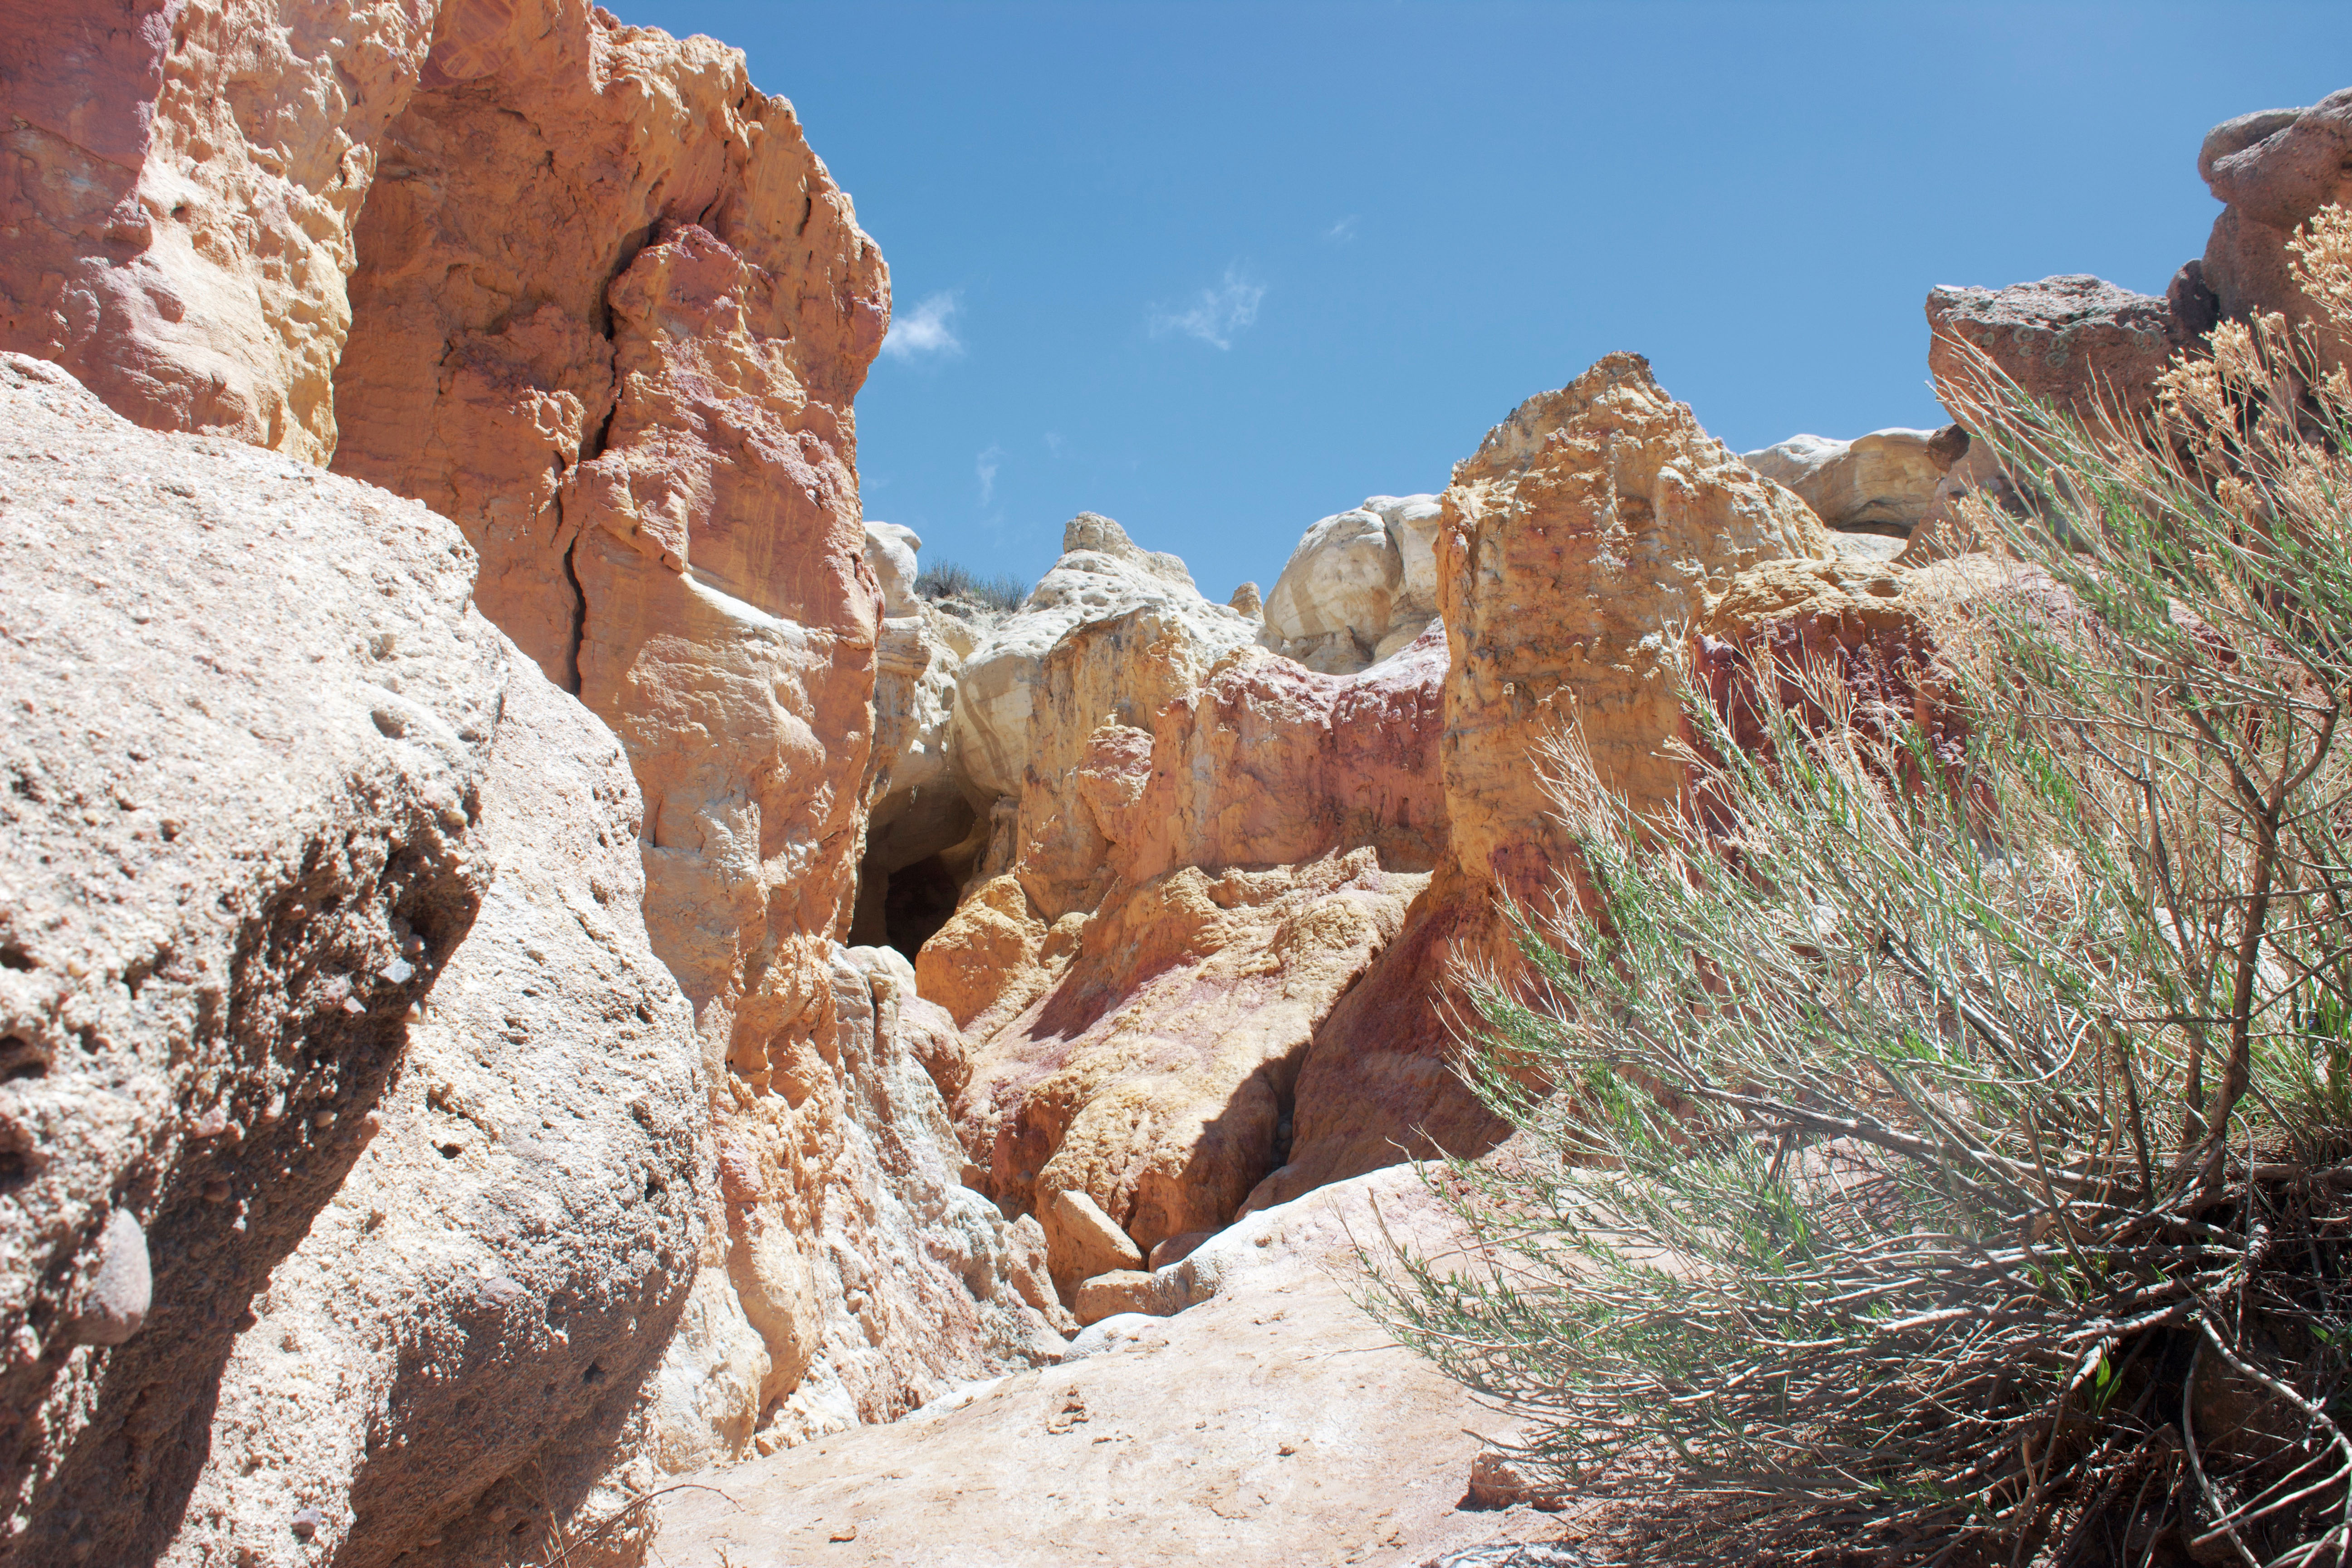
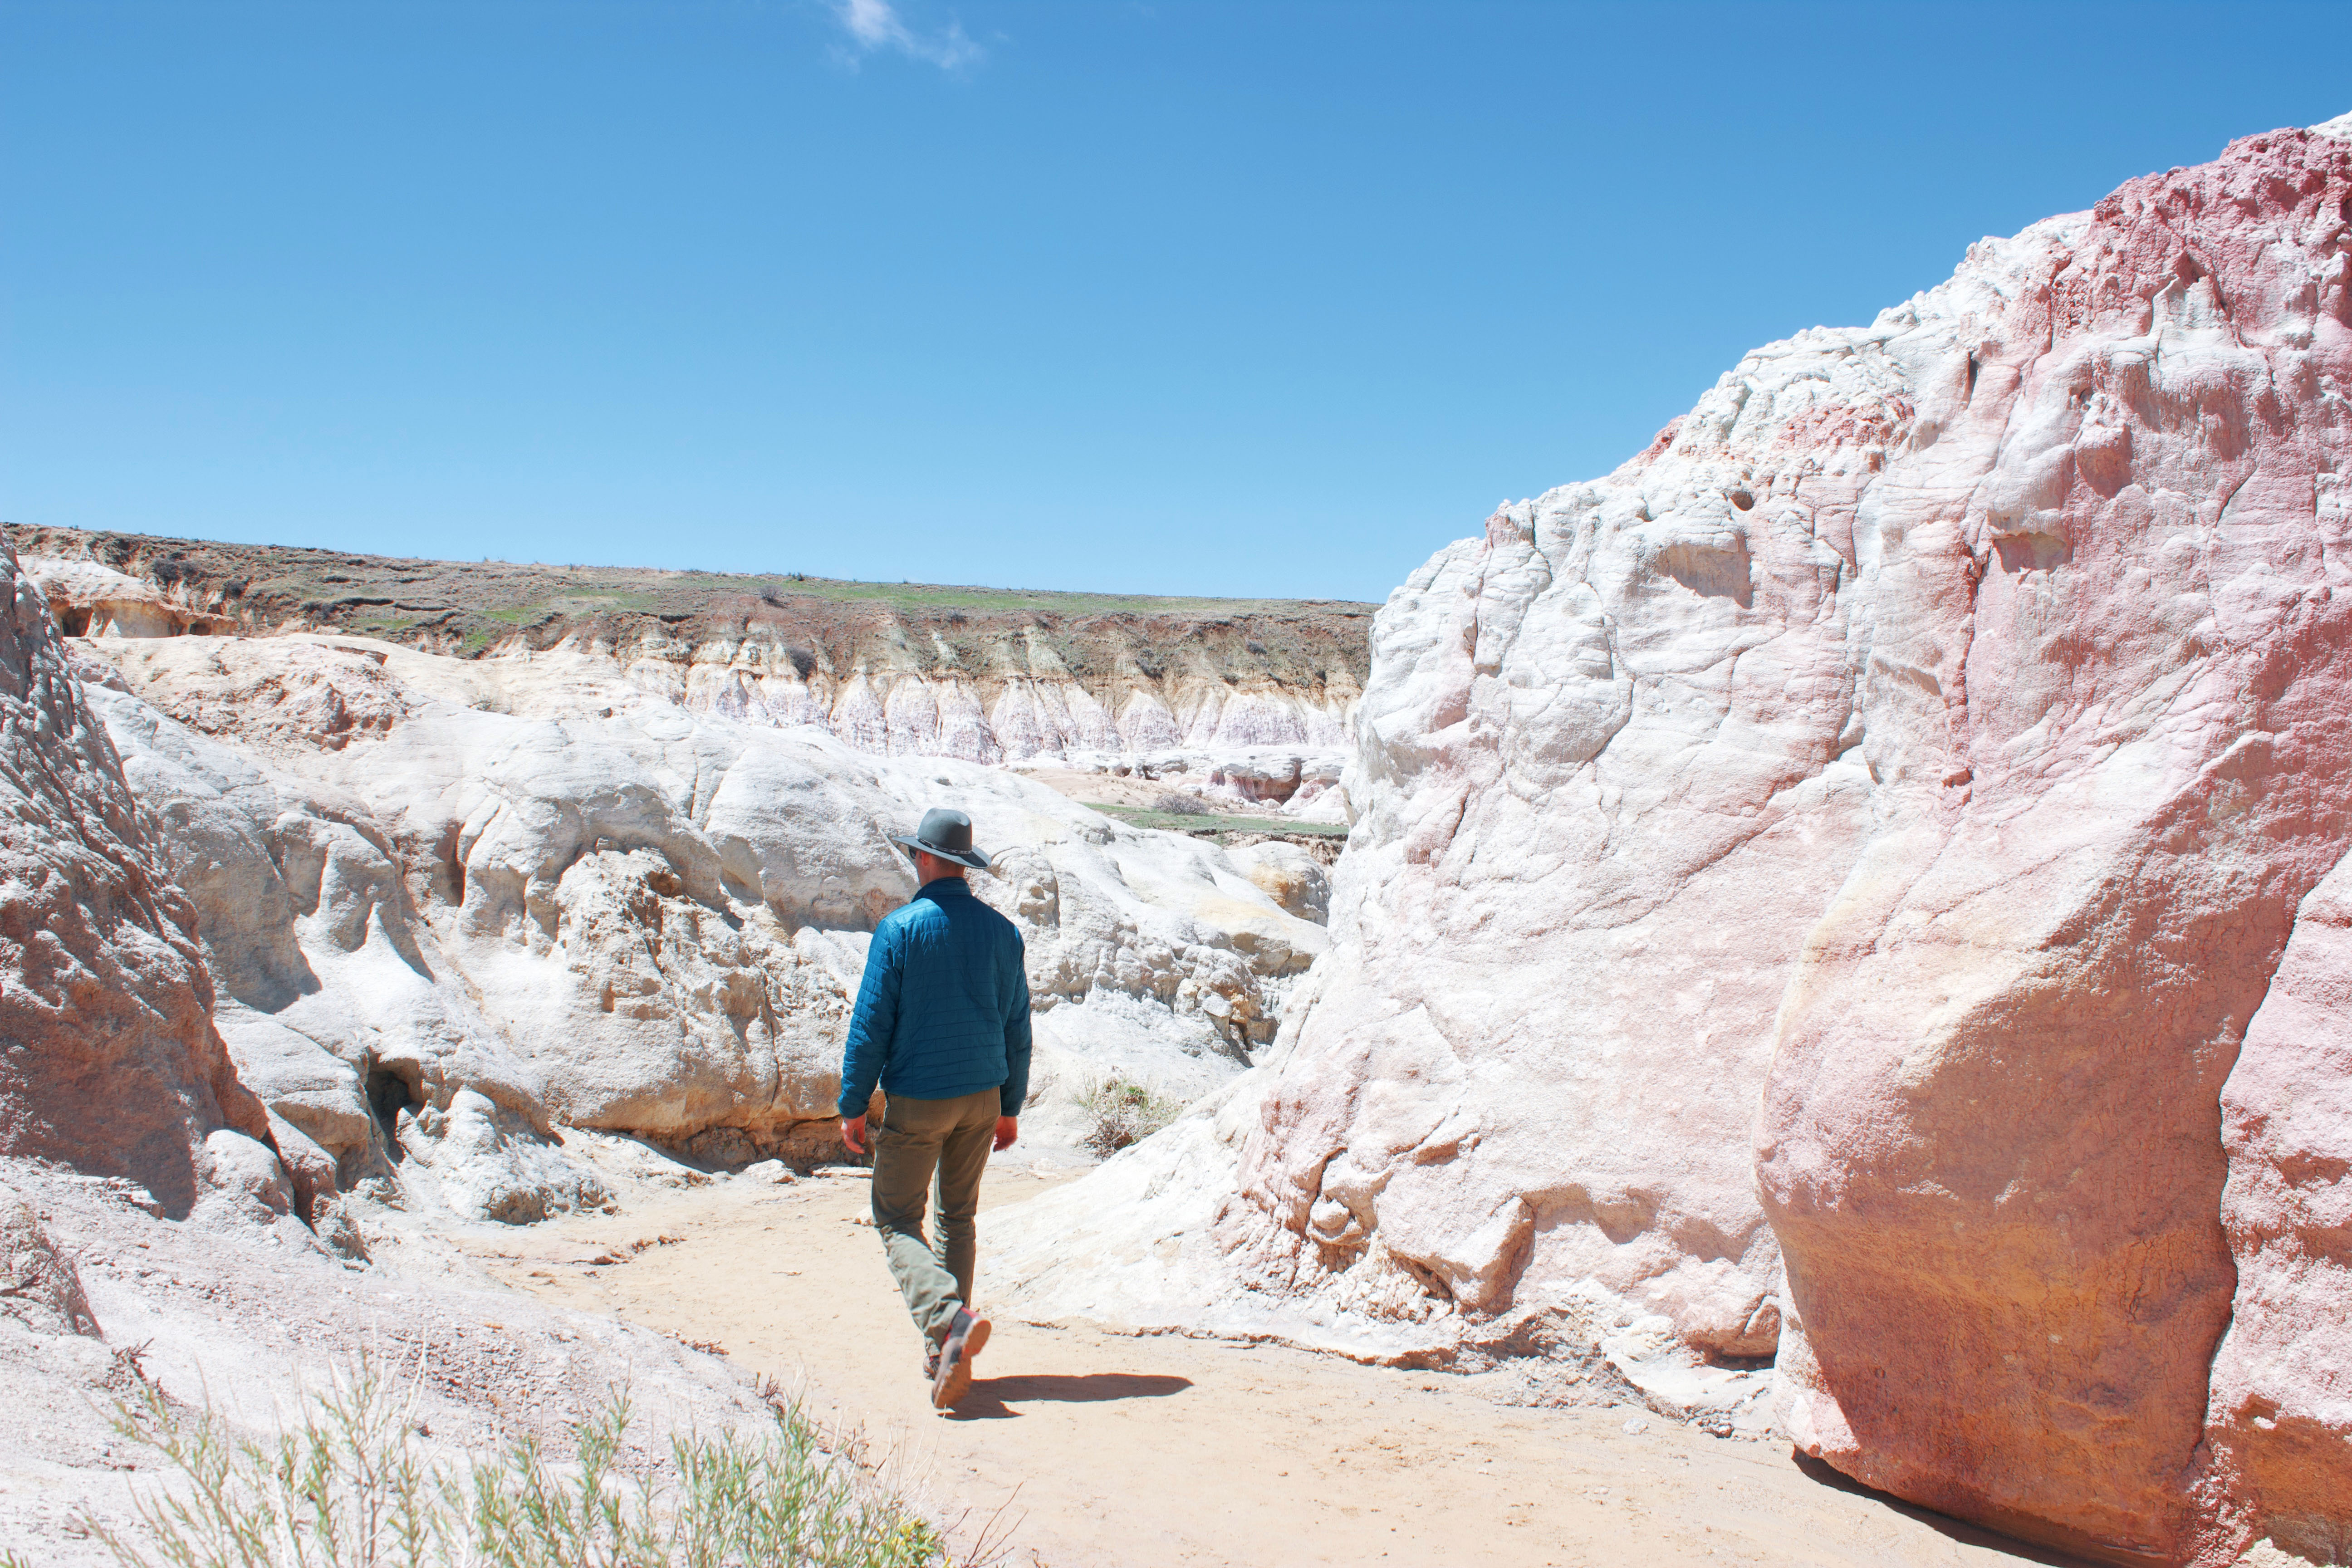
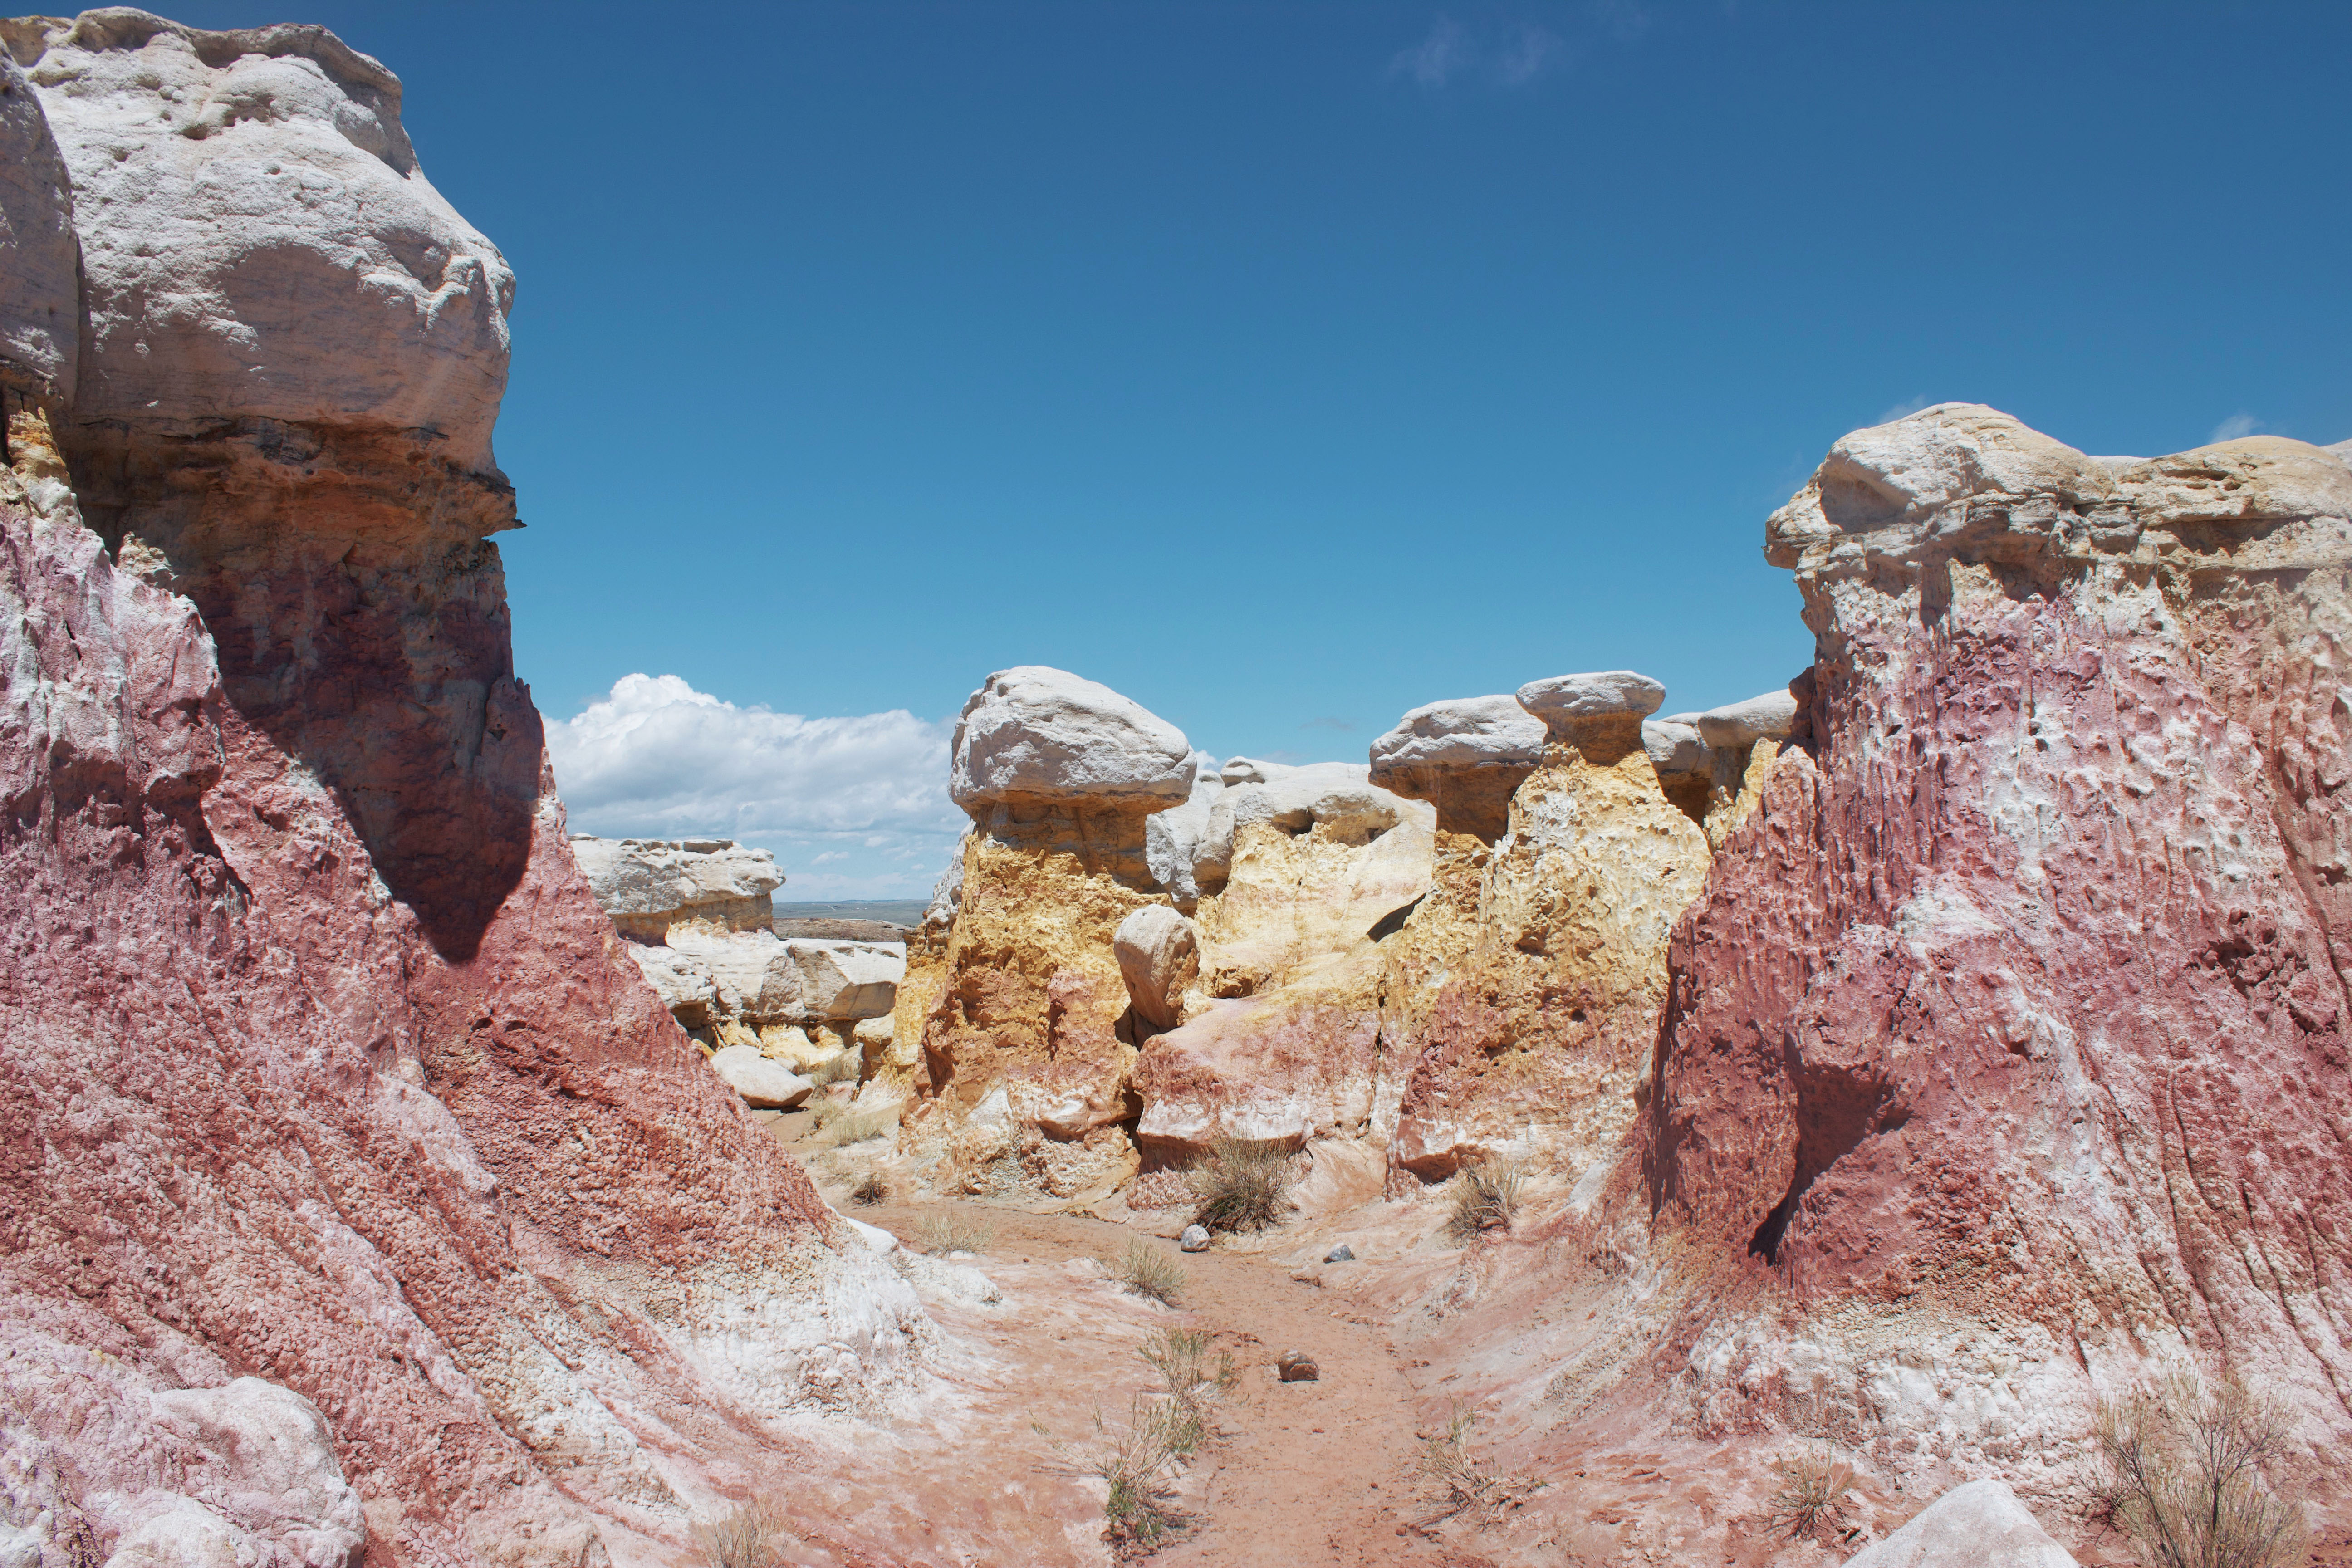
Paint Mines Trail
Paint Mines Interpretive Park is an underrated hiking area near Colorado Springs. It’s easy to see where the location got its name—the park is full of colorful clay deposits and rock formations. Wandering through the park feels like stepping onto another planet, and all of the trails here are beginner-friendly.
Zapata Falls Trail
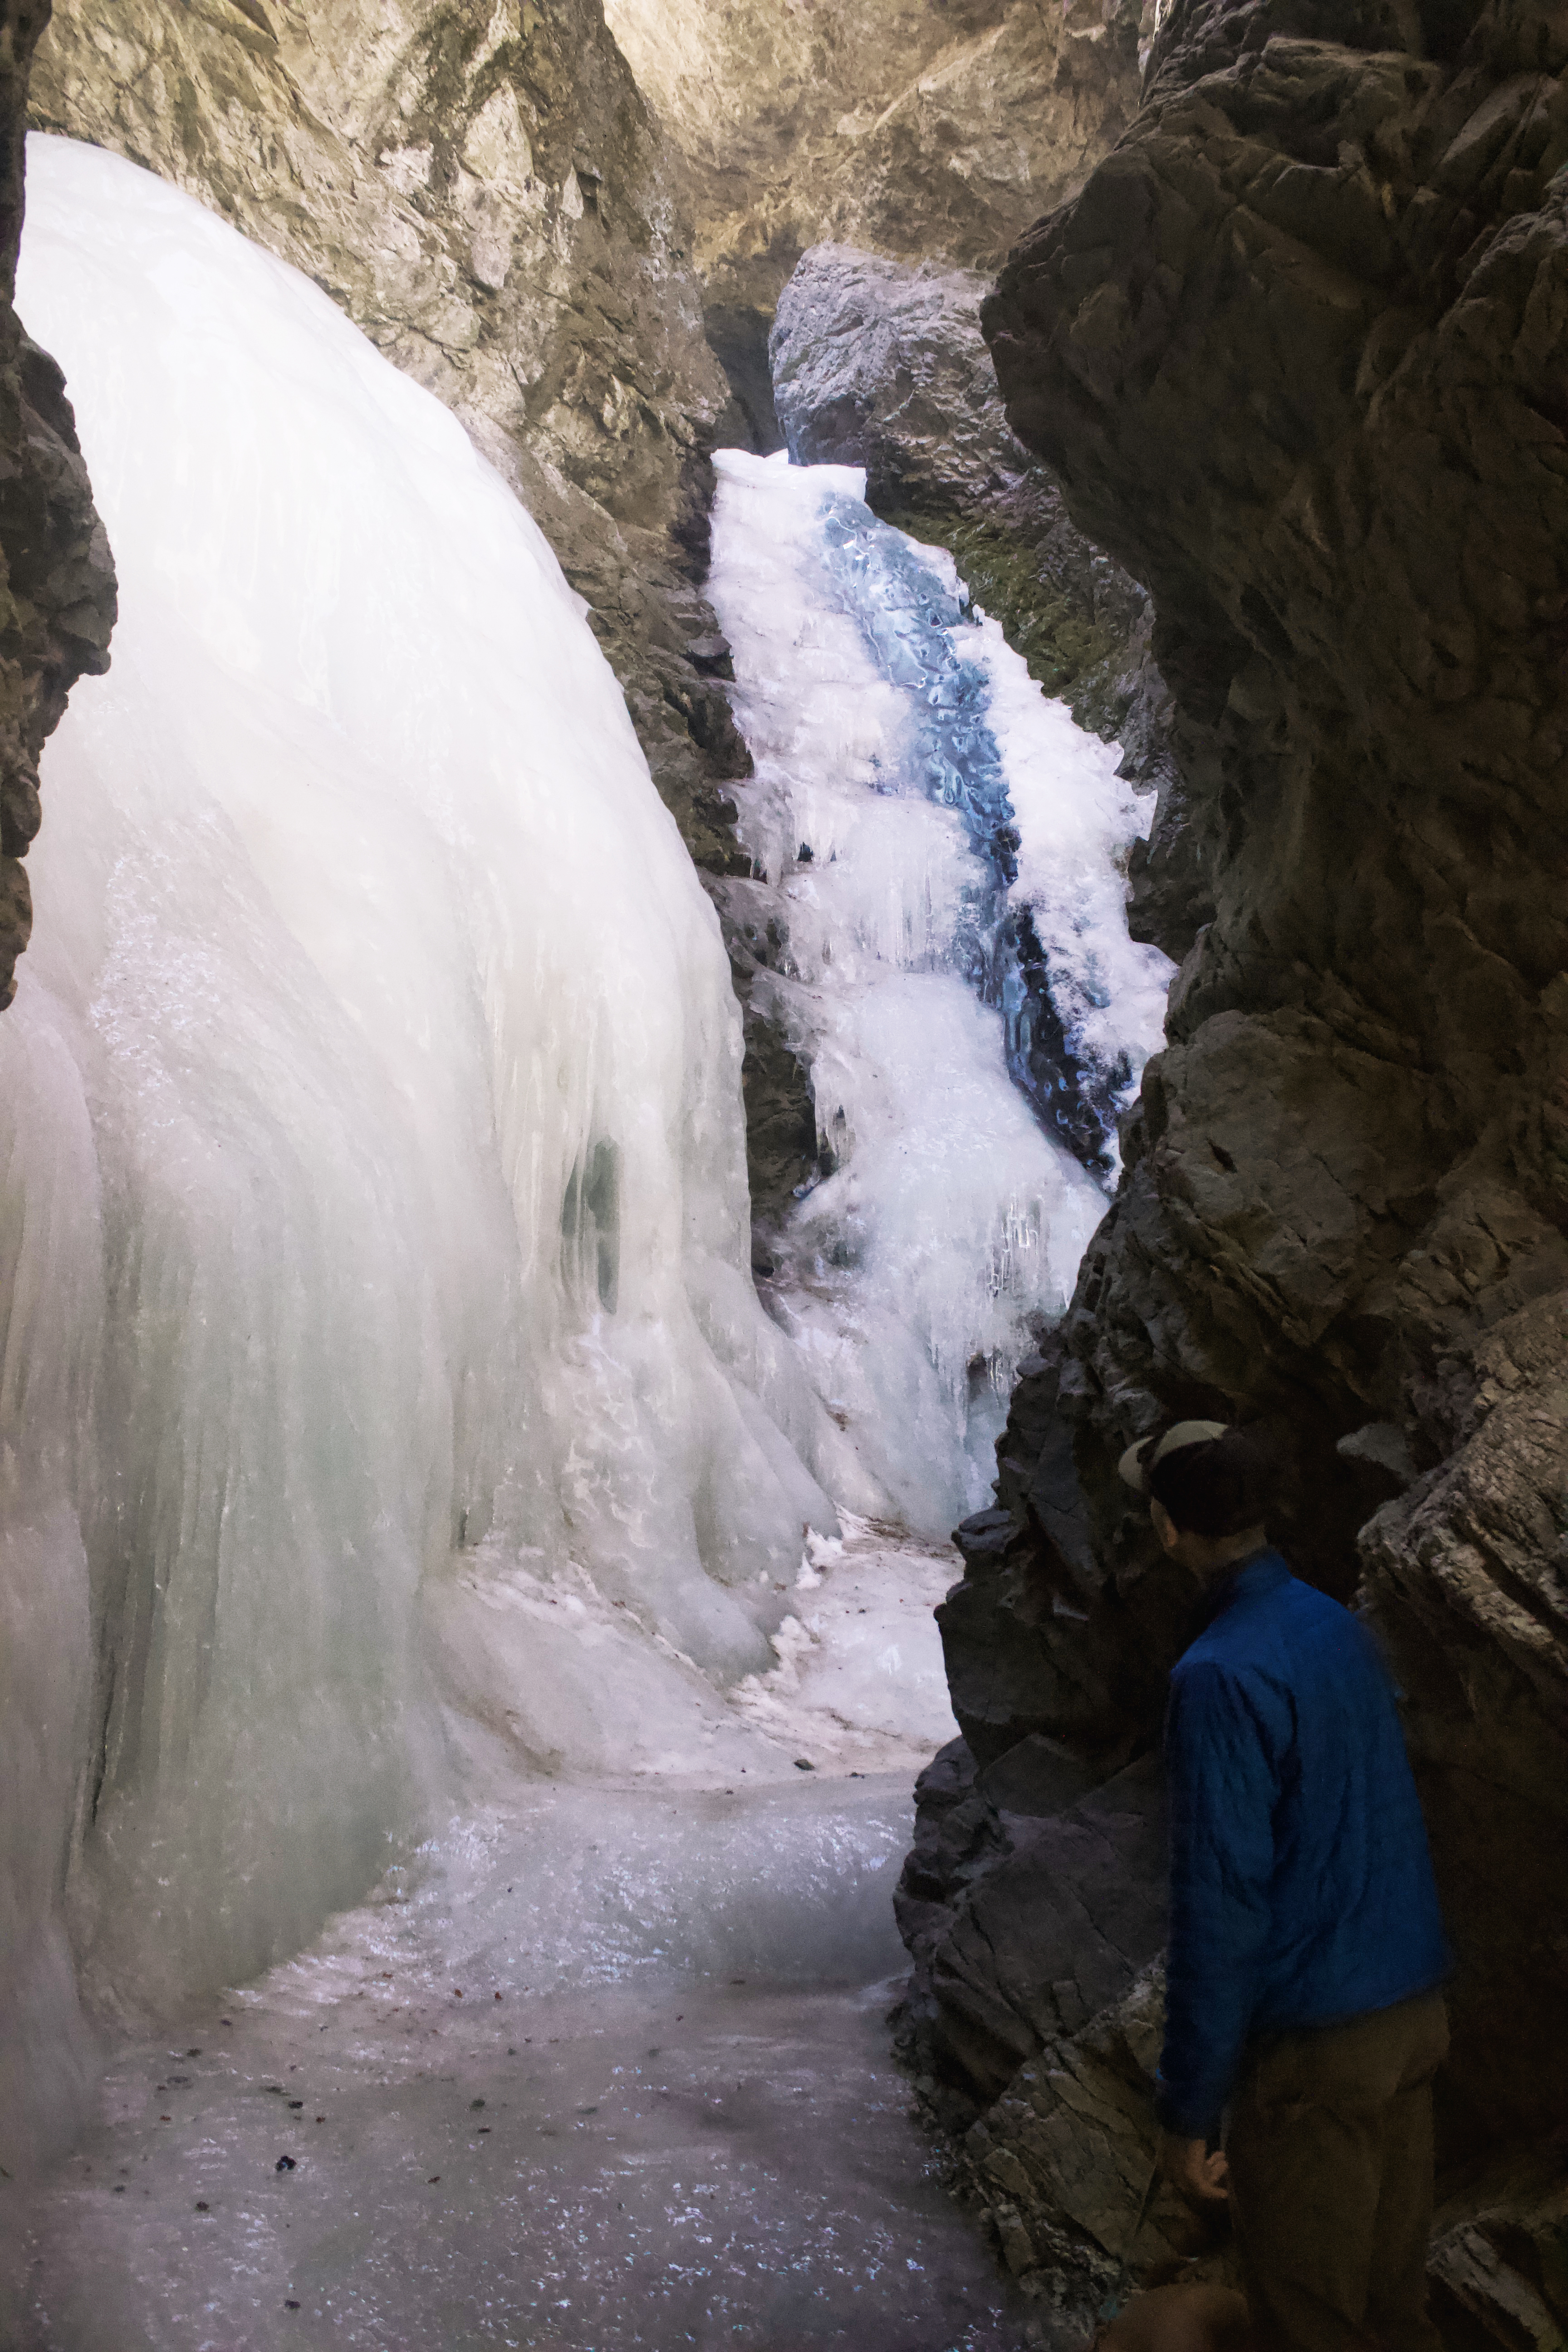
Just 20-30 minutes outside Great Sand Dunes National Park (another Colorado spot worth exploring) is Zapata Falls. The trail is easy and short, taking you to a partially hidden, 25-foot waterfall. In the winter, the falls freeze over, creating a magical icy wonderland.
Blue Lakes Trail
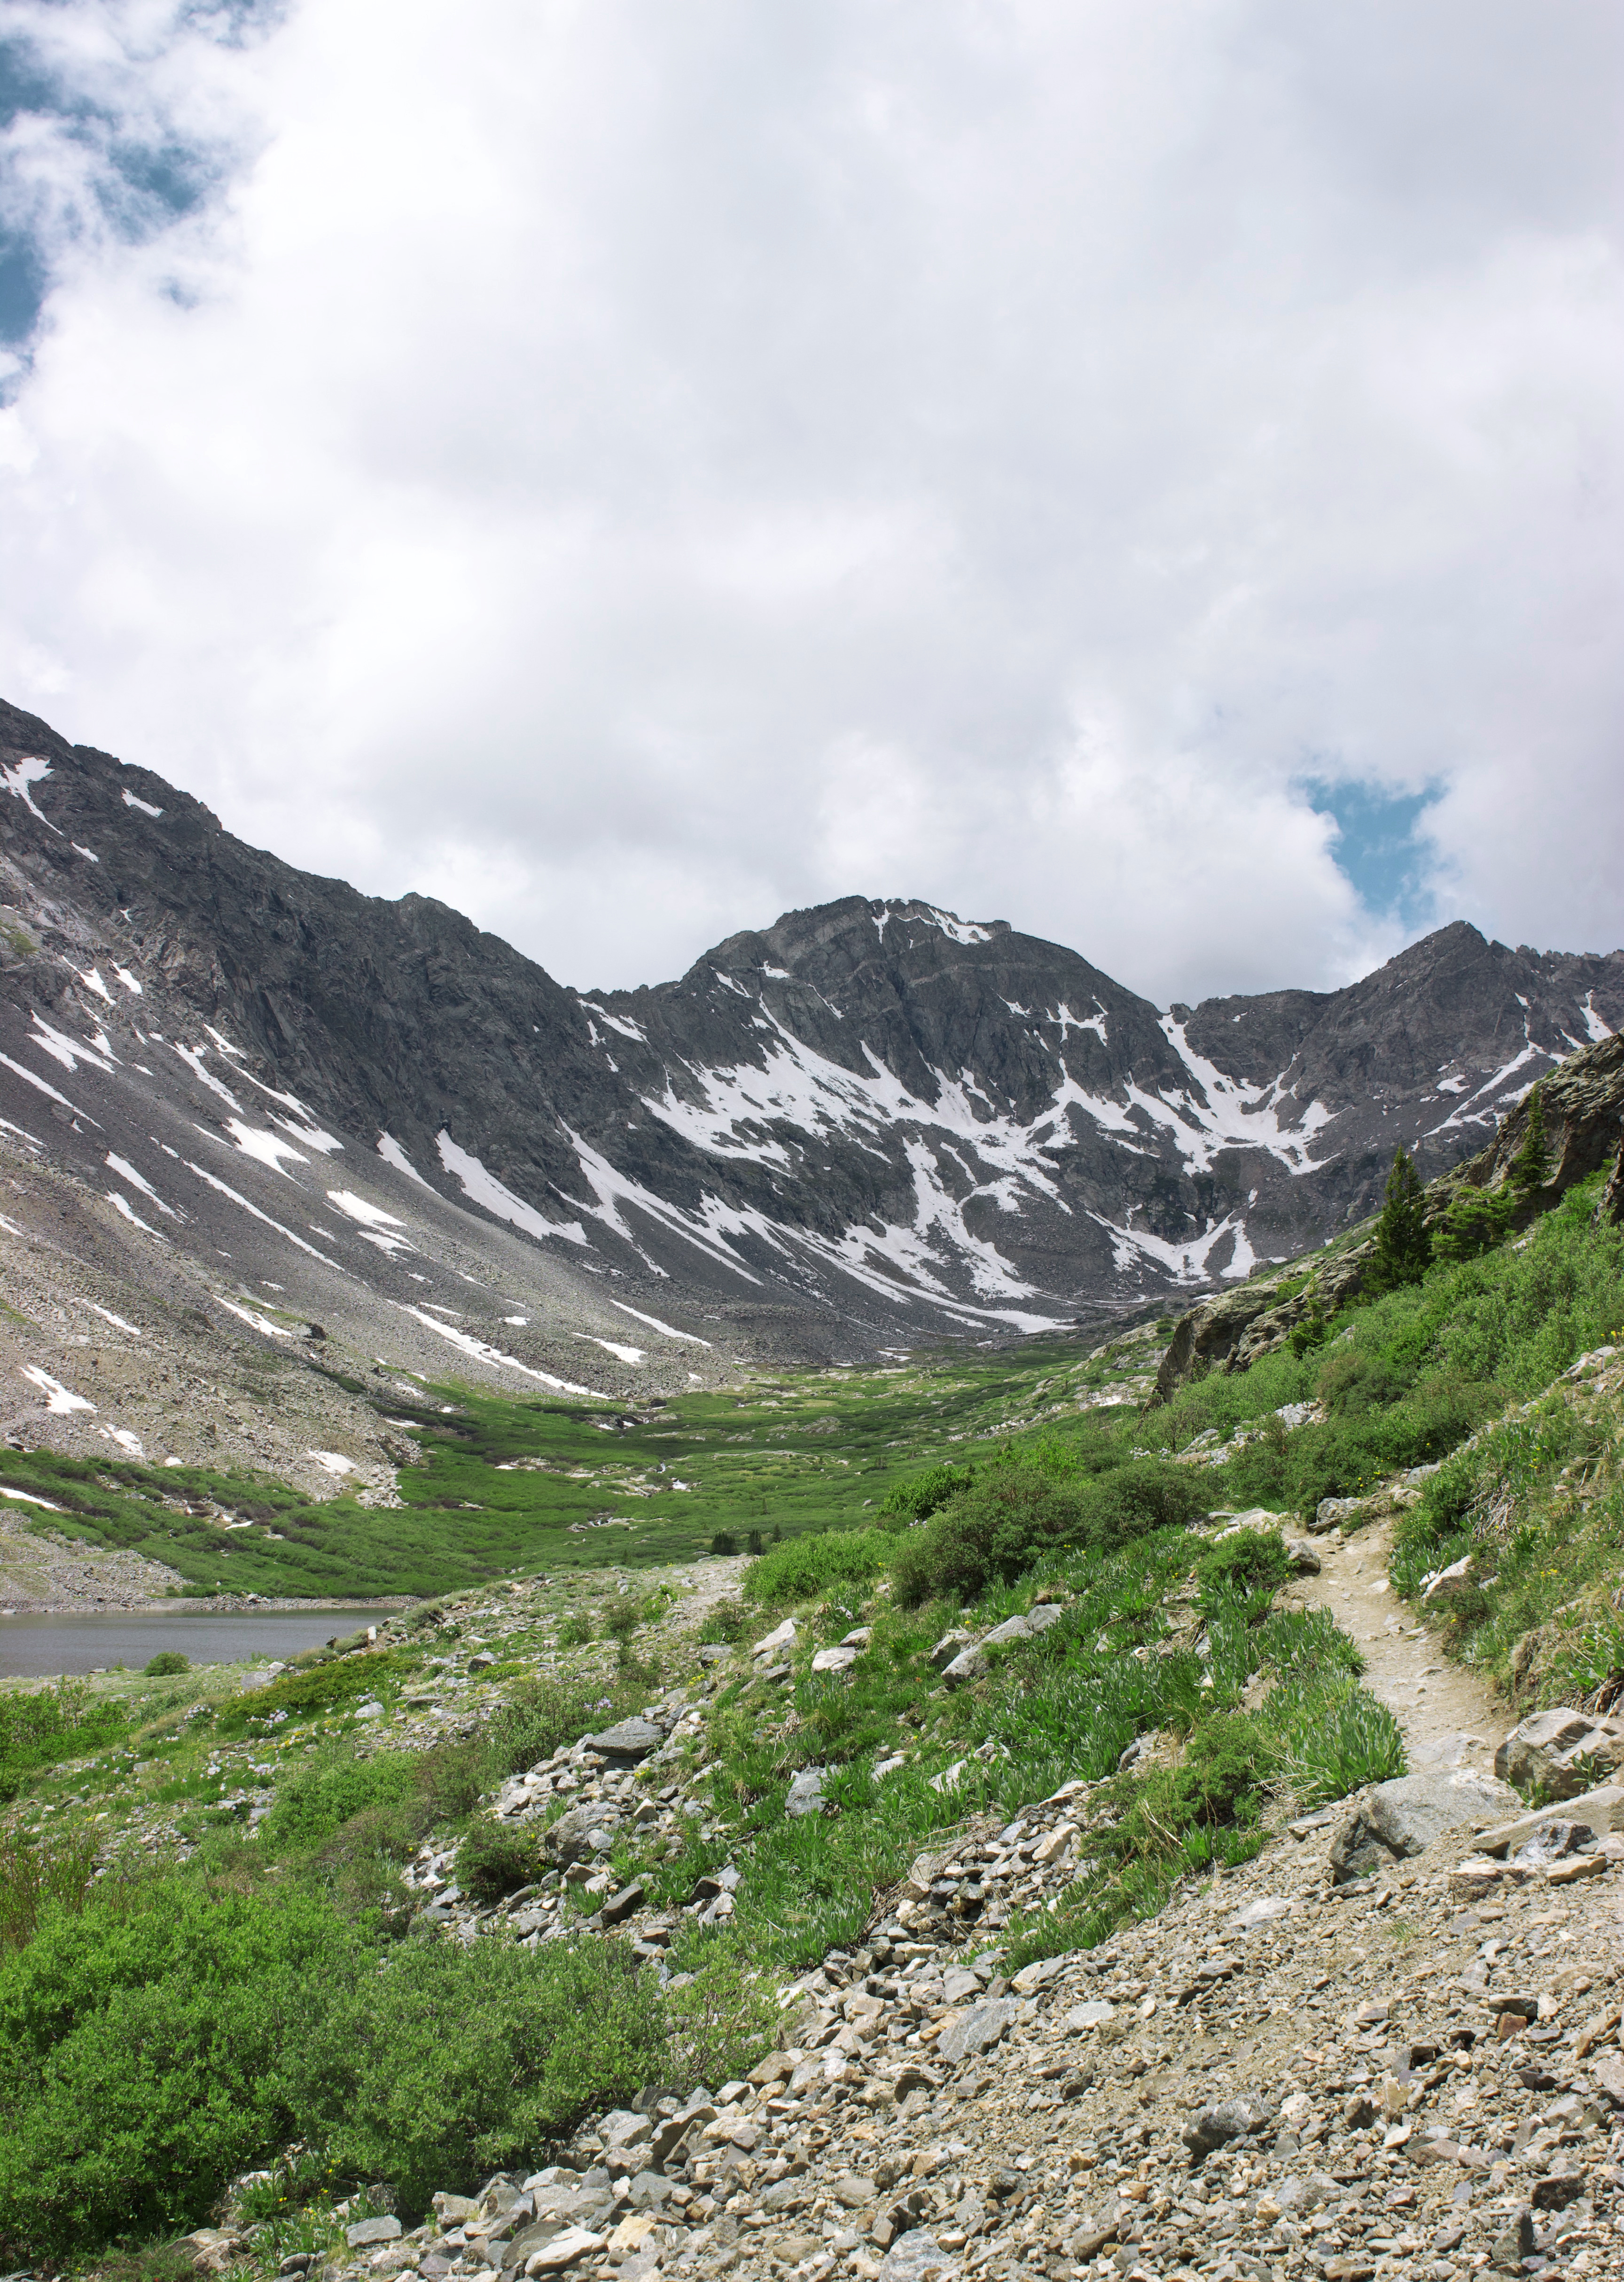
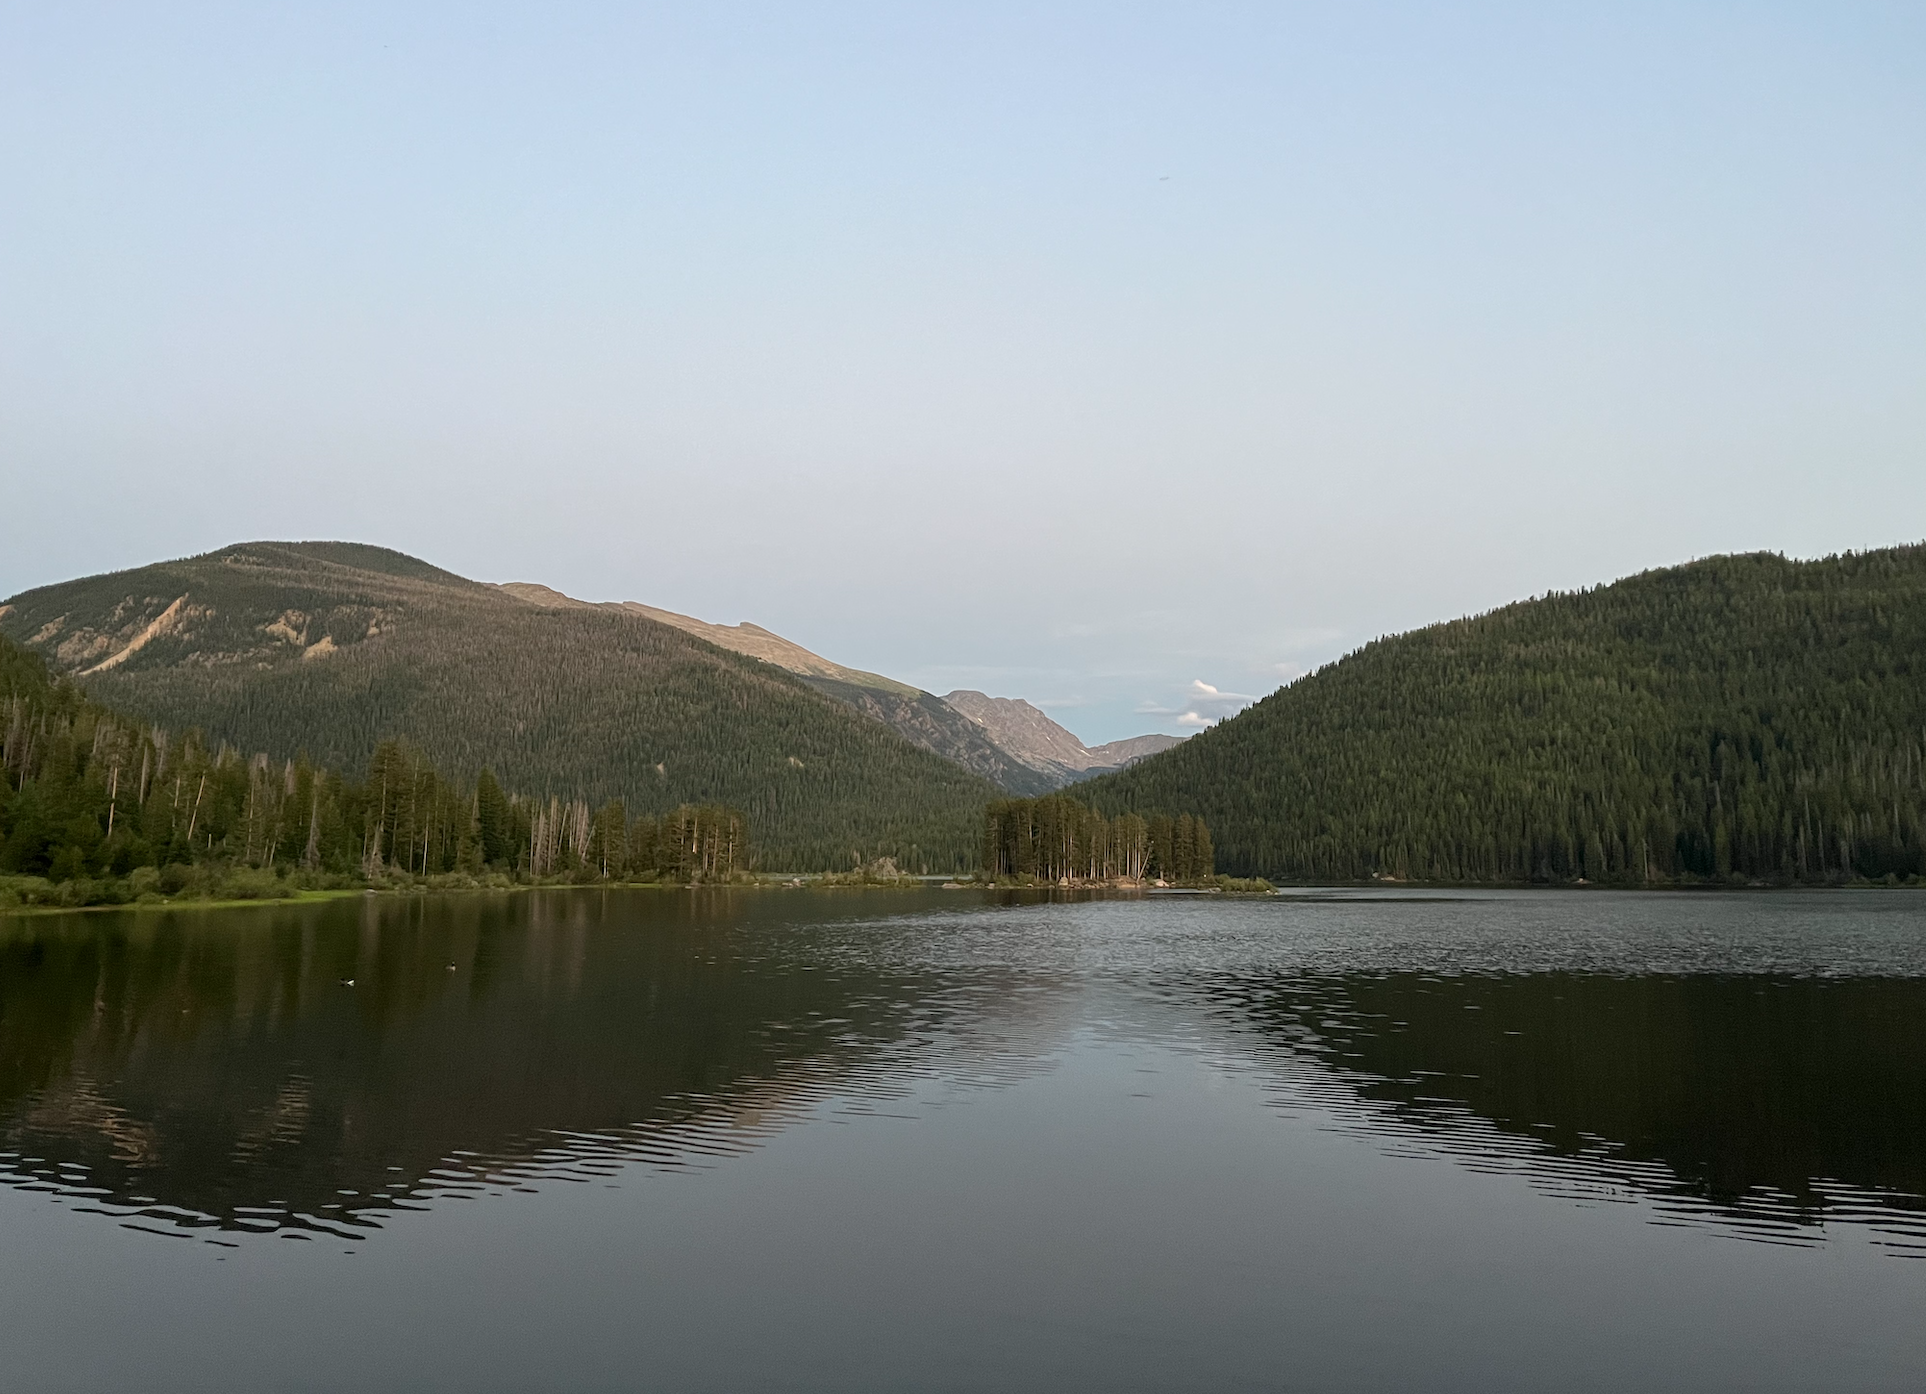
Blue Lakes Trail is an excellent option if you’re short on time or looking for a casual all-ages hike. This stunning outdoor area is located near Breckenridge, making it the ideal afternoon activity.
You’ll be blown way by the scenery, with serene lakes framed by jagged peaks. Watch for mountain goats in the parking lot and on the trail!
Perkins Central Garden Trail
There are tons of hiking options in Garden of the Gods, but you can’t go wrong with the Perkins Central Garden Trail. This paved walking path takes you through picturesque meadows in the heart of the garden’s iconic formations. Garden of the Gods is beautiful any time of year and a must-visit when in Colorado Springs.
Rampart Reservoir via Rainbow Gulch Trail
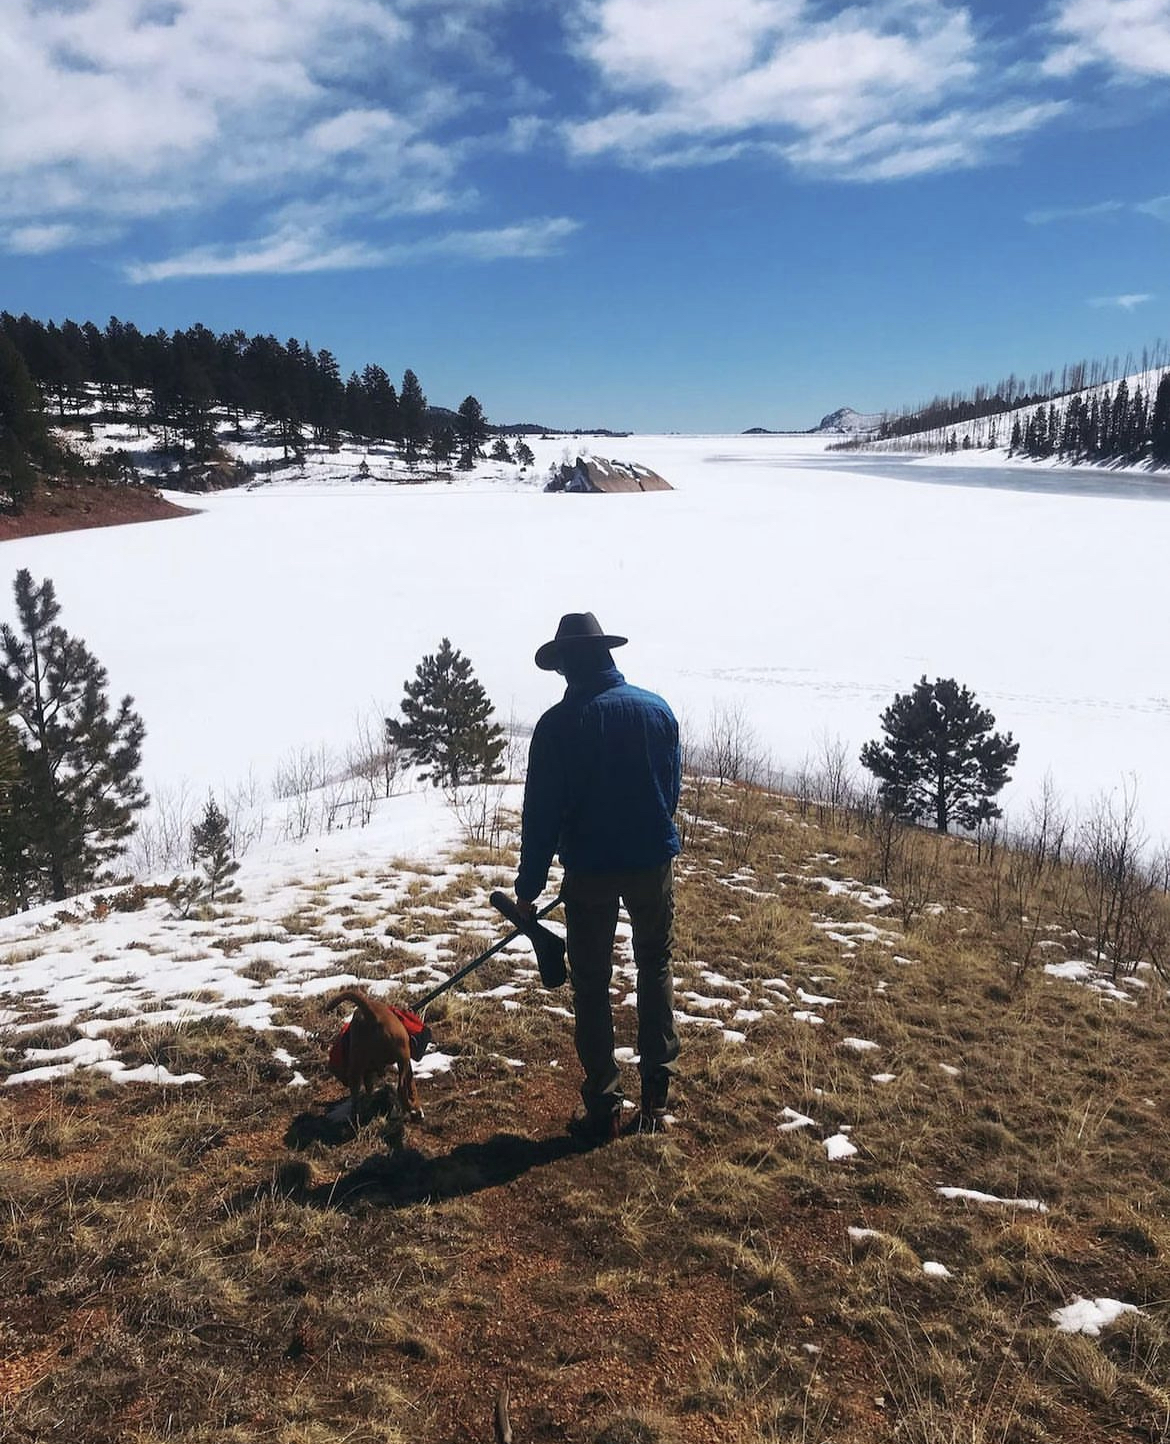
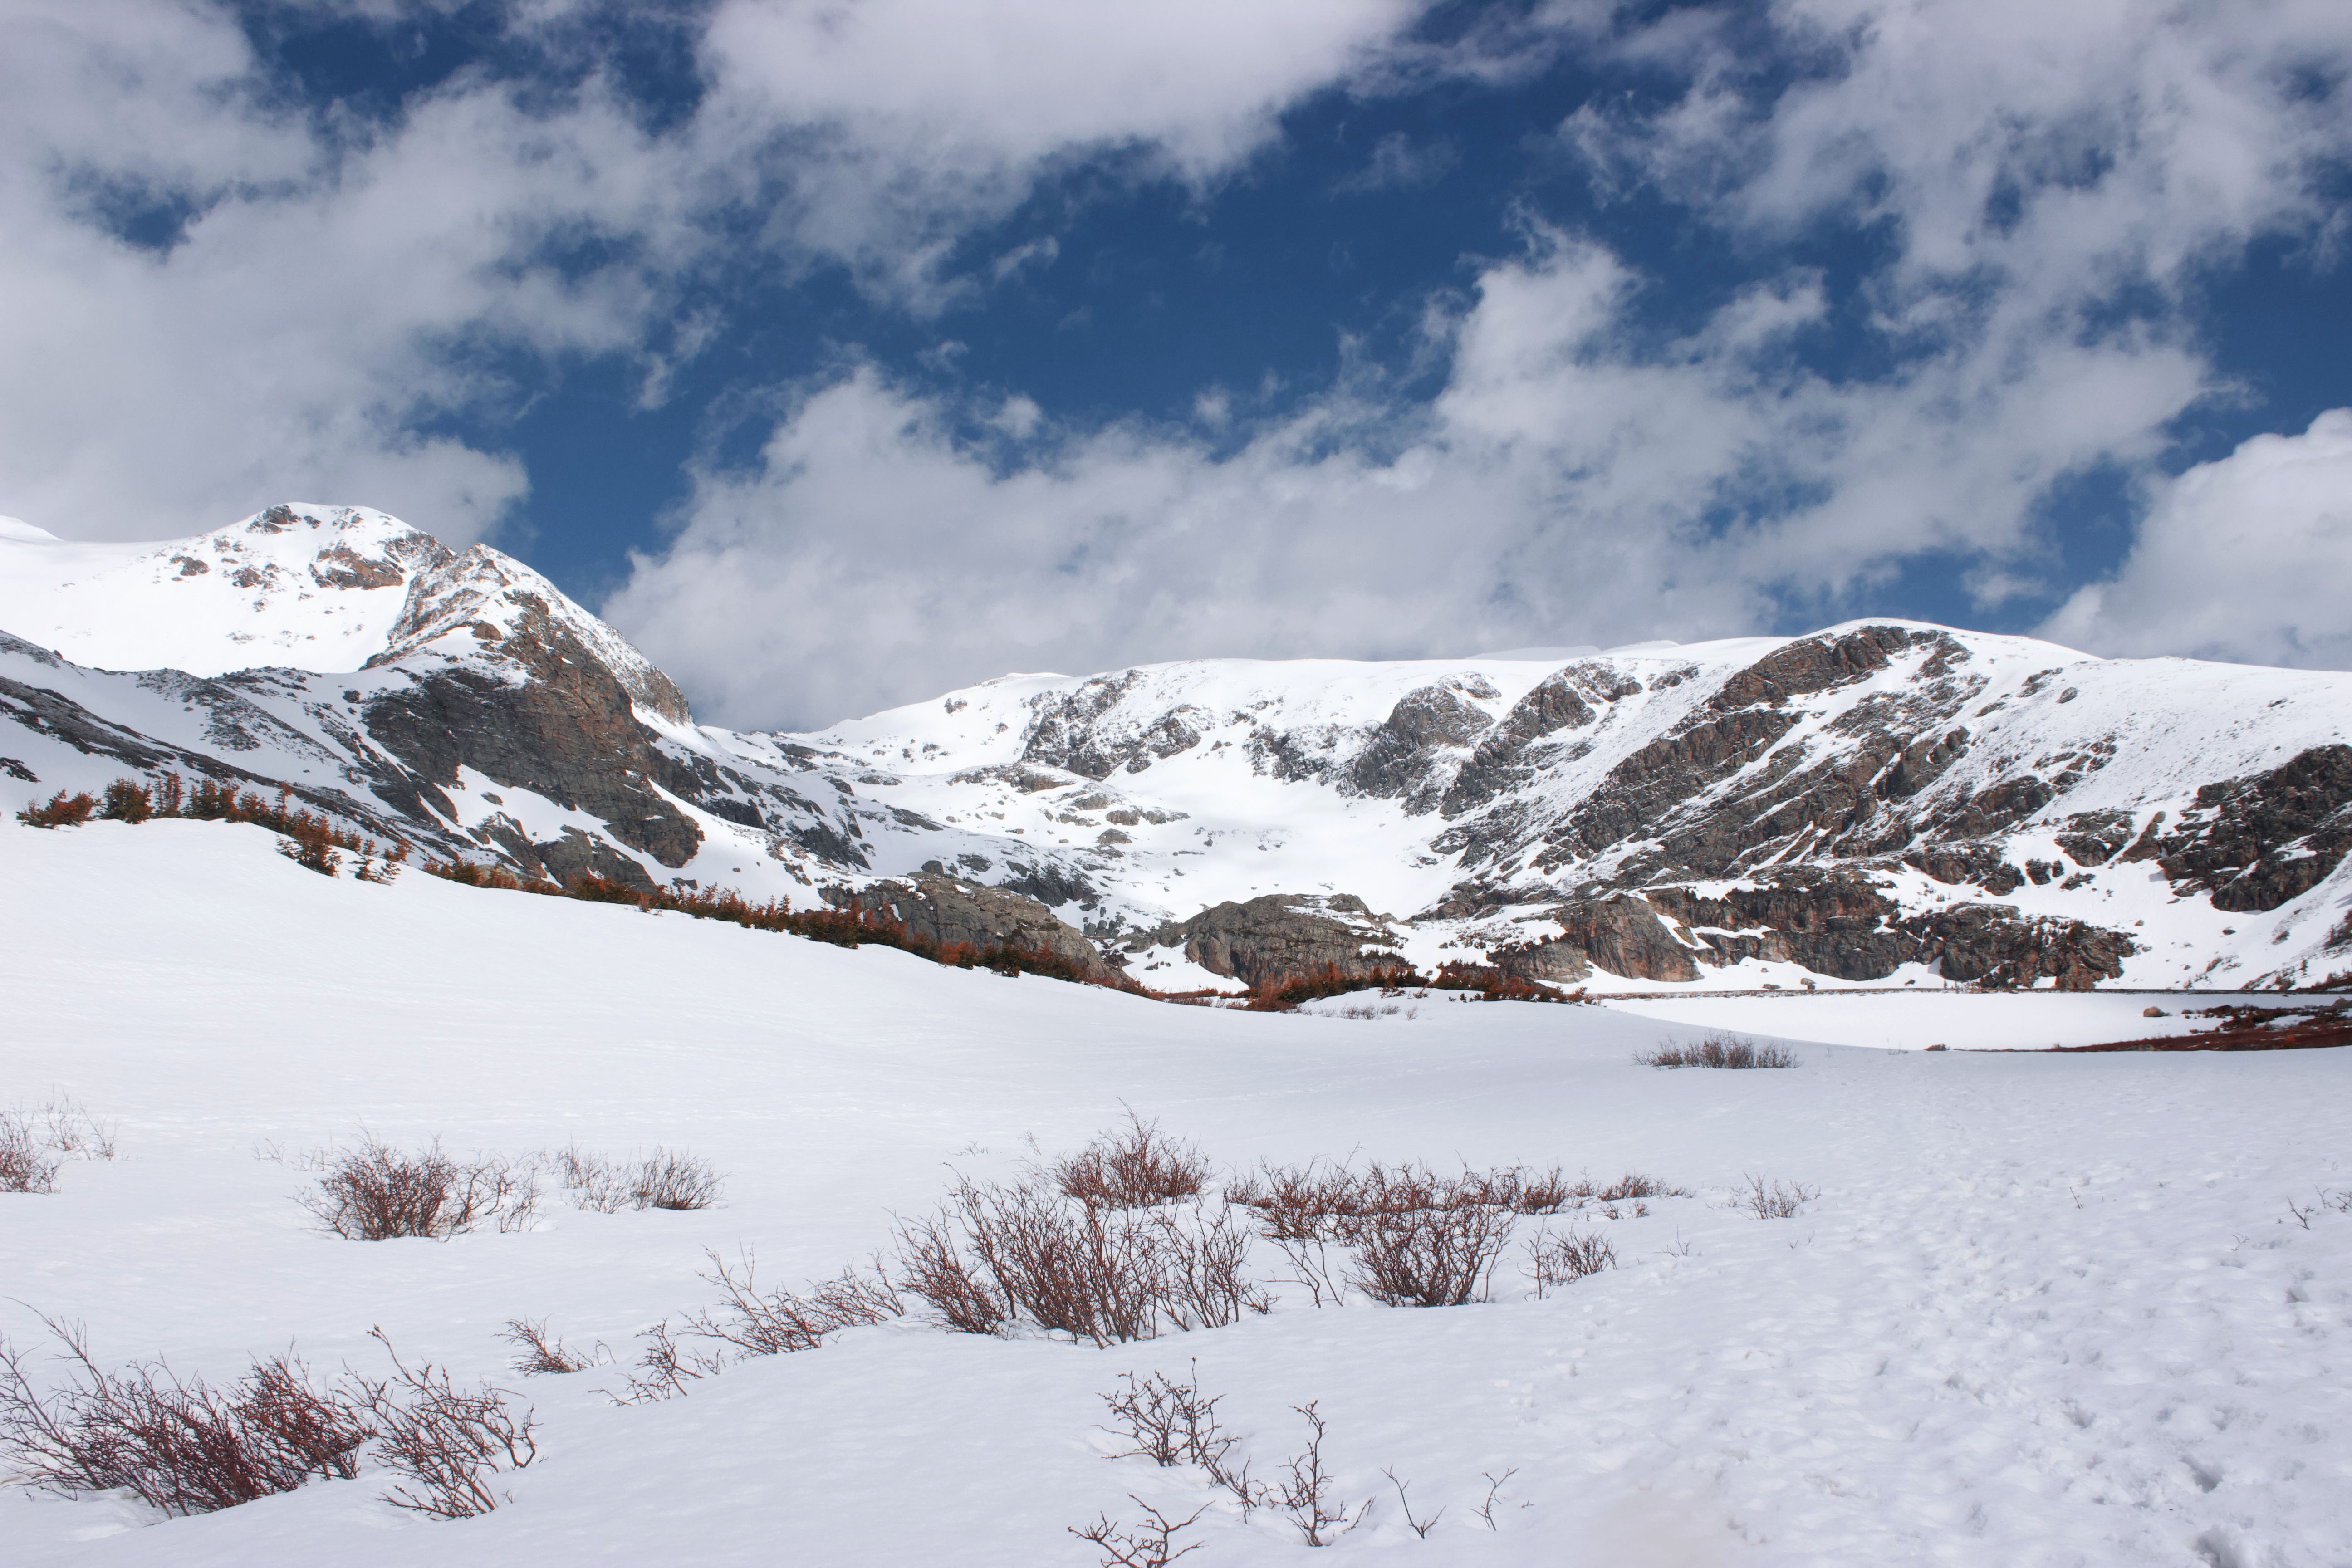
The Rainbow Gulch Trail is an easygoing hike that takes you to Rampart Reservoir, a popular outdoor spot for fishing and kayaking. Admire the striking landscape blanketed in snow during the winter, or visit in summer to see blooming flowers and watch fishermen casting lines to try their luck at snagging a fish.
Moderate
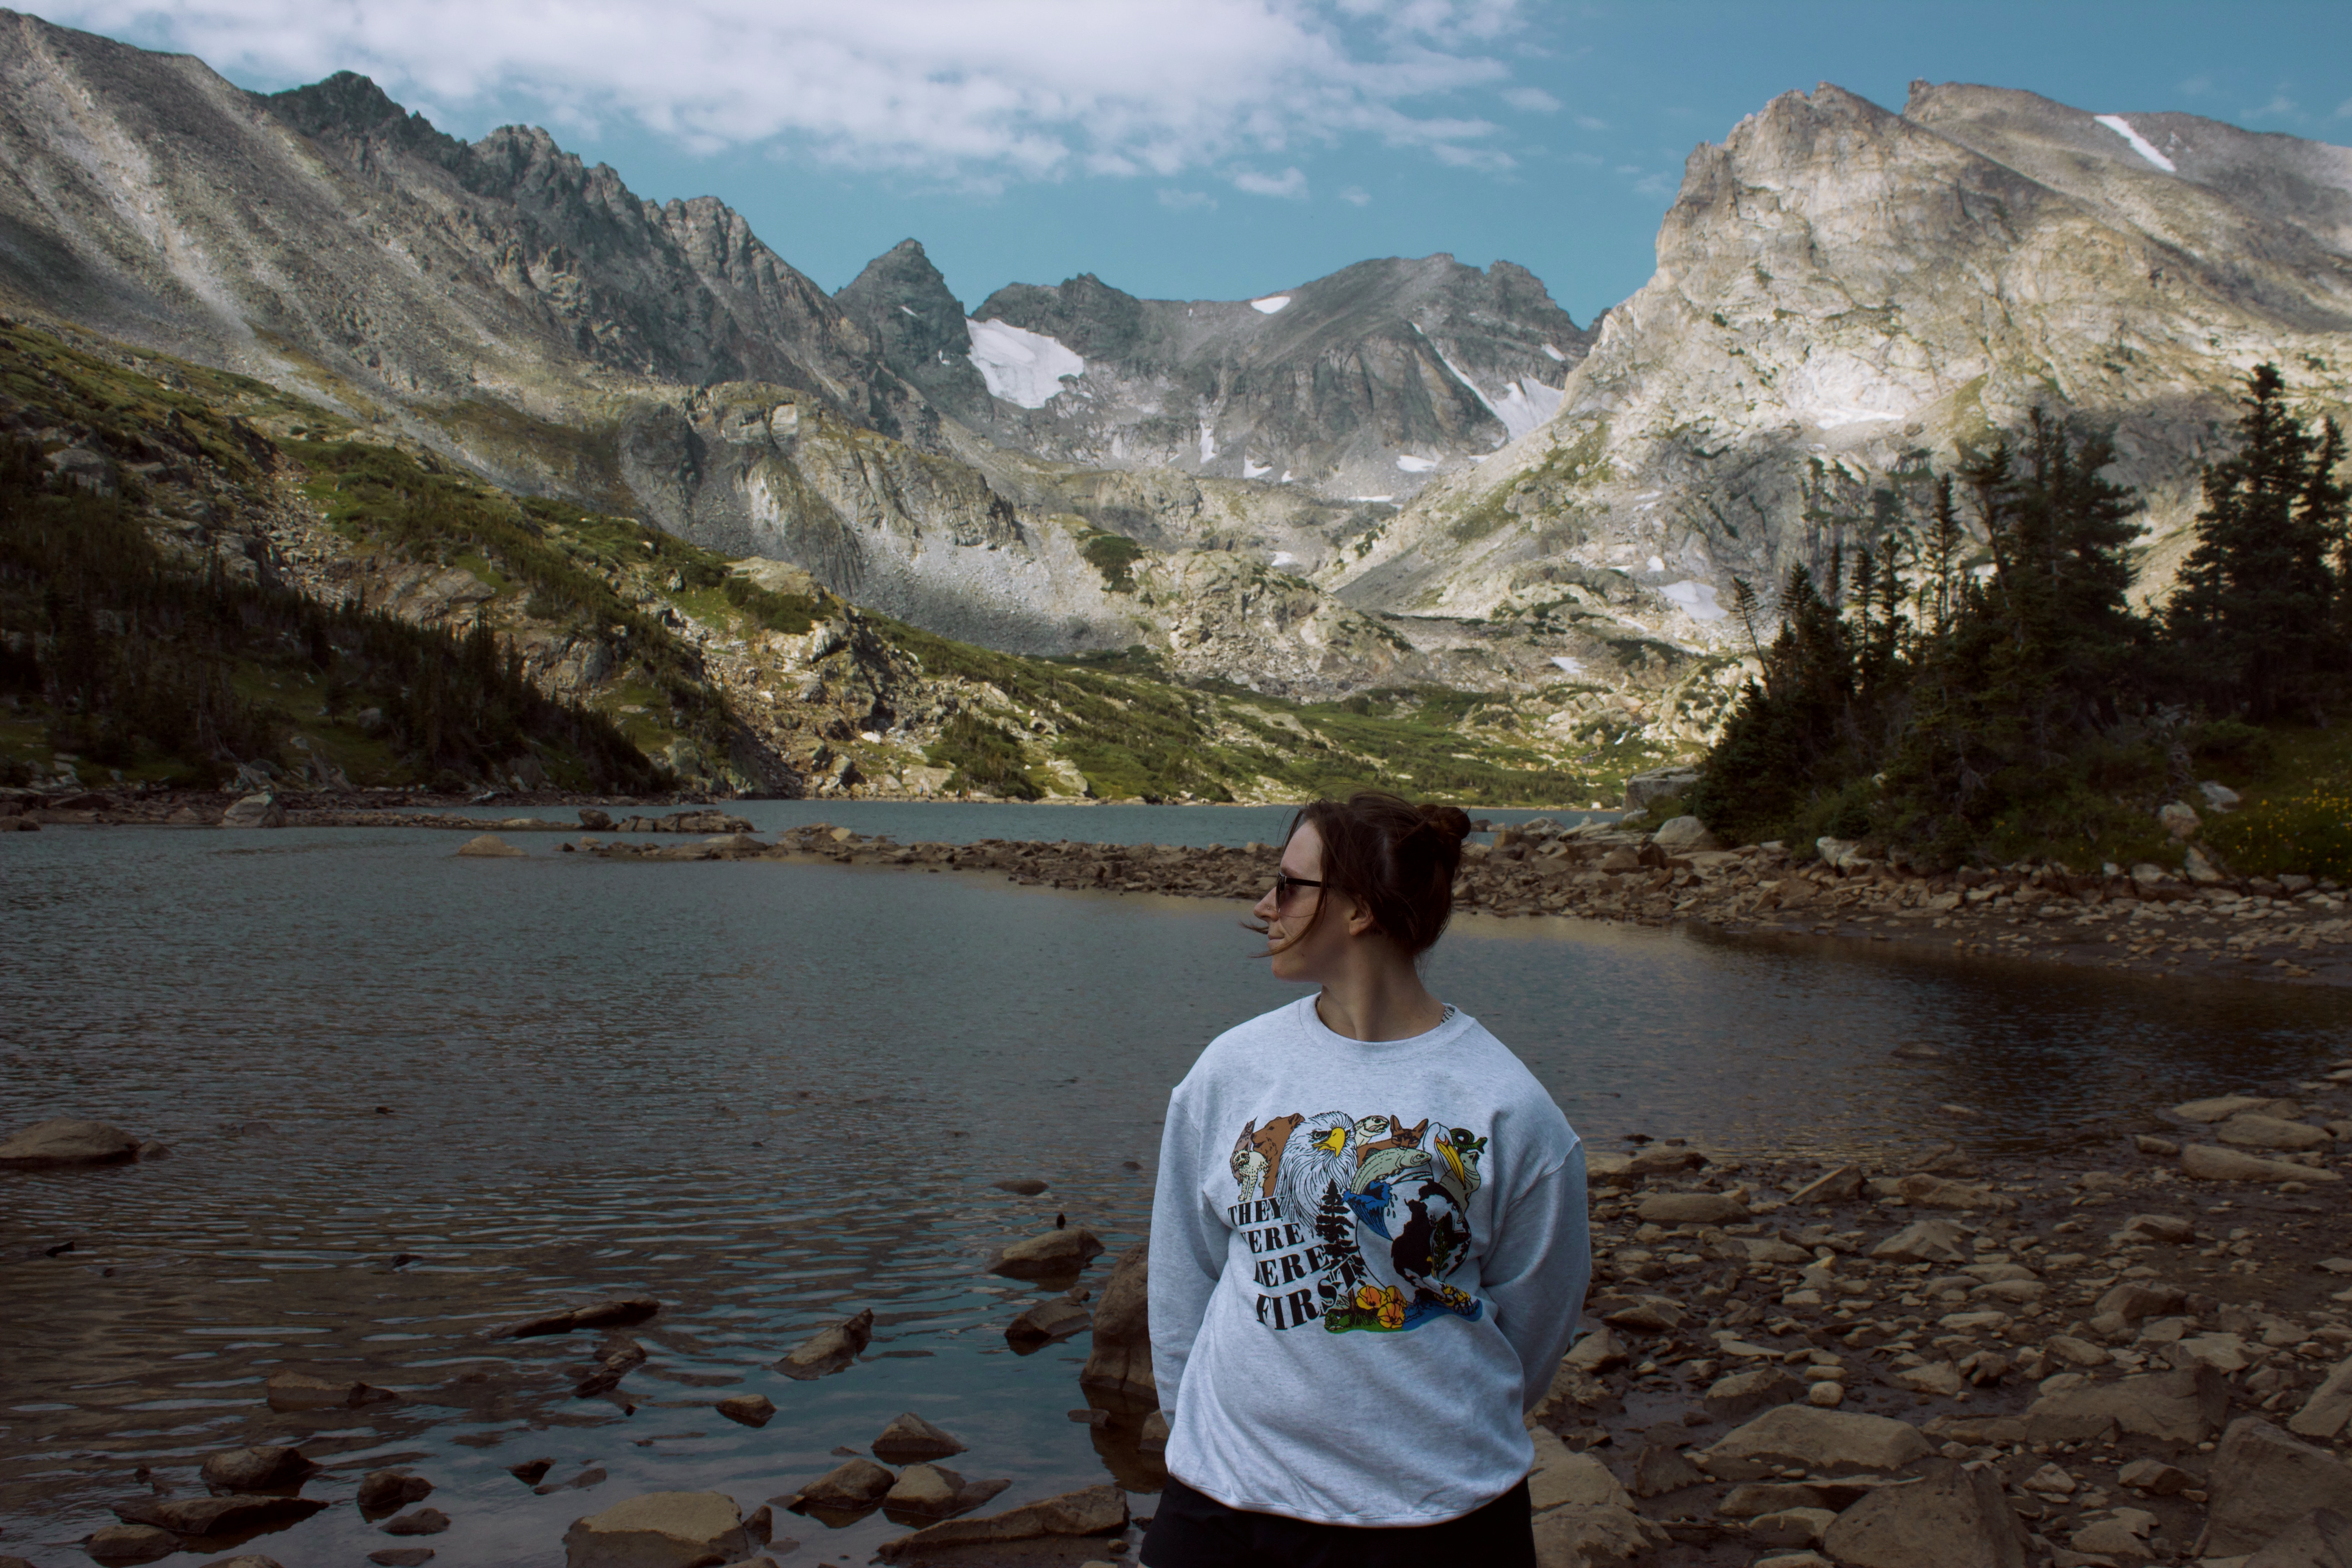
Lake Isabelle via Pawnee Pass Trail
Lake Isabelle is one of my favorite hikes in Indian Peaks Wilderness. It has a little bit of everything, from lakes to wildflower fields, forests, waterfalls, and snow-capped mountains. If you’re lucky, you might see a moose along the way.
The Crags Trail
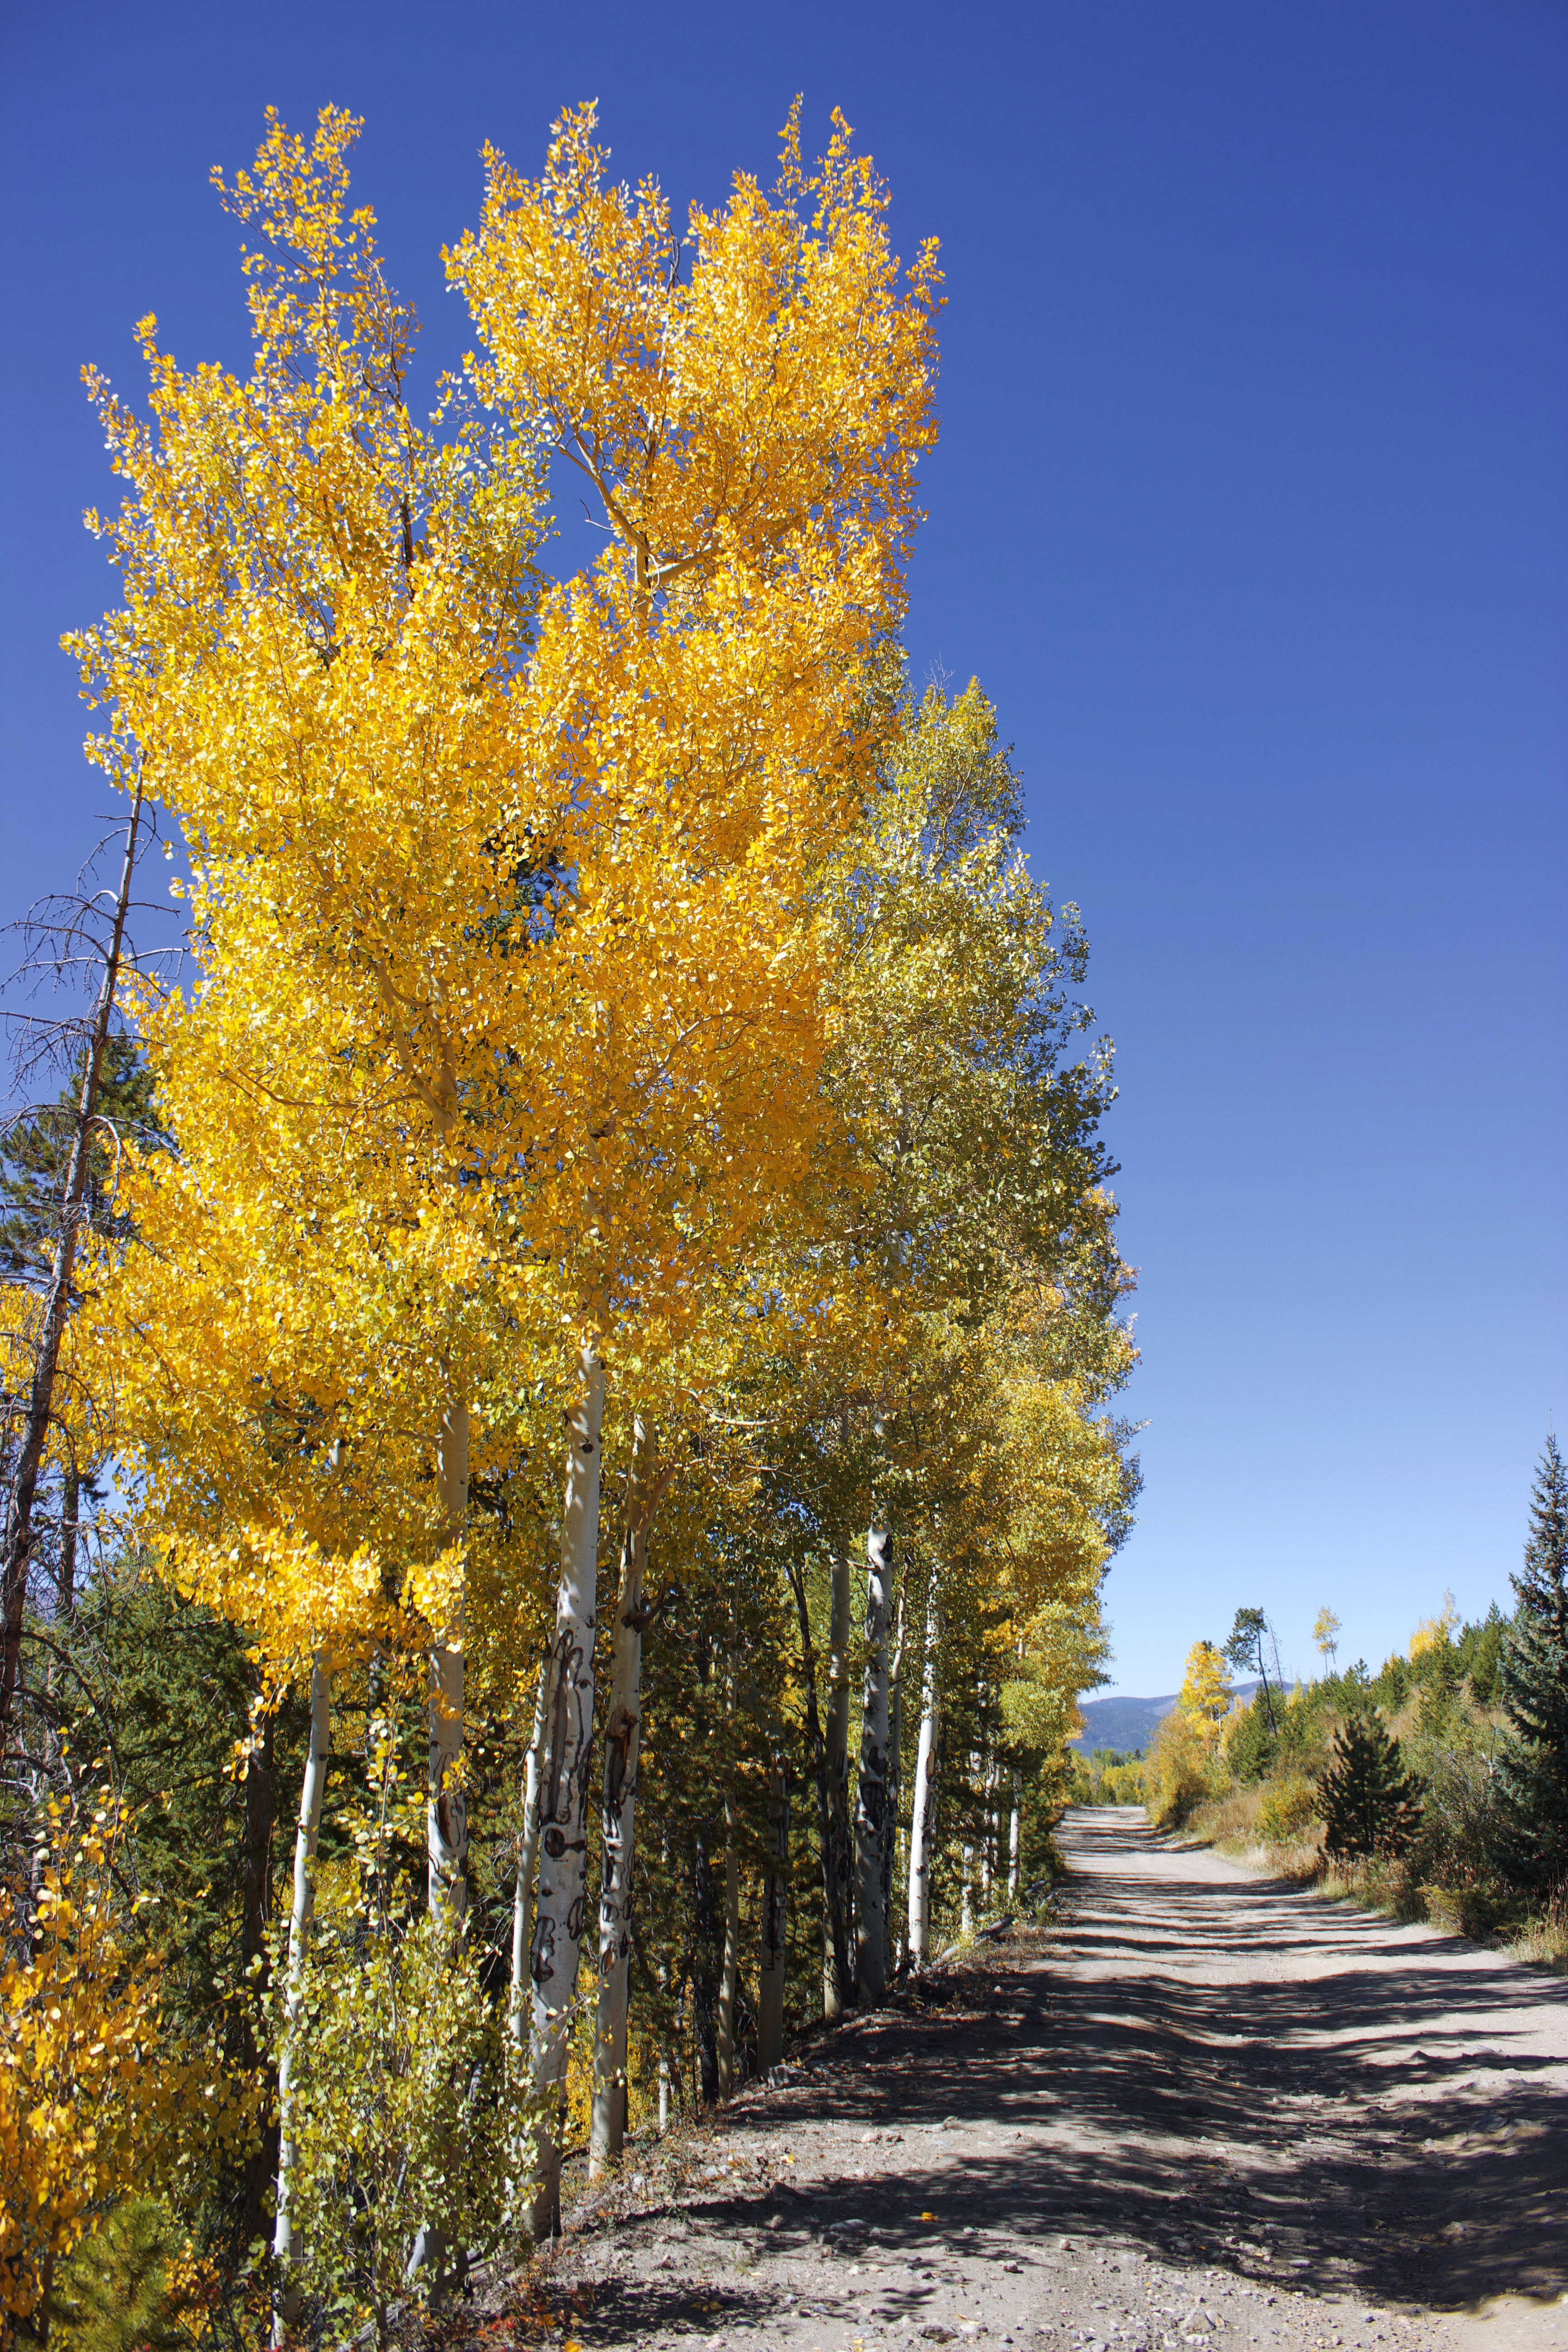
I highly recommend tackling the Crags Trail in fall to see the golden aspens. There are some steep sections at the beginning and end of the hike, but it’s overall fairly moderate. The aspen groves, rock formations, and sweeping views make this hike 100% worth the effort.
Crater Lake (Maroon Bells)
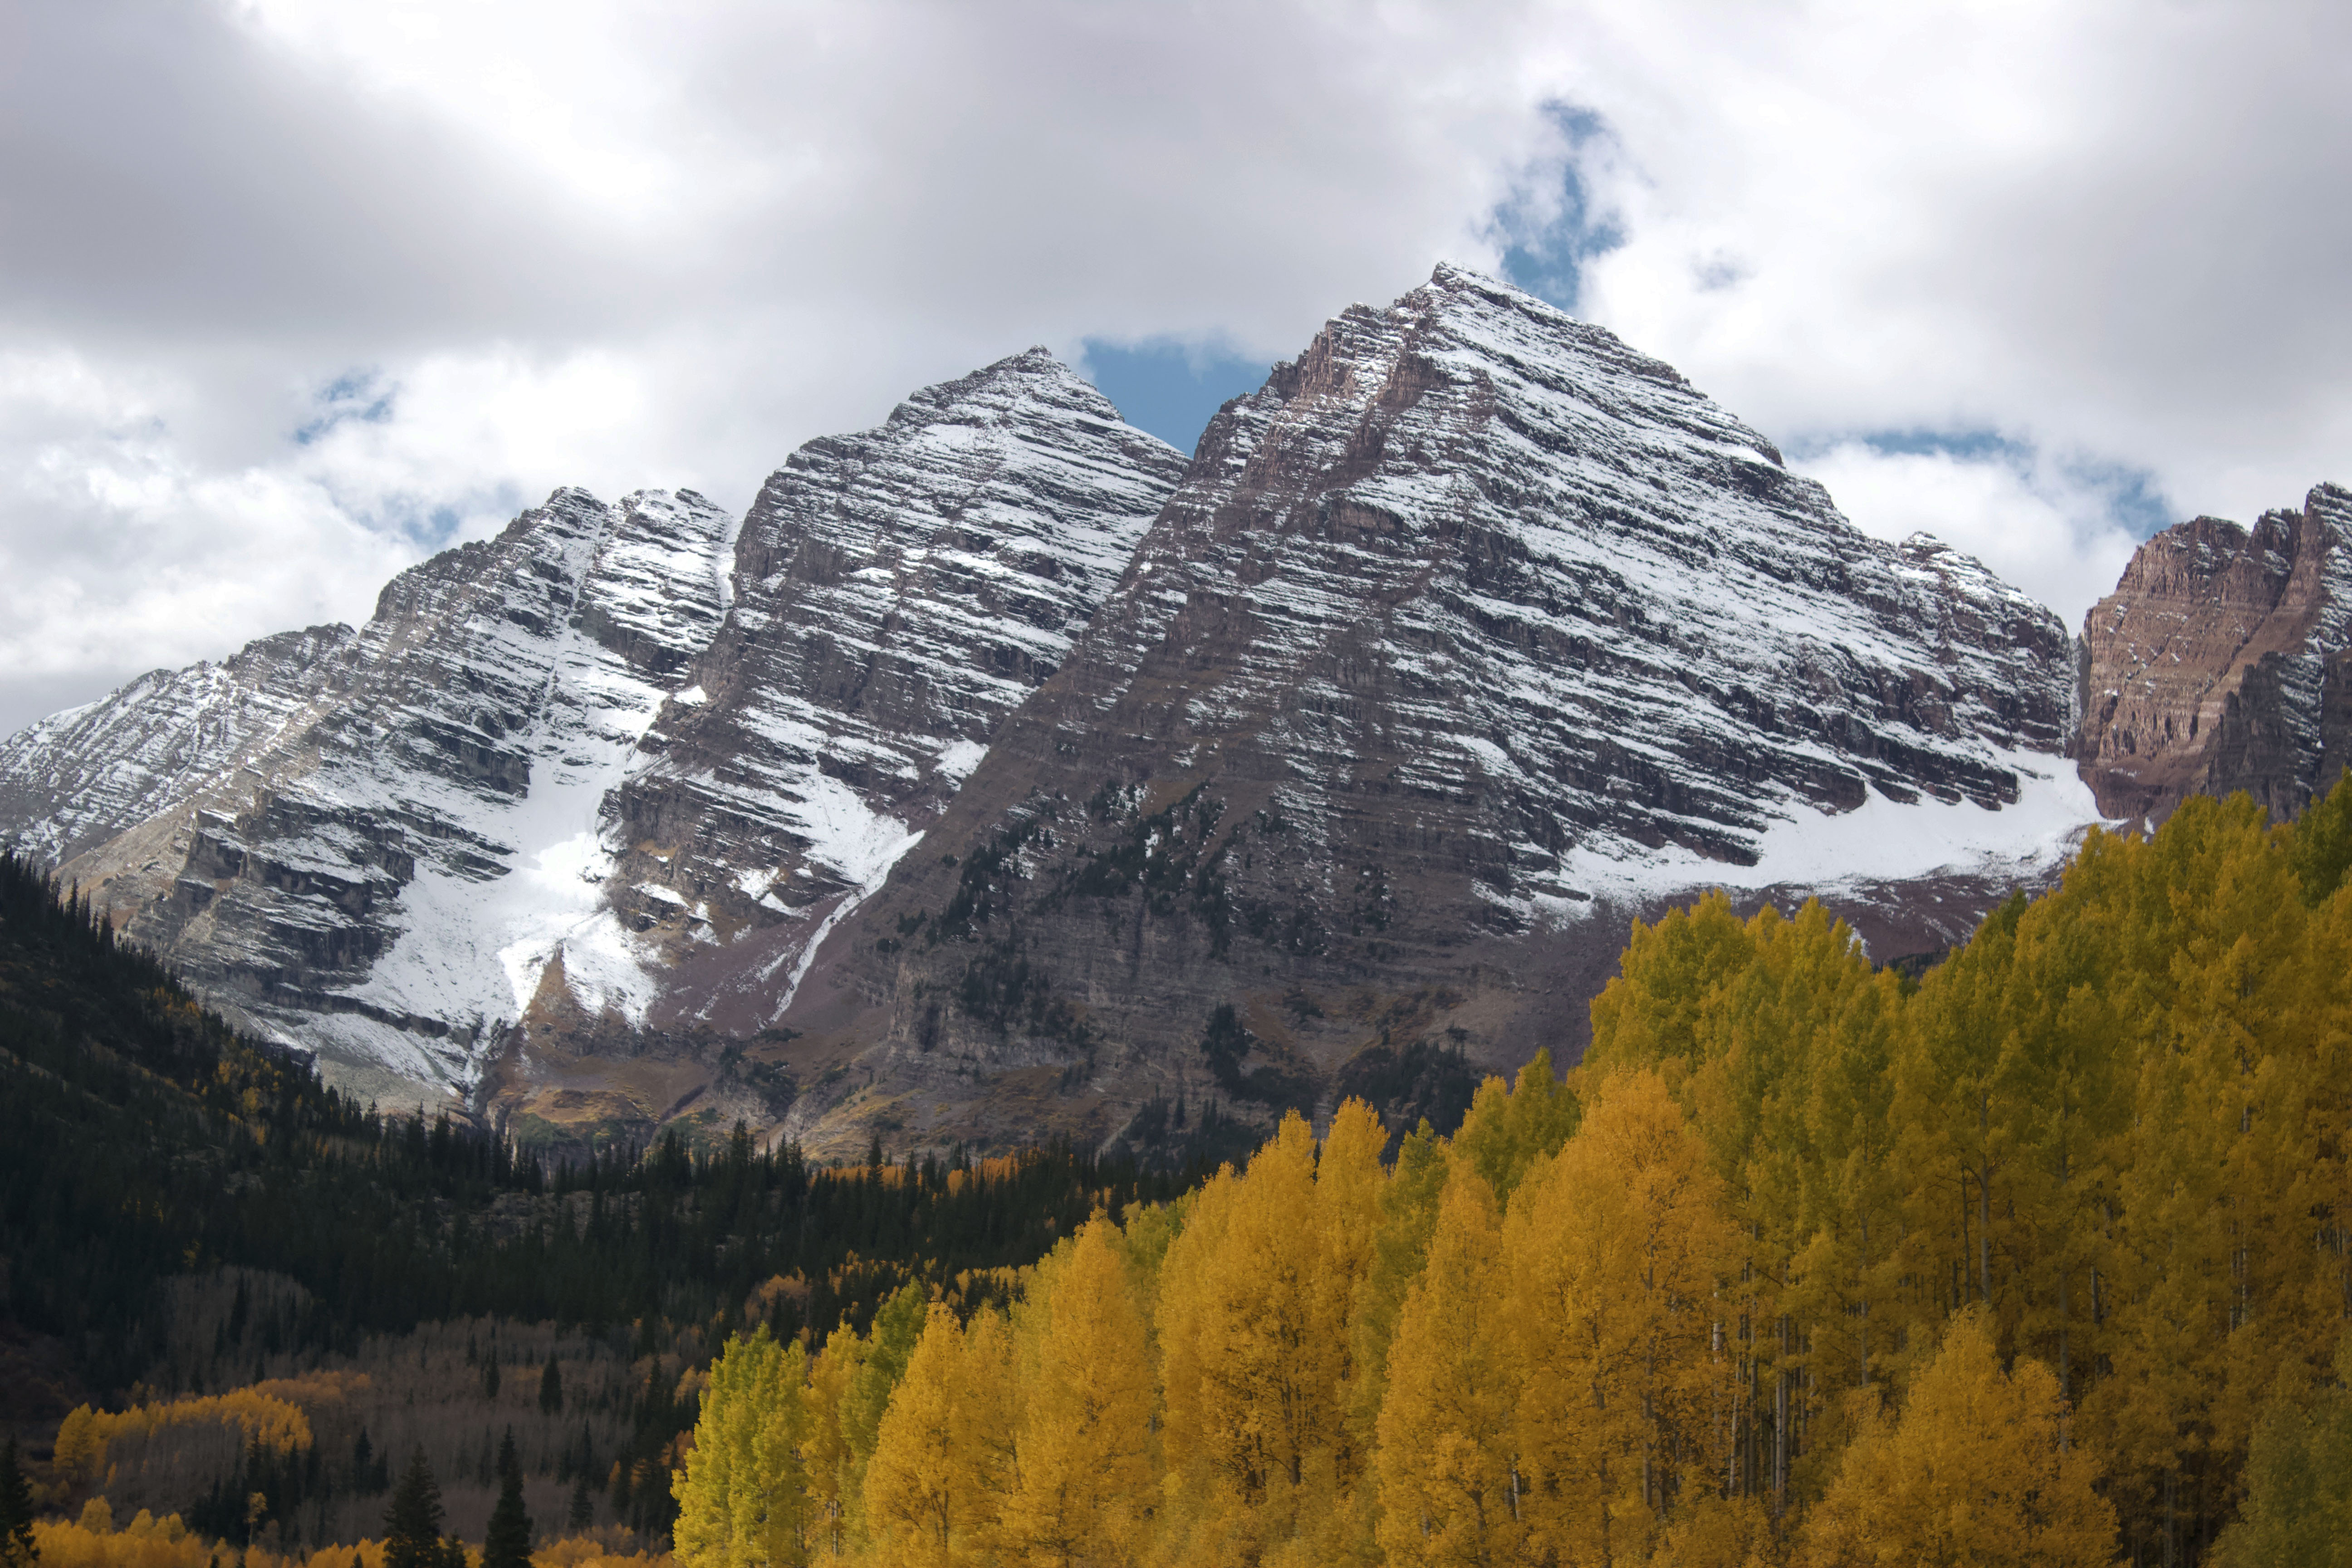
You’ve probably seen photos of the Maroon Bells even if you didn’t realize it. These iconic peaks are incredibly popular among photographers and nature enthusiasts.
The hike to Crater Lake is less than four miles with a couple hundred feet of elevation gain, making it appropriate for hikers of all experience levels. Seeing Crater Lake with the Maroon Bells in the background is insanely beautiful, and pictures truly don’t do it justice.
Loch Lomond Trail
Loch Lomond is a short but somewhat challenging hike near Empire. The trail is technically a 4×4 road you can drive on, but hiking is much more fun (in my opinion). I didn’t get to see the lake in summer while living in Colorado, but it was an unforgettable winter adventure.
Rogers Pass
Rogers Pass is far less popular than other hikes in the Winter Park area but is just as beautiful. It provides the perfect amount of challenge for beginners and is a fantastic introduction to the Colorado mountains. From the old train trestle to the aspens and scenic overlooks, there’s a lot to love about this underrated trail.
Diamond Lake Trail
Diamond Lake is another classic Indian Peaks Wilderness trail. The hike gains over 1,000′ of elevation, so it’s definitely a good workout. Diamond Lake itself is picture-perfect, with lots of room to spread out and explore.
Bluebell, Royal Arch, Flatiron, Bluebell-Baird, and Meadow Trail Loop
Get up close and personal to Boulder’s famous Flatirons on the Bluebell, Royal Arch, Flatiron, Bluebell-Baird, and Meadow Trail Loop (try saying that five times fast). Don’t underestimate this under-2.5-mile-long hike—there’s enough elevation gain to make you break a sweat. Along the way, you’ll enjoy beautiful views of the distinctive rock formations, downtown Boulder, and the surrounding mountains.
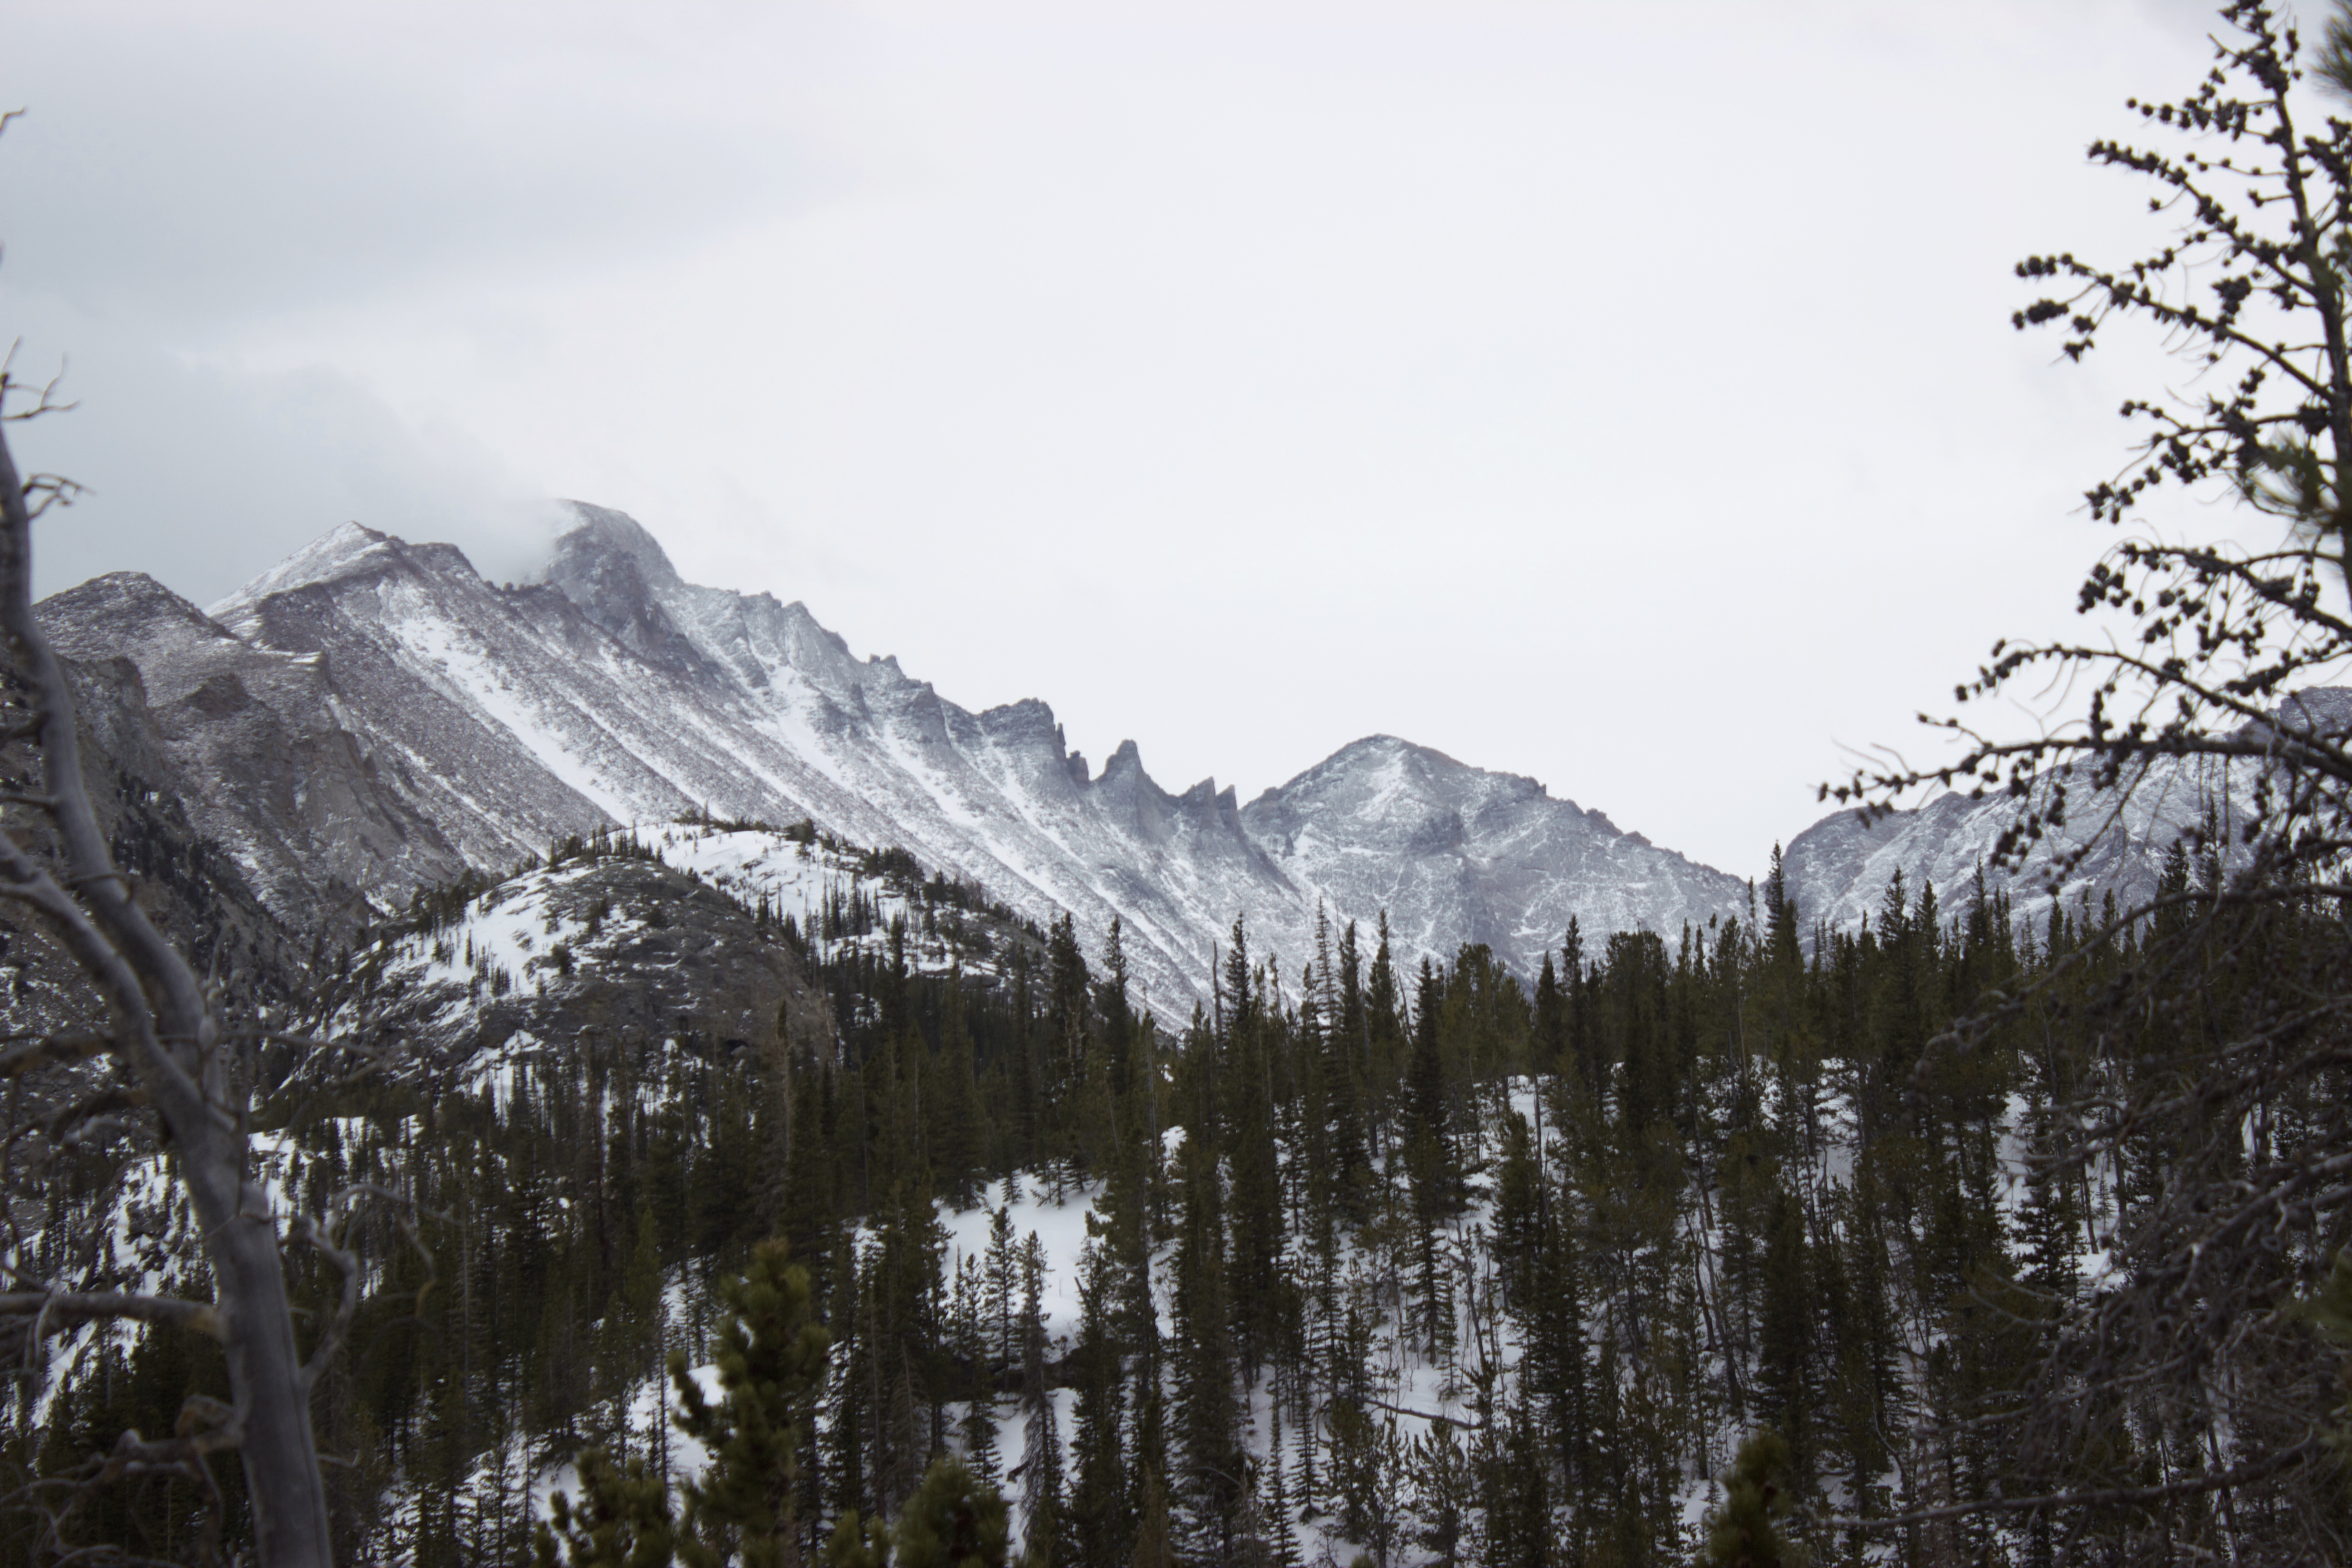
Dream Lake Trail
If you only have time for one hike in Rocky Mountains National Park, make it the Dream Lake Trail. This is my go-to when hosting friends and family who want to do some hiking in the park. I’ve only experienced it in winter (which is gorgeous and dramatic), but it’s a great option any time of the year.
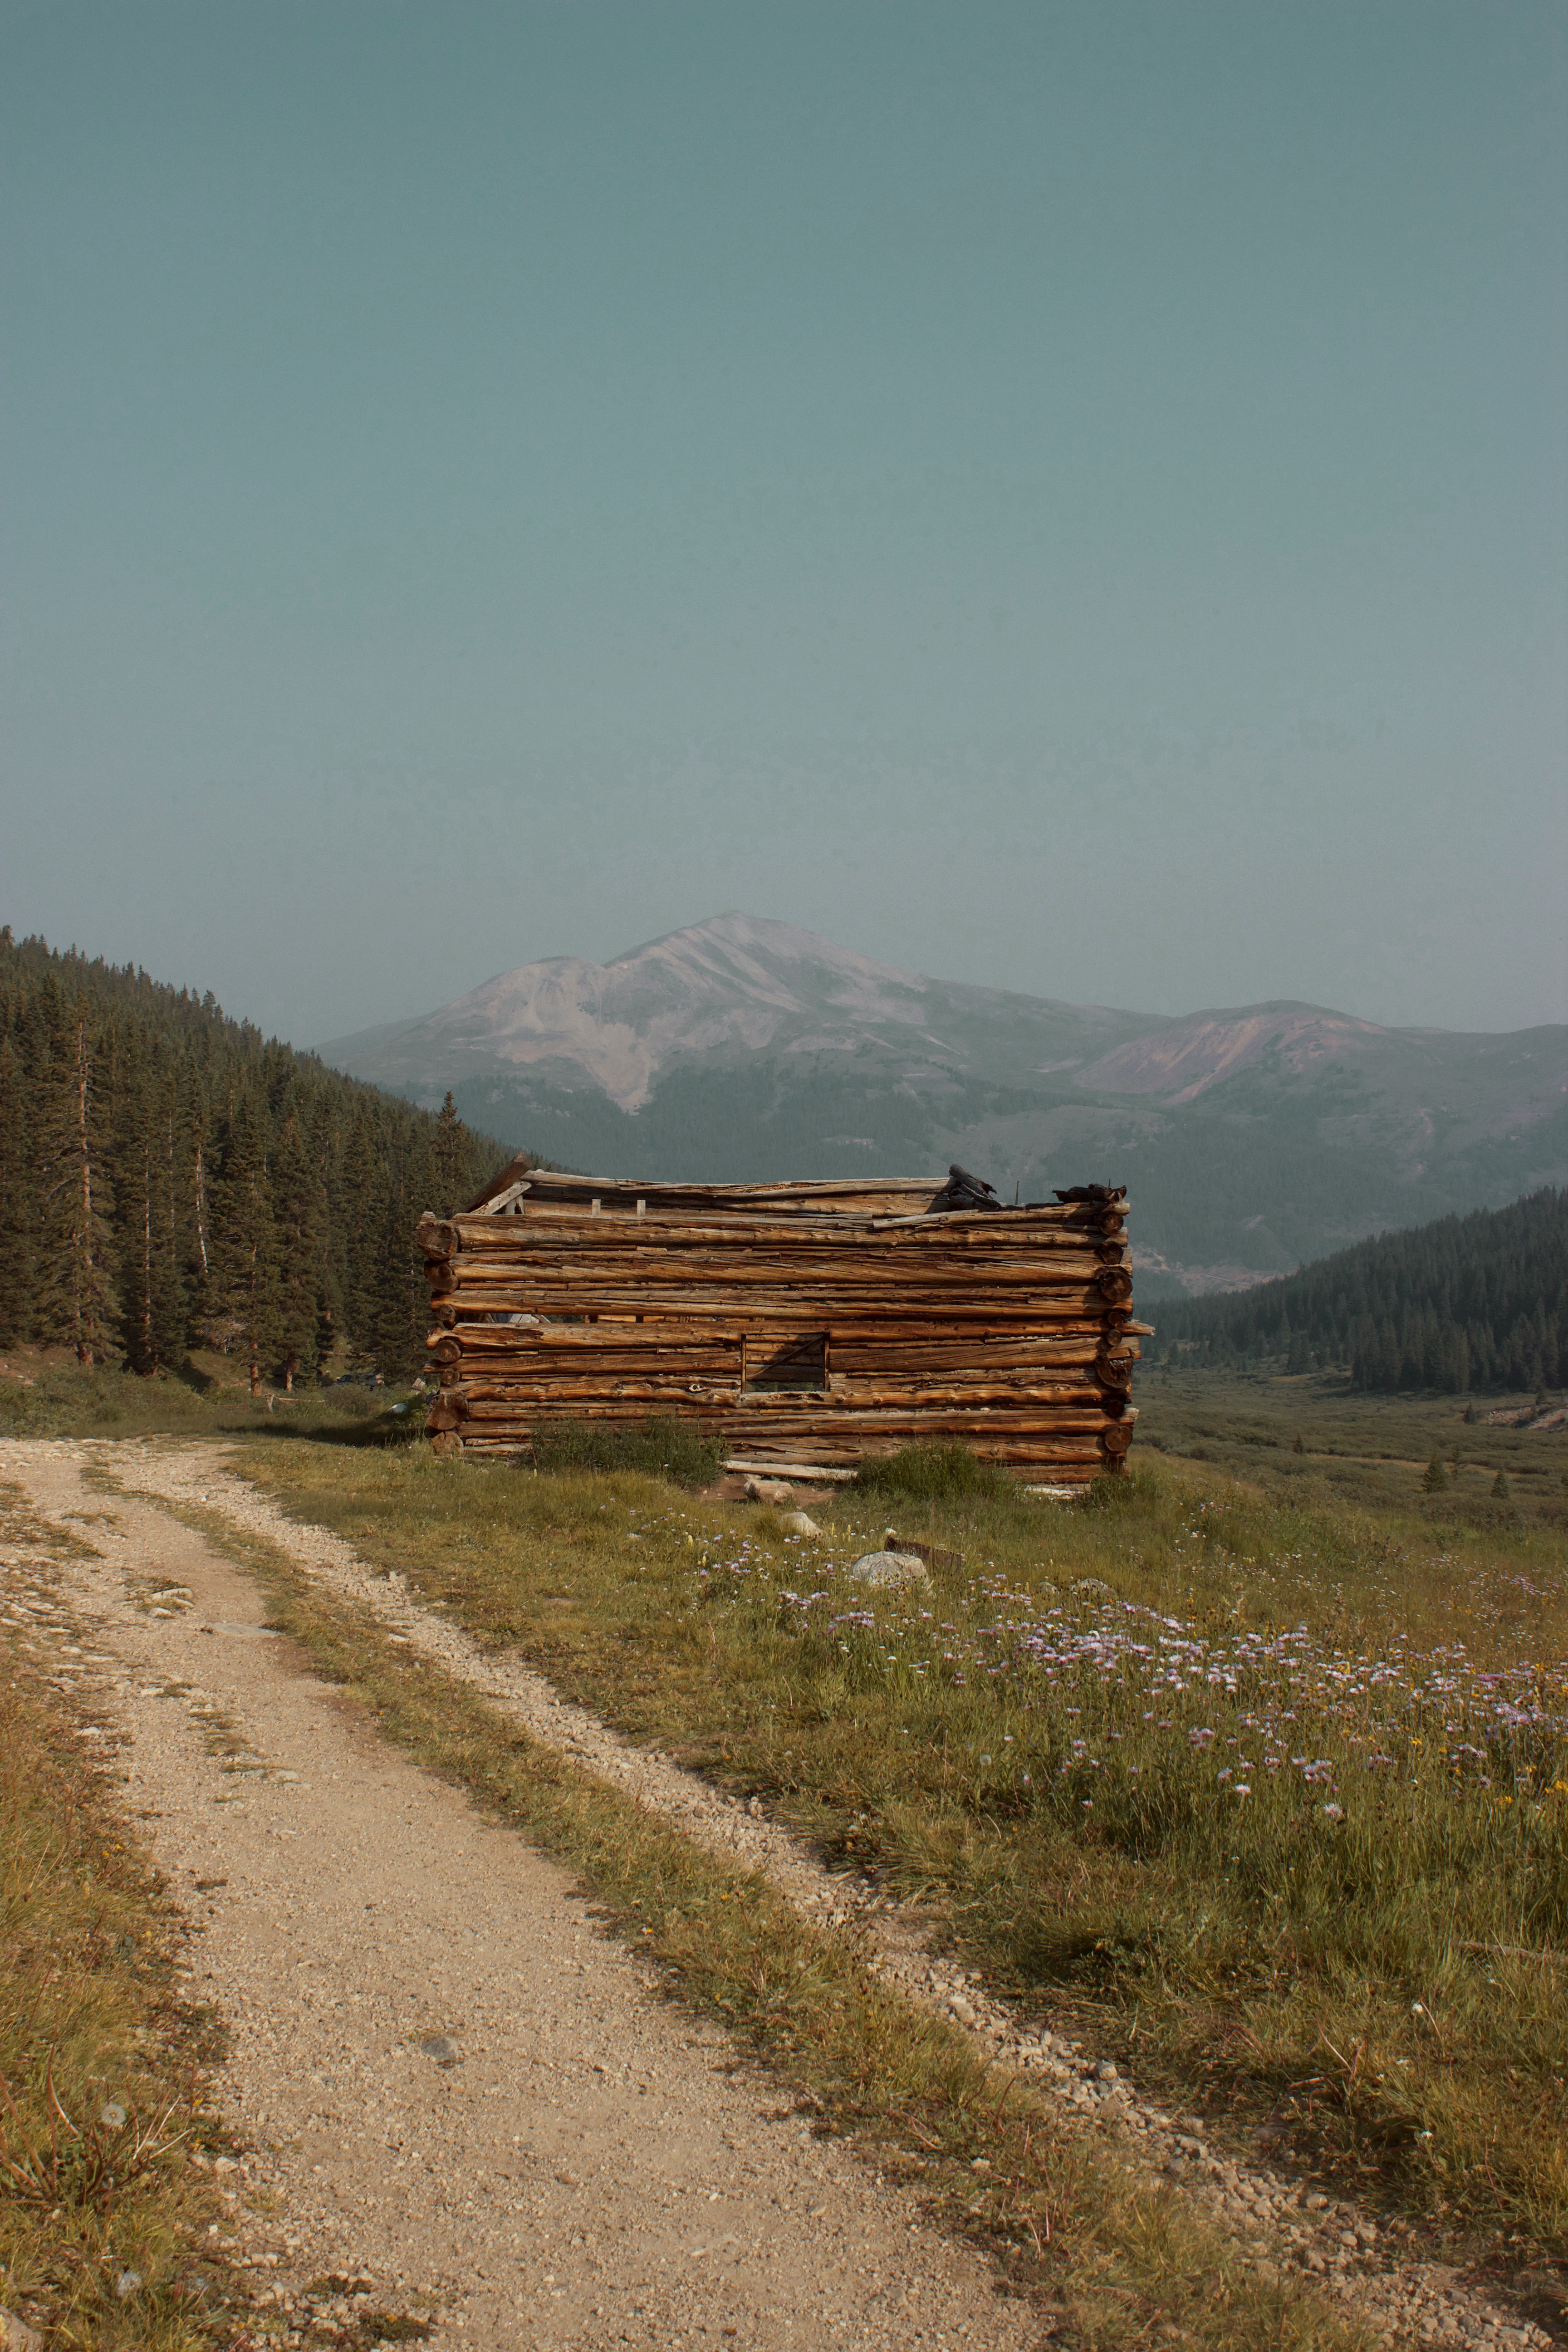
Mayflower Gulch Grand Traverse
Discover an abandoned mine tucked among the mountains along the Mayflower Gulch Grand Traverse. The trail follows an old wagon road to a historic mining site, and you can add mileage by hiking around what remains of the log cabins and wooden structures. Summer is an excellent time to hike Mayflower Gulch because all the flowers will be in bloom.
Mule Creek Trail
Mule Creek Trail is a must when visiting Woodland Park. It follows the creek along seven miles of forests and canyons, making you feel like a rugged wilderness explorer. This hike is moderately challenging if you tackle the entire route, but you can always shorten it for a less intense adventure.
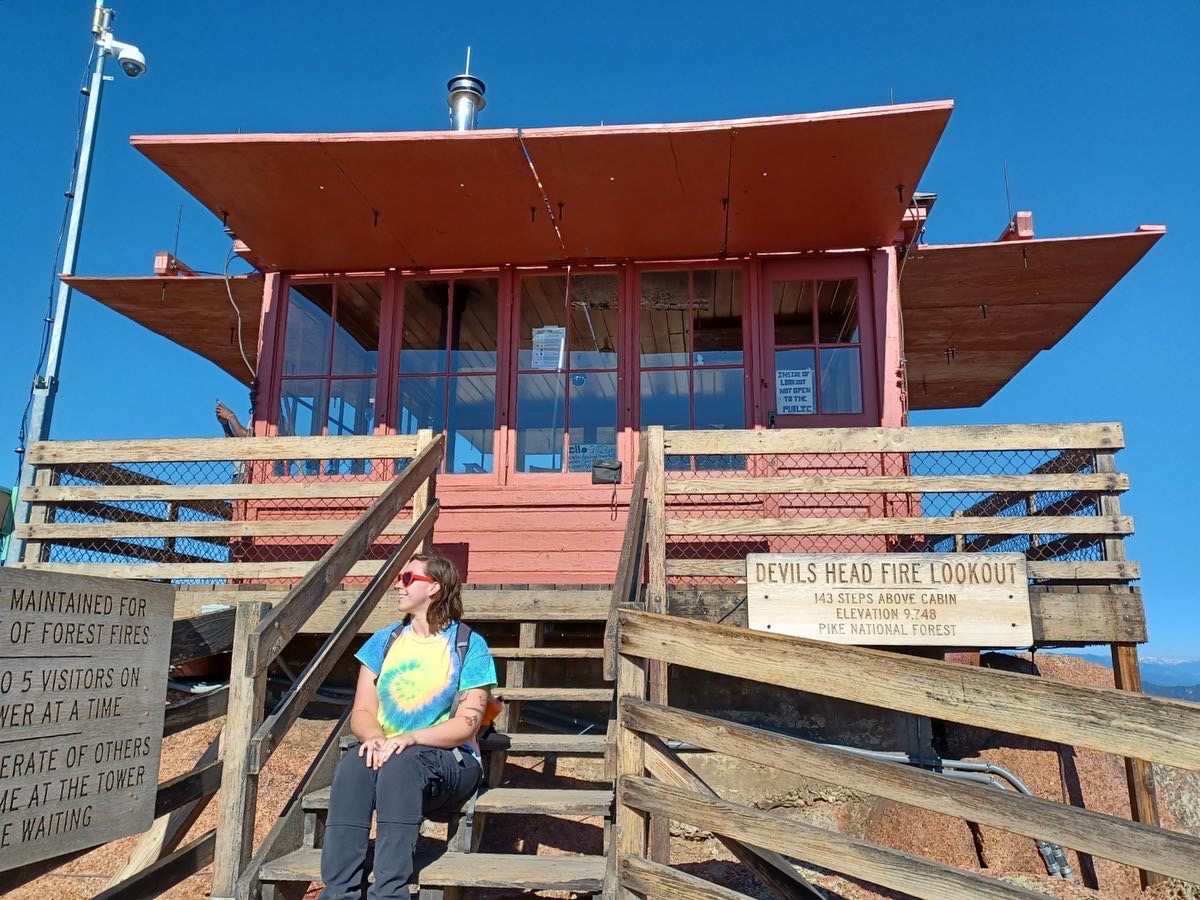
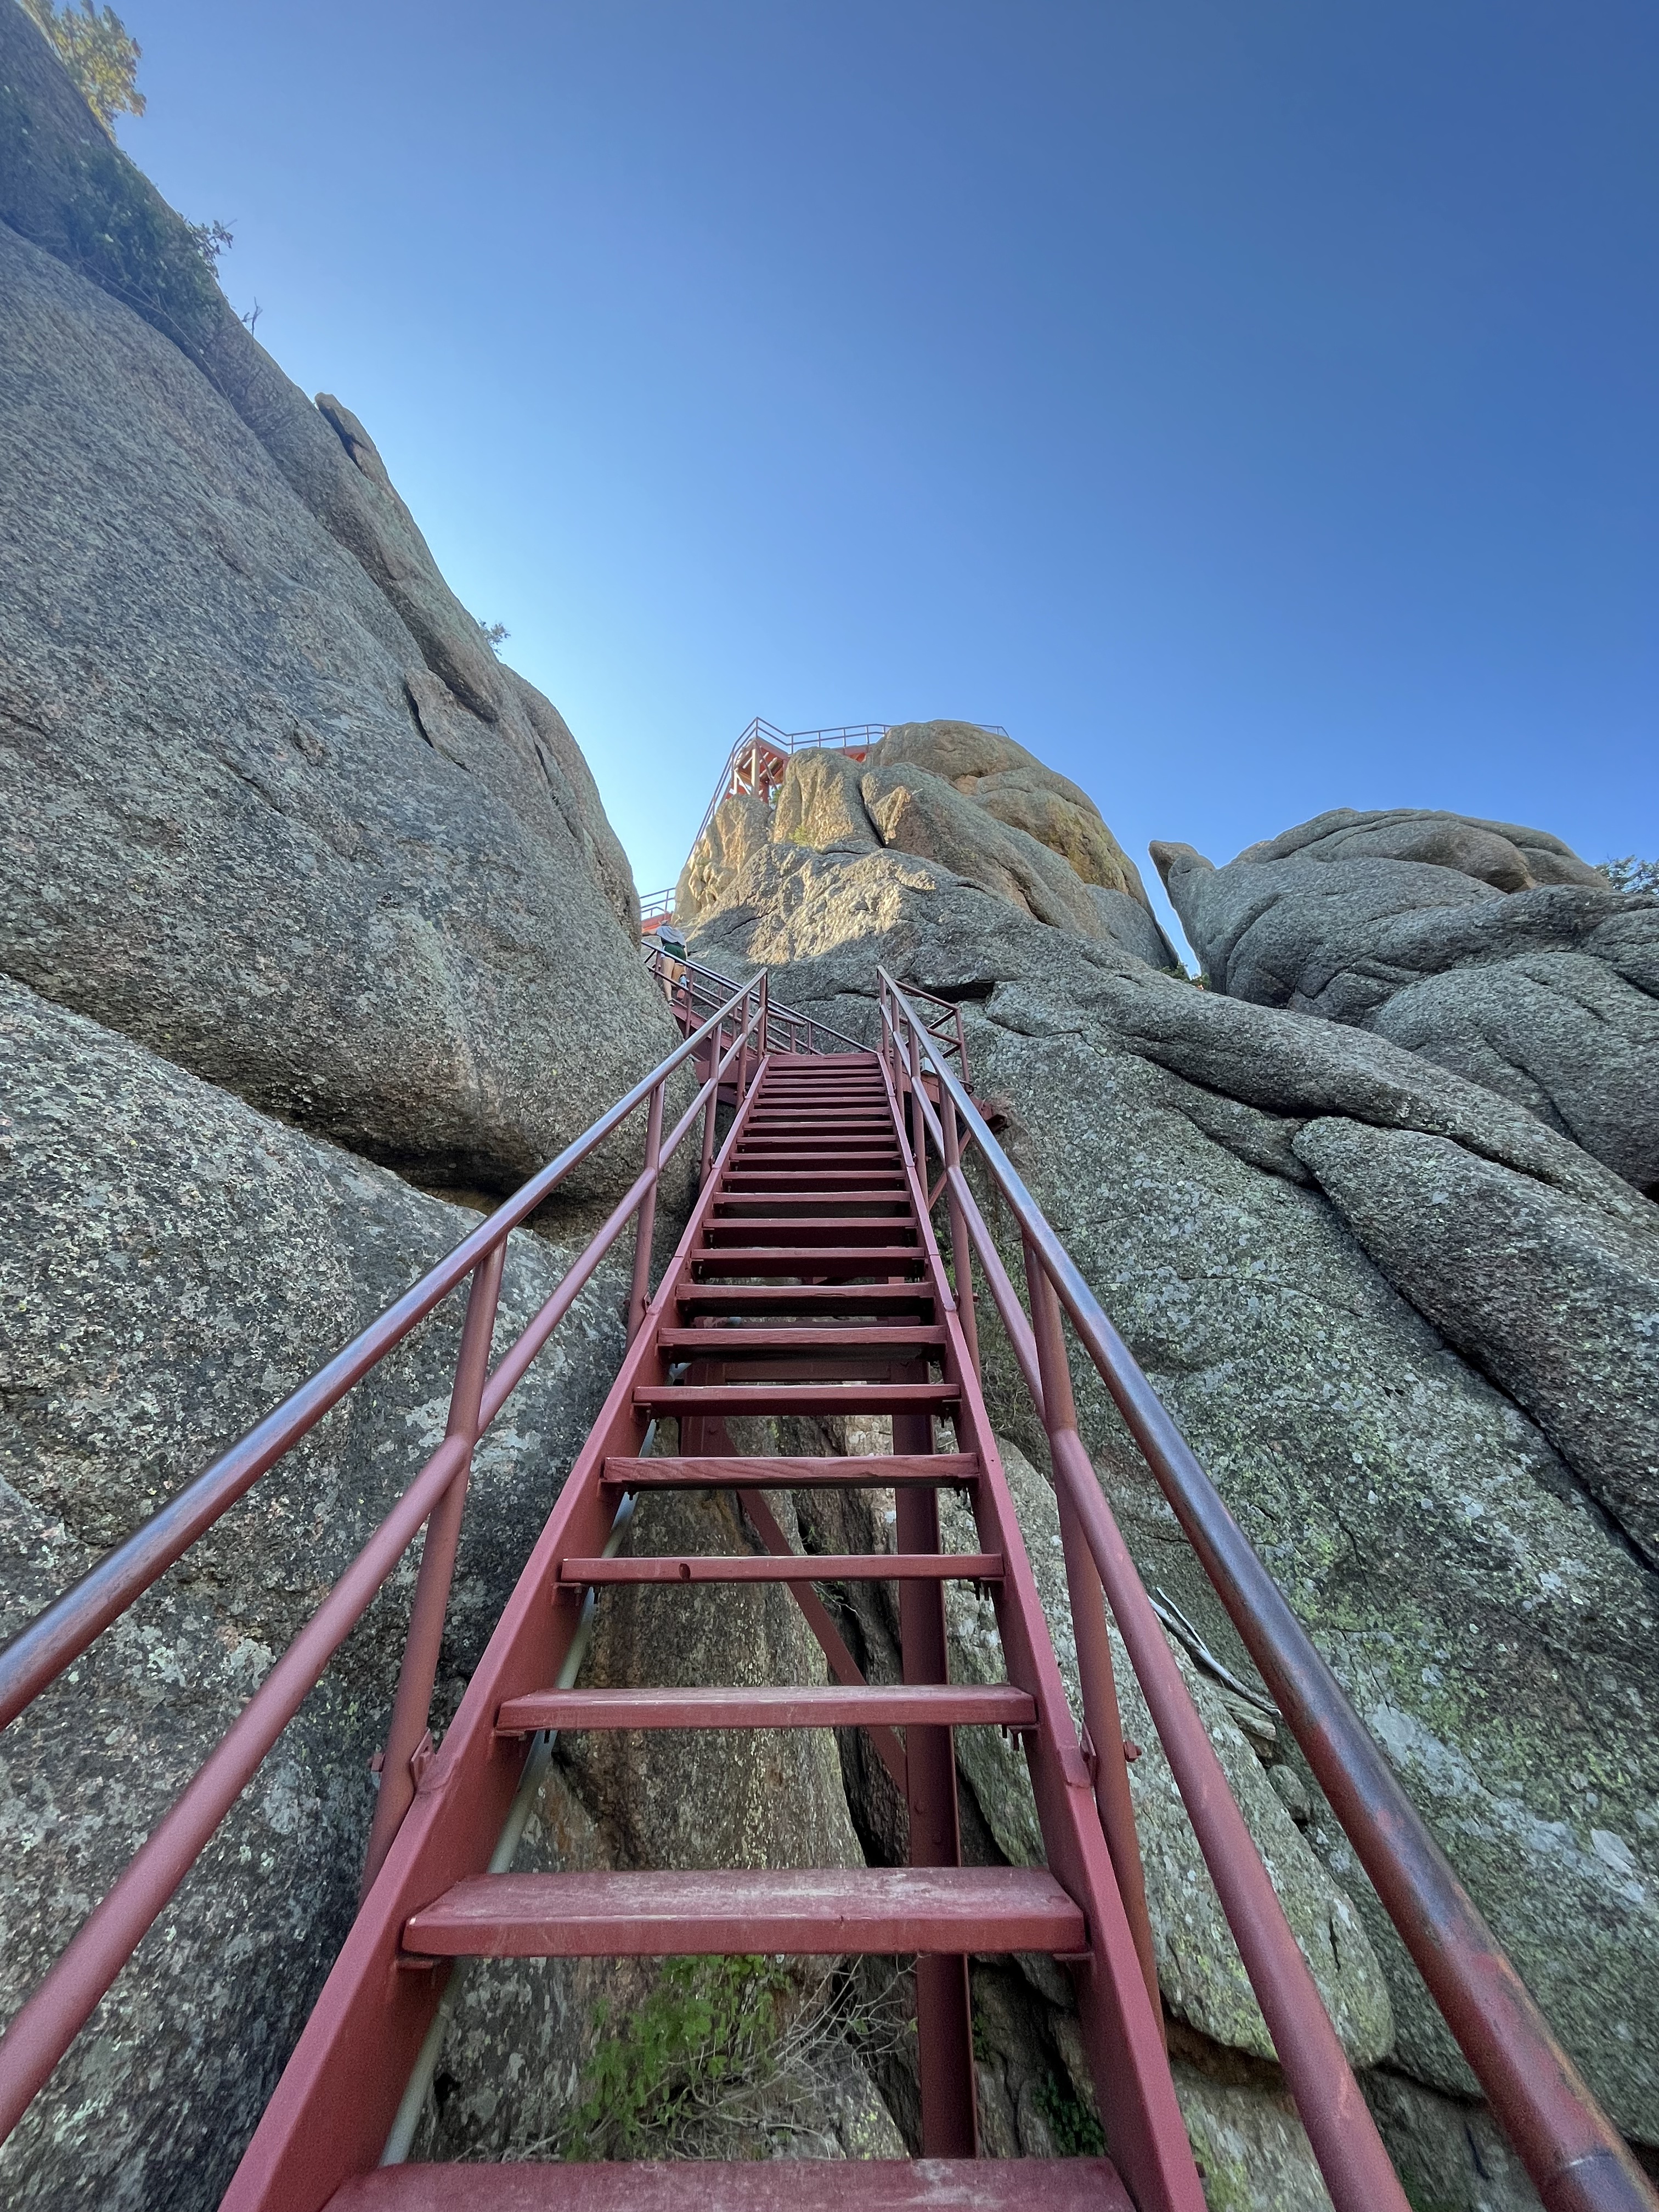
Devil’s Head Lookout
I love every step of the trail to Devil’s Head Lookout, a picturesque fire tower in Pike National Forest. The tower is staffed by forest rangers, and it’s fascinating to see where they work and live while on duty. Devil’s Head Lookout is less than three miles roundtrip but steadily gains elevation, with an intense final push up a set of stairs leading to the tower.
Silver Dollar Lake and Murray Lake Trail
See two stunning alpines lakes along the Silver Dollar and Murray Lake Trail. This was one of the first hikes I ever stepped foot on in Colorado, so it holds a special place in my heart.
You’ll travel through a forest before ascending above the tree-line, eventually arriving at Silver Dollar Lake. Continue up and over a saddleback to see Murray Lake, which is equally beautiful.
Challenging
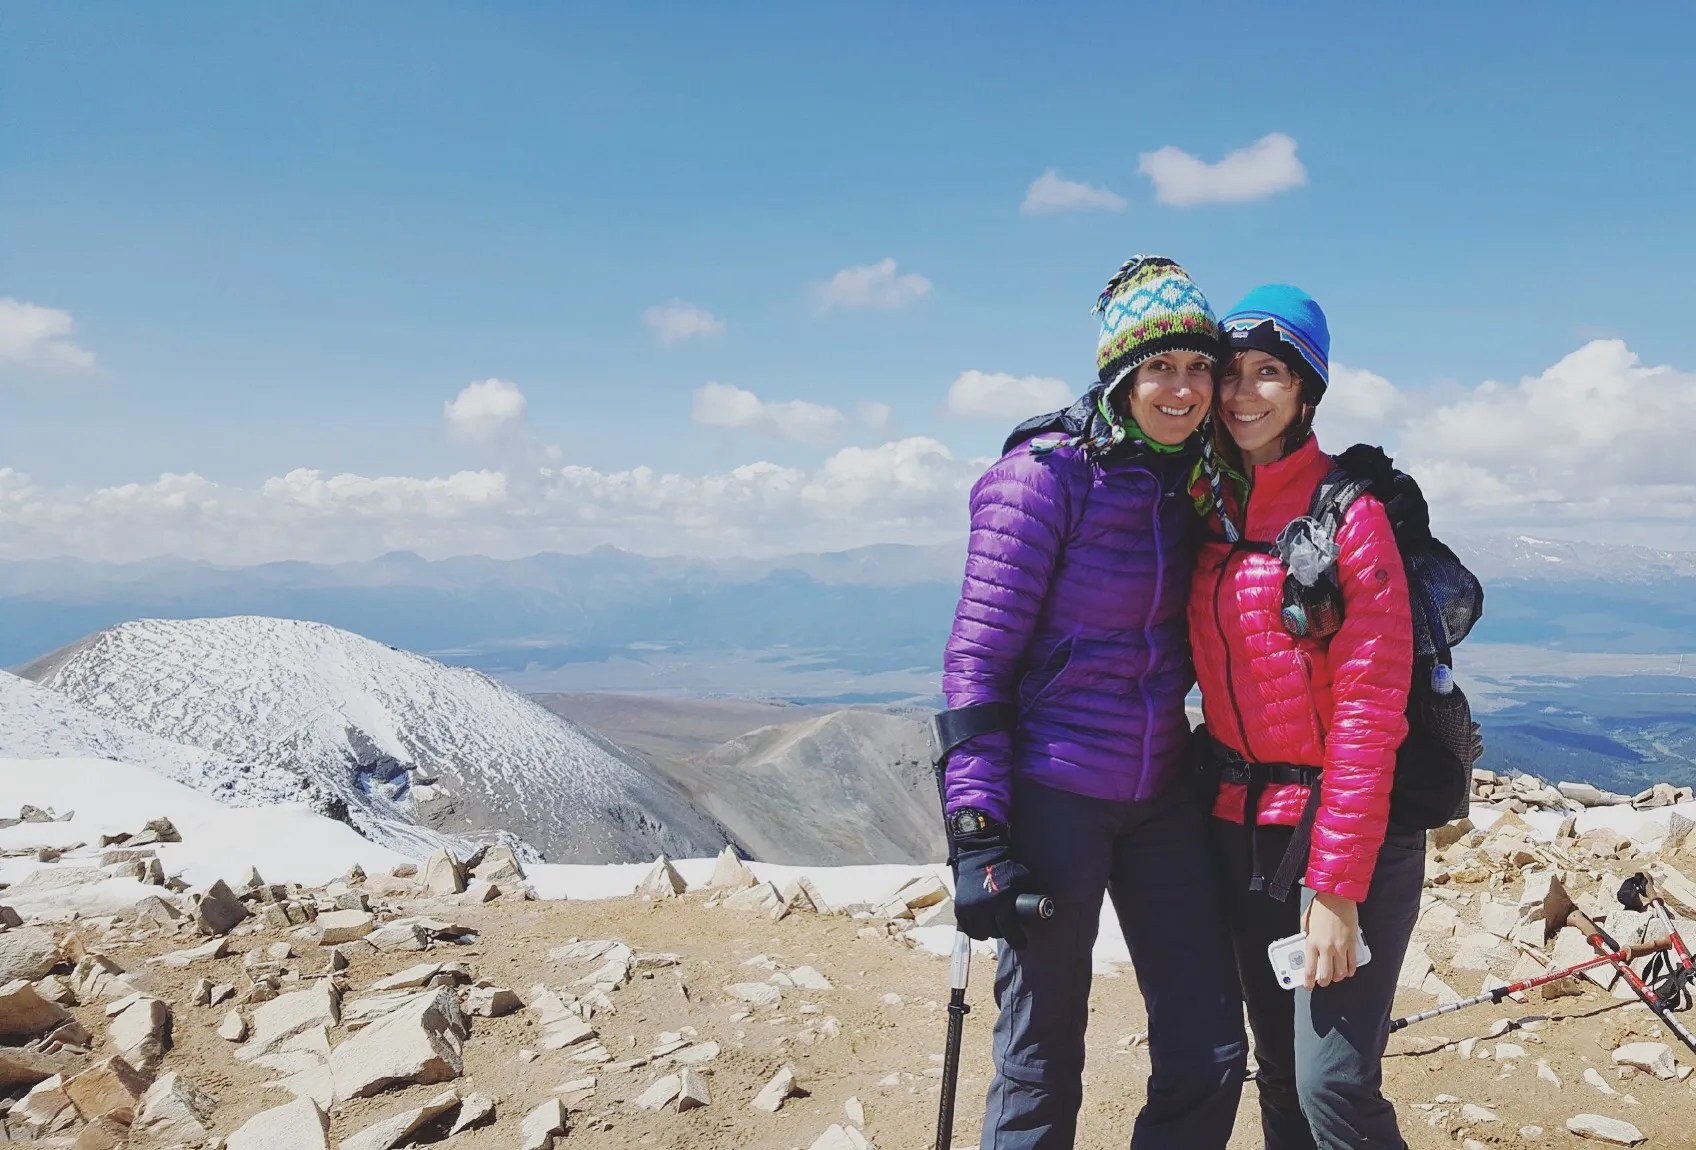
Mount Democrat via Kite Lake Trail
Mount Democrat is one of four 14ers that make up the DeCaLiBron, an intense loop that summits multiple peaks in one strenuous hike. While Mount Democrat is relatively moderate compared to other Colorado 14ers, it isn’t easy by any stretch of the imagination. Regardless if you do the entire DeCaLiBron or turn back after the summit of Democrat, you’re in for a stunning high-altitude adventure.
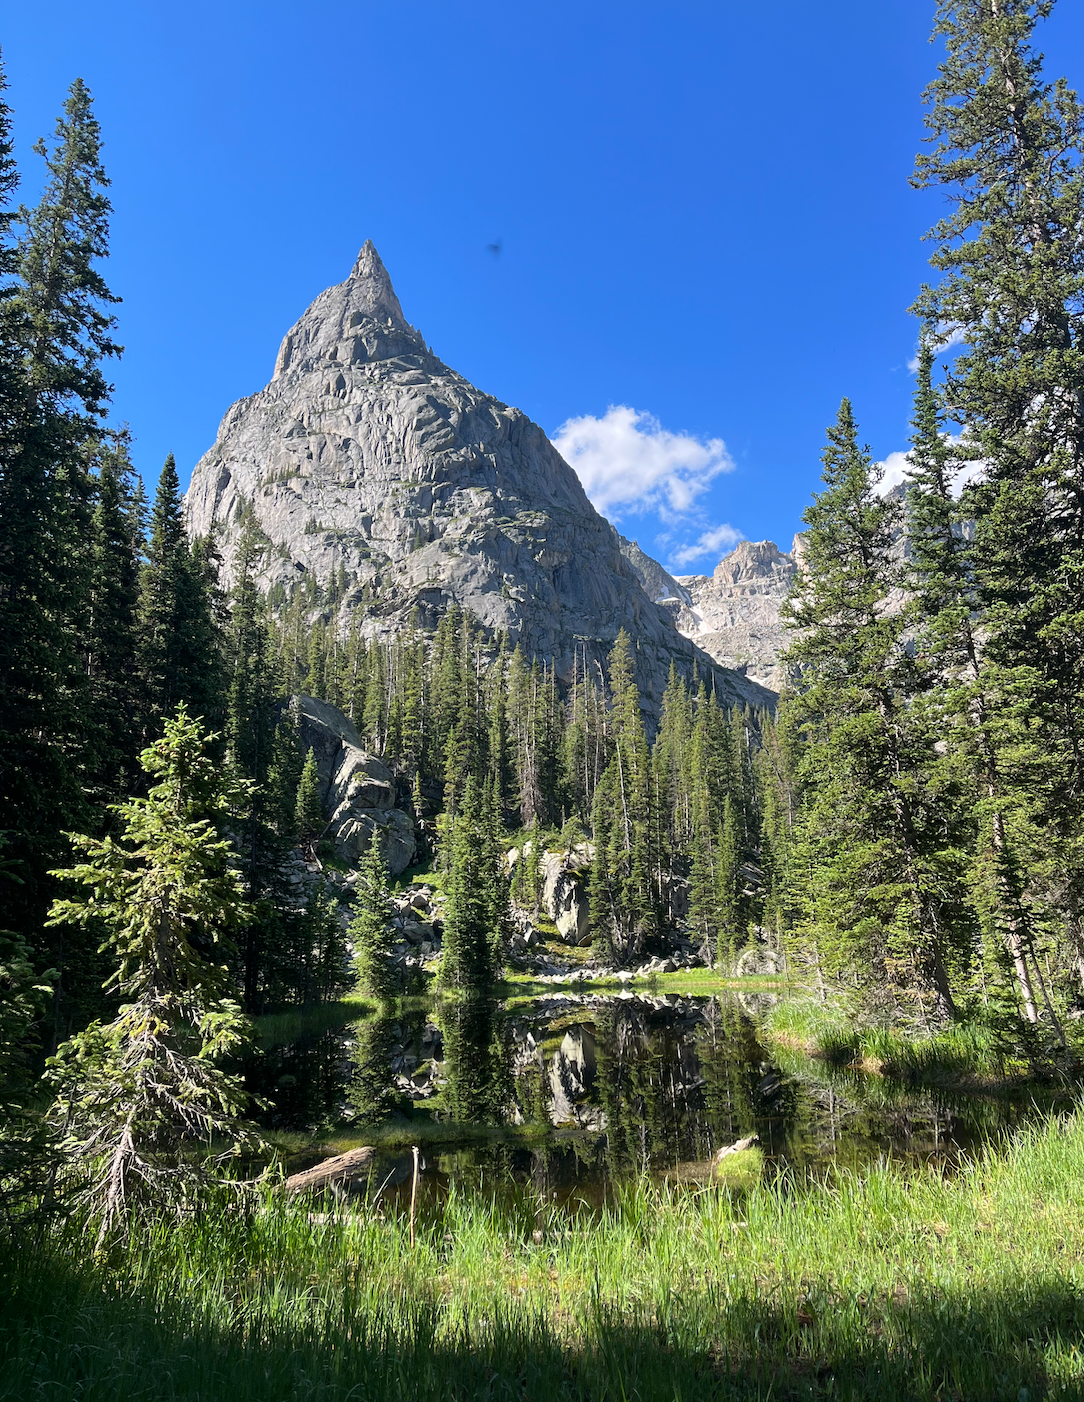
Crater Lake and Lone Eagle from Long Lake Trailhead (Indian Peaks Wilderness)
The trail to Crater Lake and Lone Eagle in Indian Peaks Wilderness might be my all-time favorite Colorado hike. It’s around 15 miles to Crater Lake and Lone Eagle from the Monarch Lake Trailhead, so many camp overnight to tackle it over two days.
My husband, dog, and I hiked the entire route in one day, which was very challenging and exhausting. However, the views of Mirror and Crater Lakes and Lone Eagle Peak were absolutely breathtaking and made every step feel worthwhile.
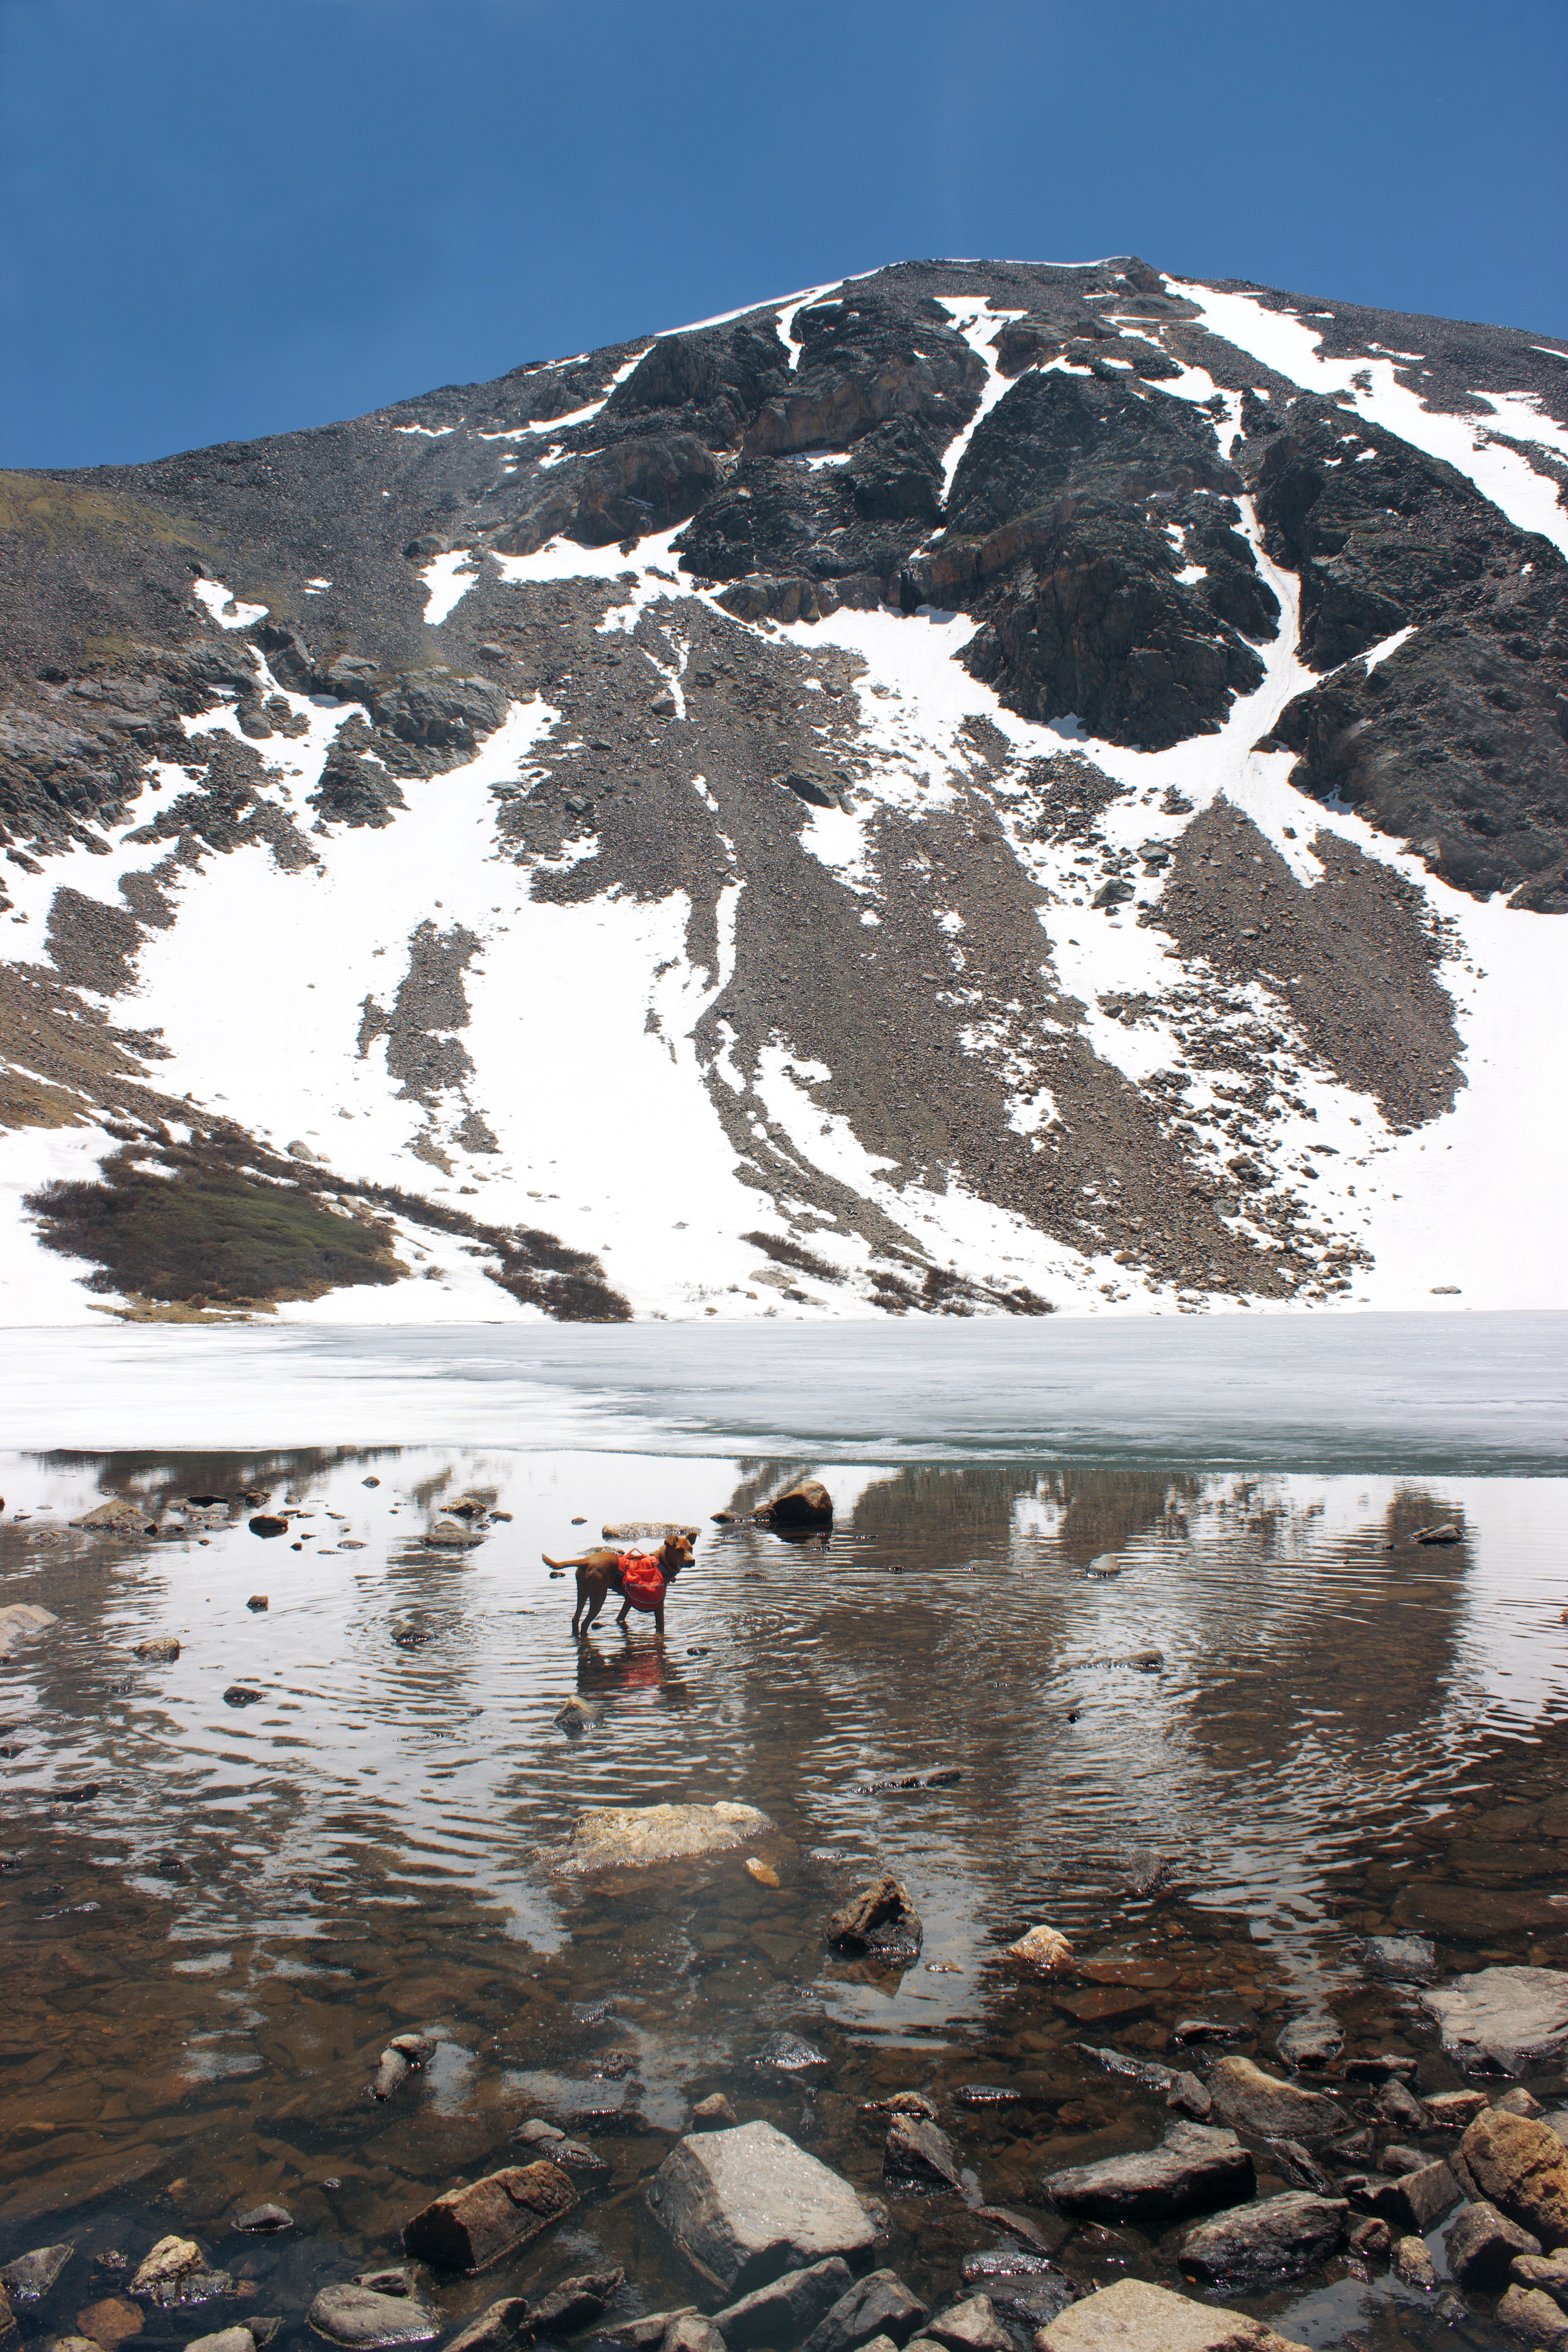
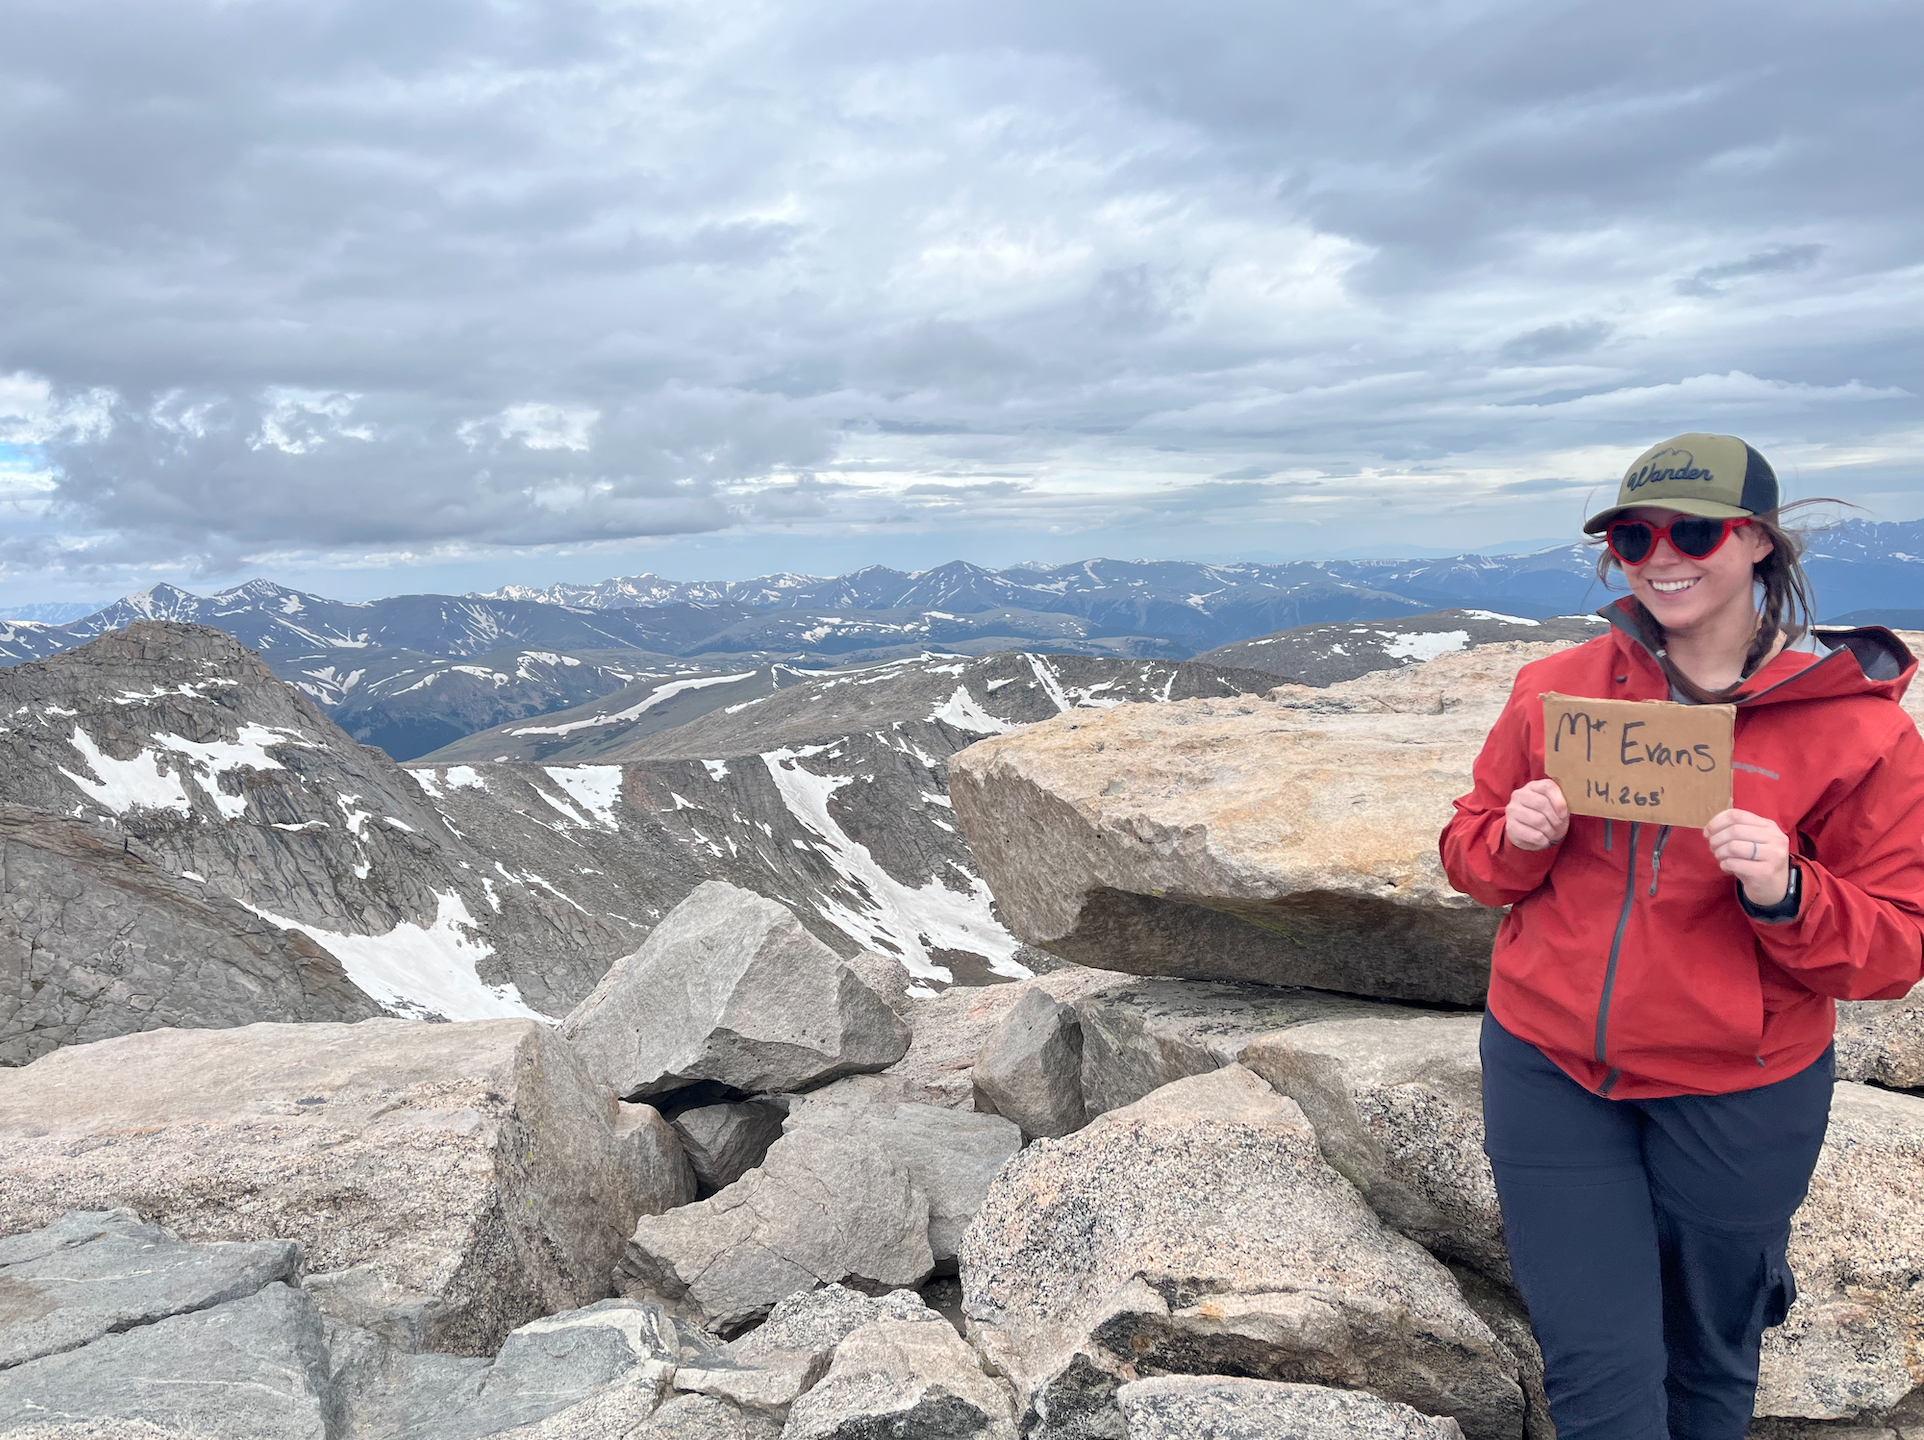
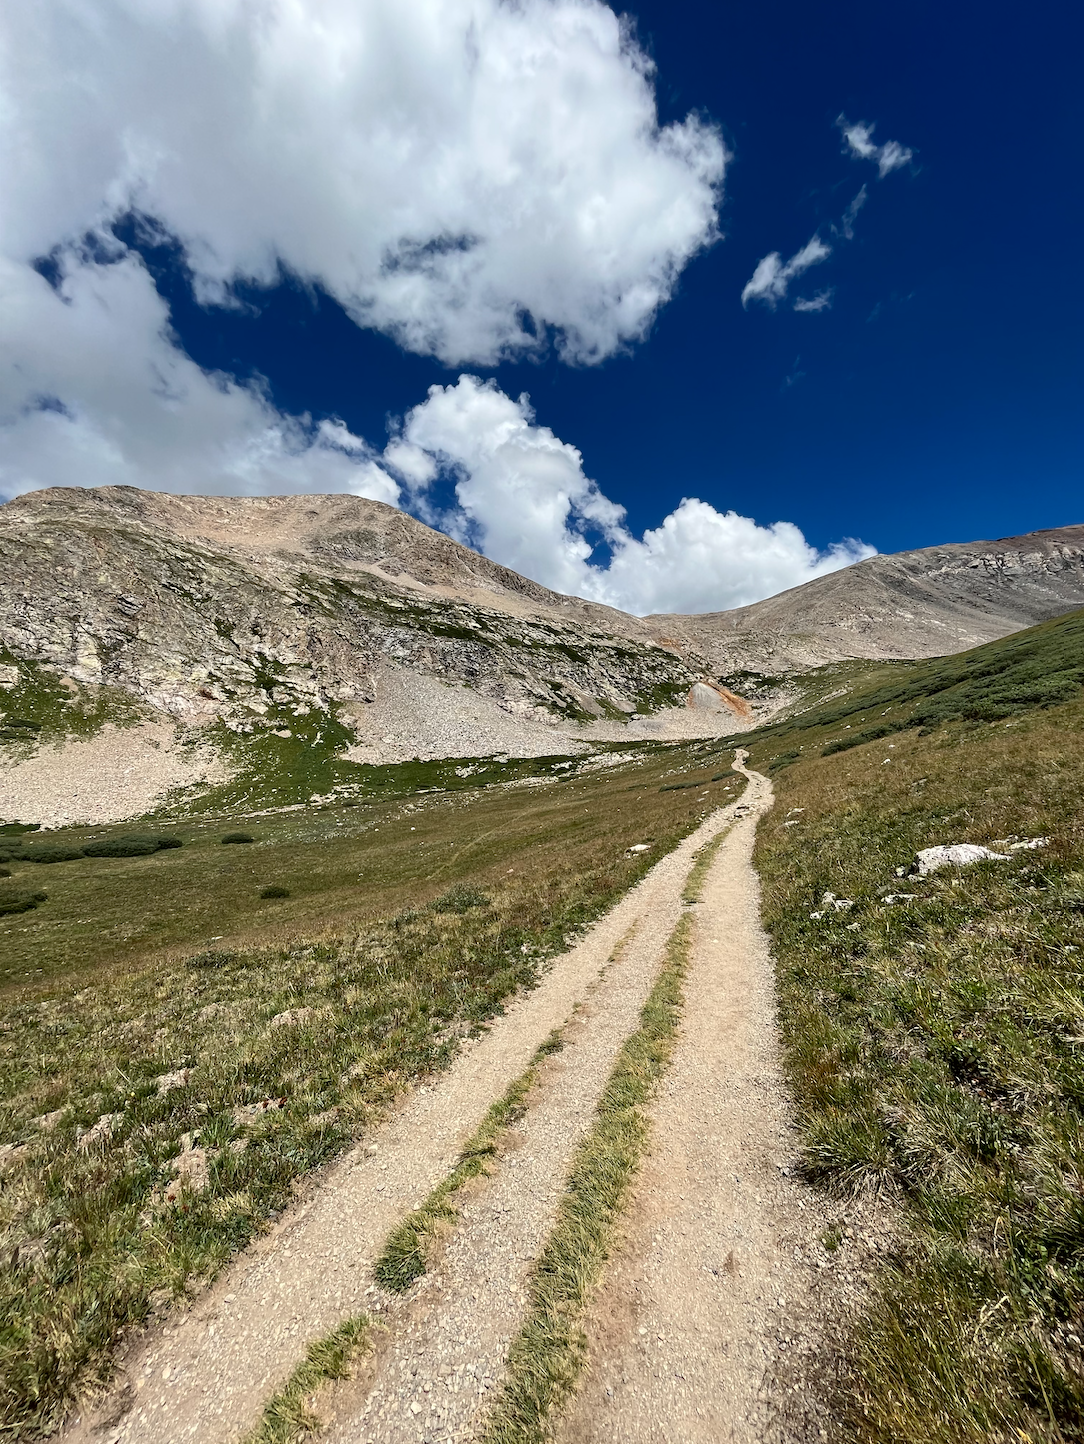
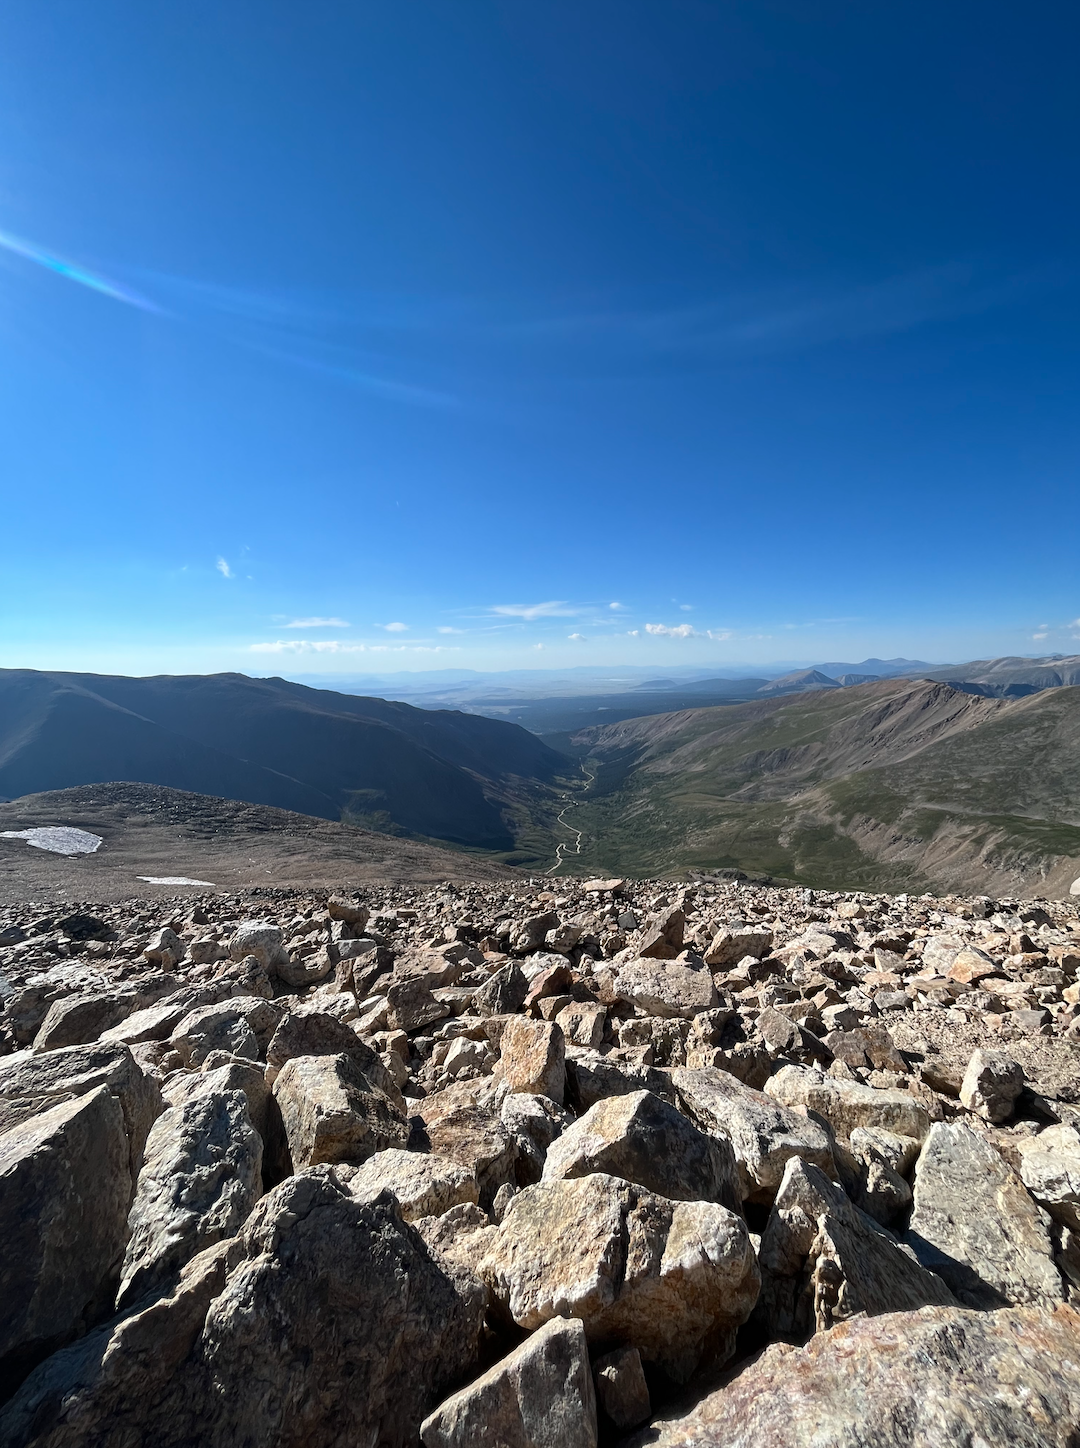
Mount Blue Sky (formerly Mount Evans) via Summit Lake
Mount Blue Sky is a popular pick among hikers eager to summit their first Colorado 14er because it’s an easily accessible and fairly short trail. It gains around 2,000′ of elevation over 5.5 miles, which is pretty doable if you’re up for the challenge.
Some portions of the hike are steep, but I found the rocks leading up the final stretch to the summit to be the hardest part. You have to watch where you’re walking and step carefully to avoid going off trail or slipping.
Mount Bierstadt Trail
Mount Bierstadt is the first 14er I ever attempted in Colorado. Spoiler alert: I didn’t successfully summit it the first time due to weather. Thankfully, I got to return a few years later and finish the hike with my husband!
This peak is another top choice for those interested in hiking their first 14er, as you’ll gradually ascend Mount Bierstadt over roughly seven miles. Mountain goats and moose are frequently spotted along the trail, adding to its appeal.
Barr Trail
Summiting Pikes Peak via the Barr Trail is one of the most difficult hikes I’ve tackled in my lifetime. The route is over 12 miles one-way and almost entirely uphill, gaining around 7,300′ of elevation. It’s an incredibly intense yet fulfilling experience, giving you a new appreciation for America’s Mountain.
Mount Sherman Trail via Four Mile Creek Road
Last but certainly not least is the Mount Sherman Trail via Four Mile Creek Road—my first successful 14er! The roughly 5-mile route winds through some abandoned mining structures before turning into a rocky stretch of terrain leading to the summit. Mount Sherman isn’t for the faint of heart, but it’s pretty straightforward and less technical than many other 14ers throughout Colorado.
What are your favorite hikes in Colorado? I’m already missing this beautiful state and will definitely return for more hiking adventures in the future!
I’ve called Colorado Springs home for the last four years, and I’m excited to finally share my perfect Colorado Springs weekend itinerary! While you could spend a week exploring Colorado Springs and not see the same thing twice, three days is ideal for experiencing all the highlights. Here’s exactly how to spend three days in Colorado Springs, from outdoor adventures to indoor activities and plenty of food and fun in between.
3-Day Colorado Springs Weekend Itinerary
Friday
Start your weekend in Colorado Springs on the right foot by exploring one of the city’s most iconic sights: Pikes Peak. Afterward, spend the afternoon exploring the adorable city of Manitou Springs. Catch sunset at Garden of the Gods before grabbing a casual dinner and preparing for an early start on Saturday.
Morning
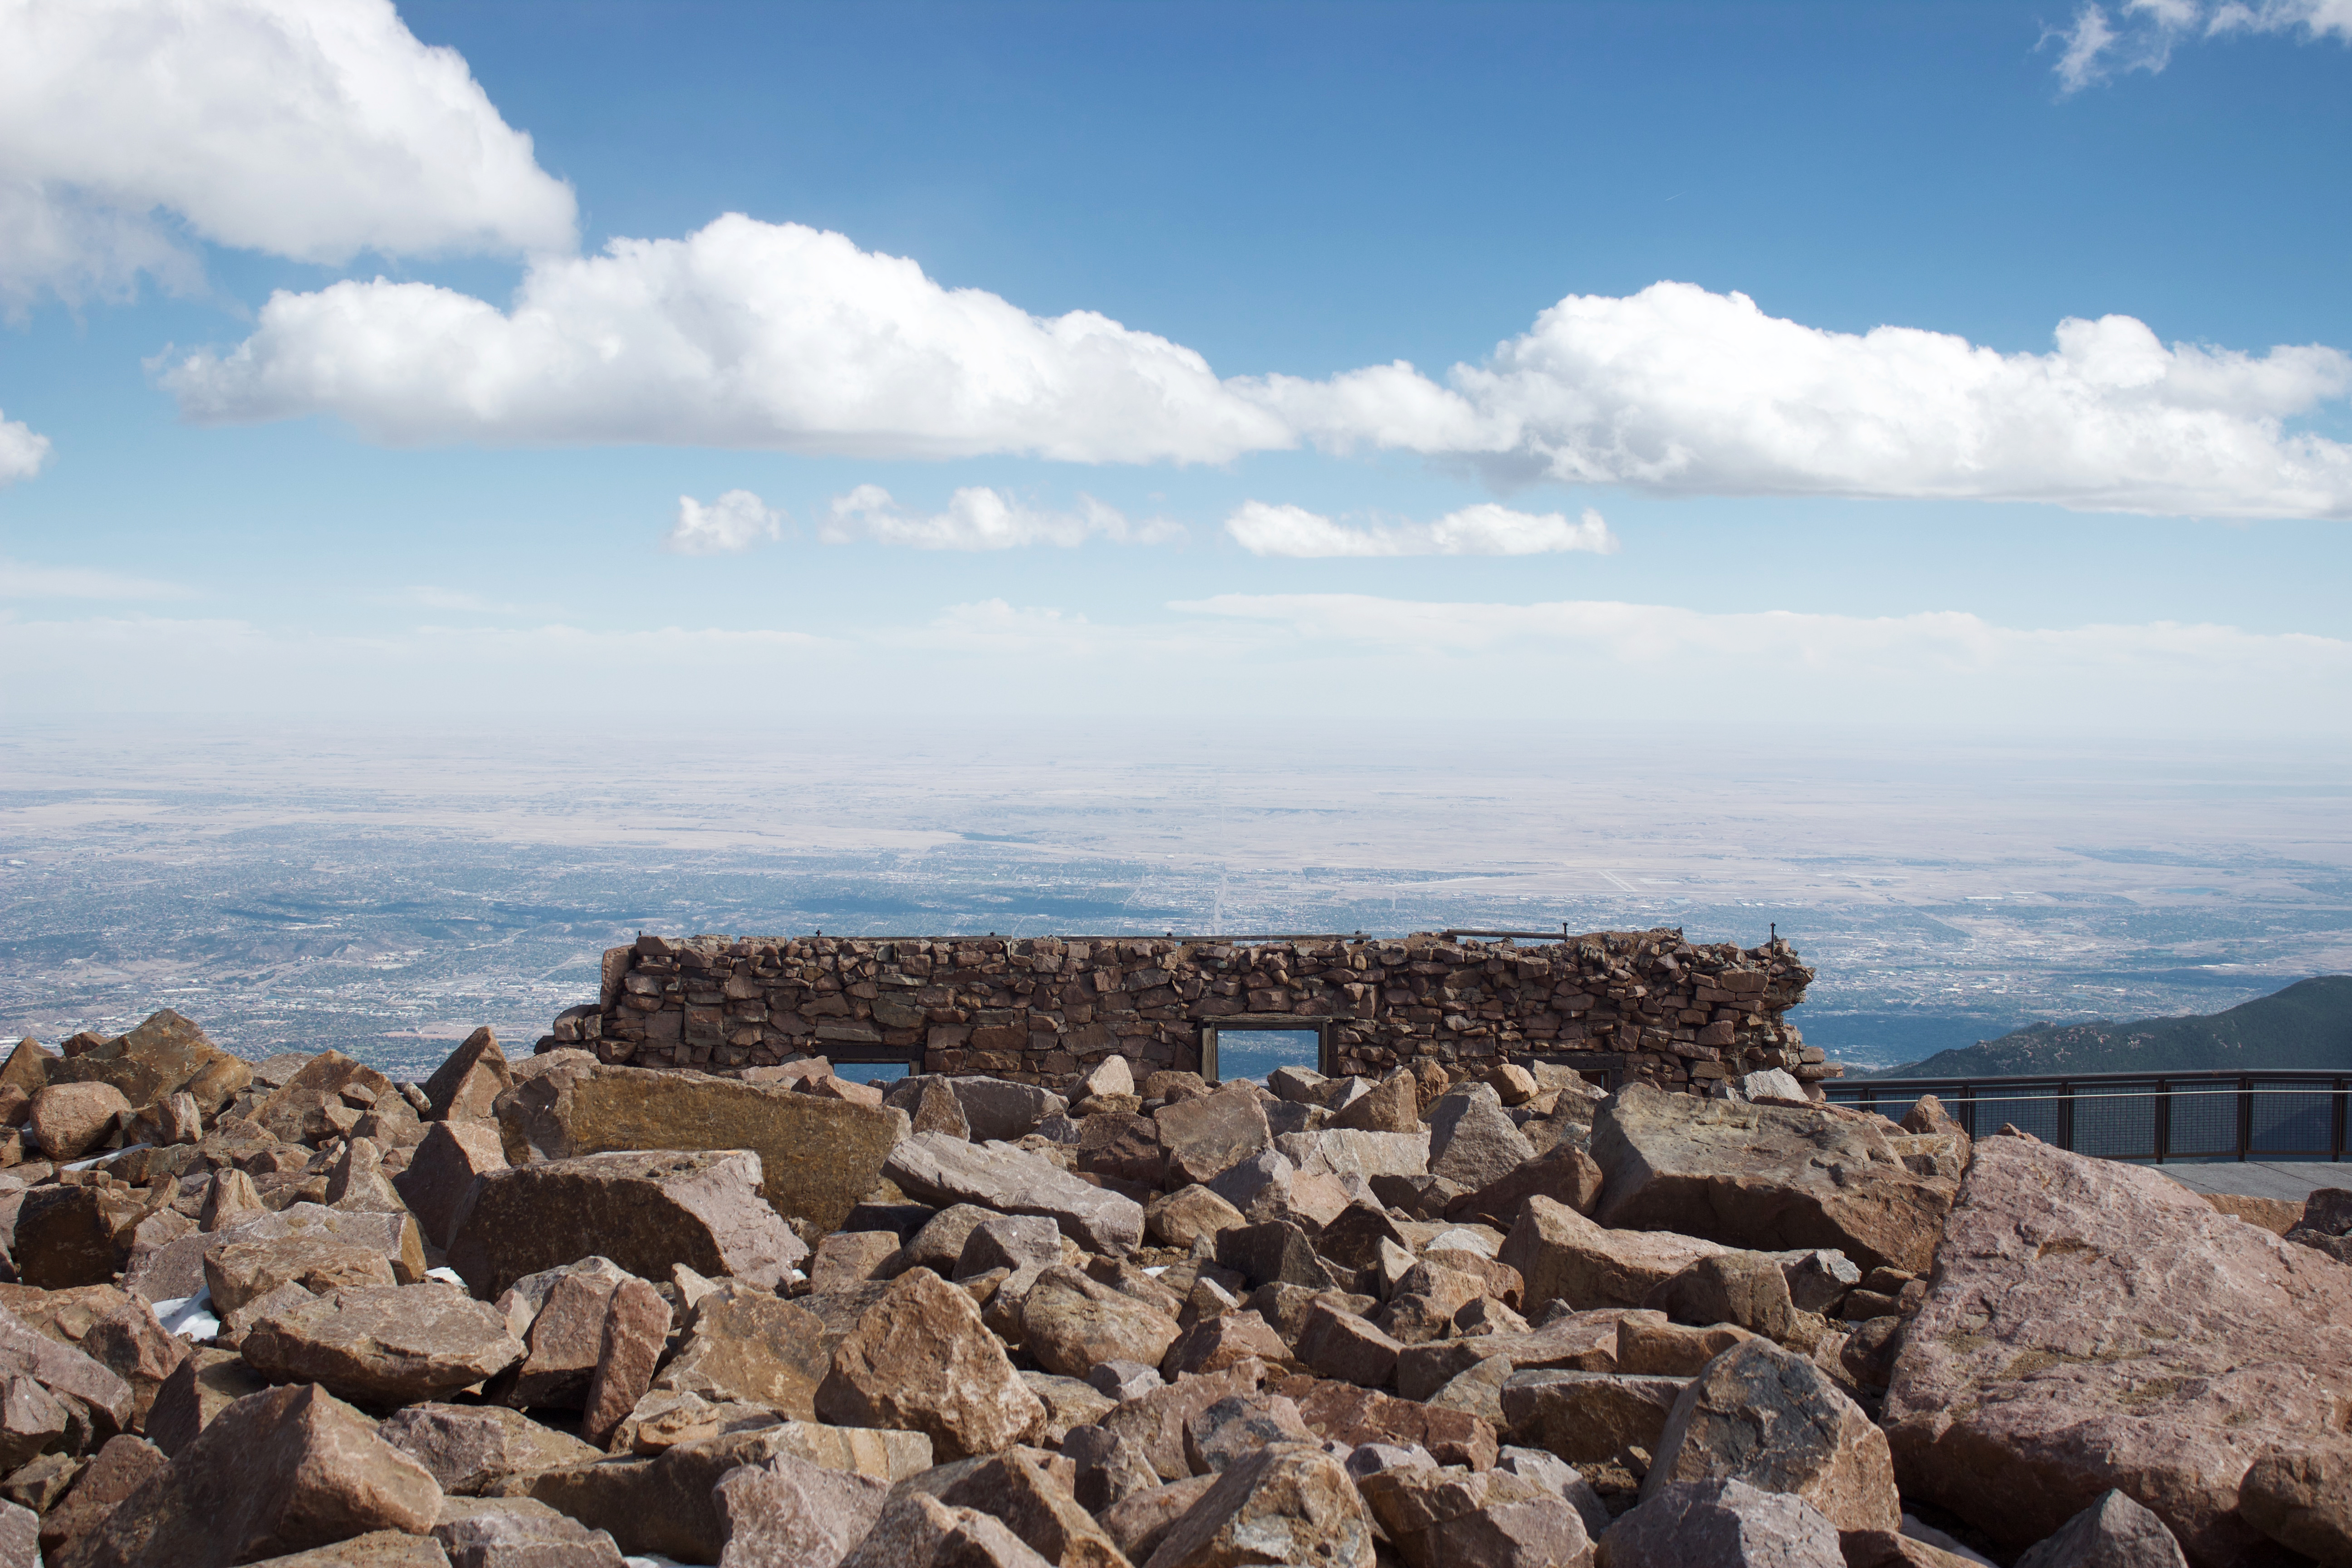
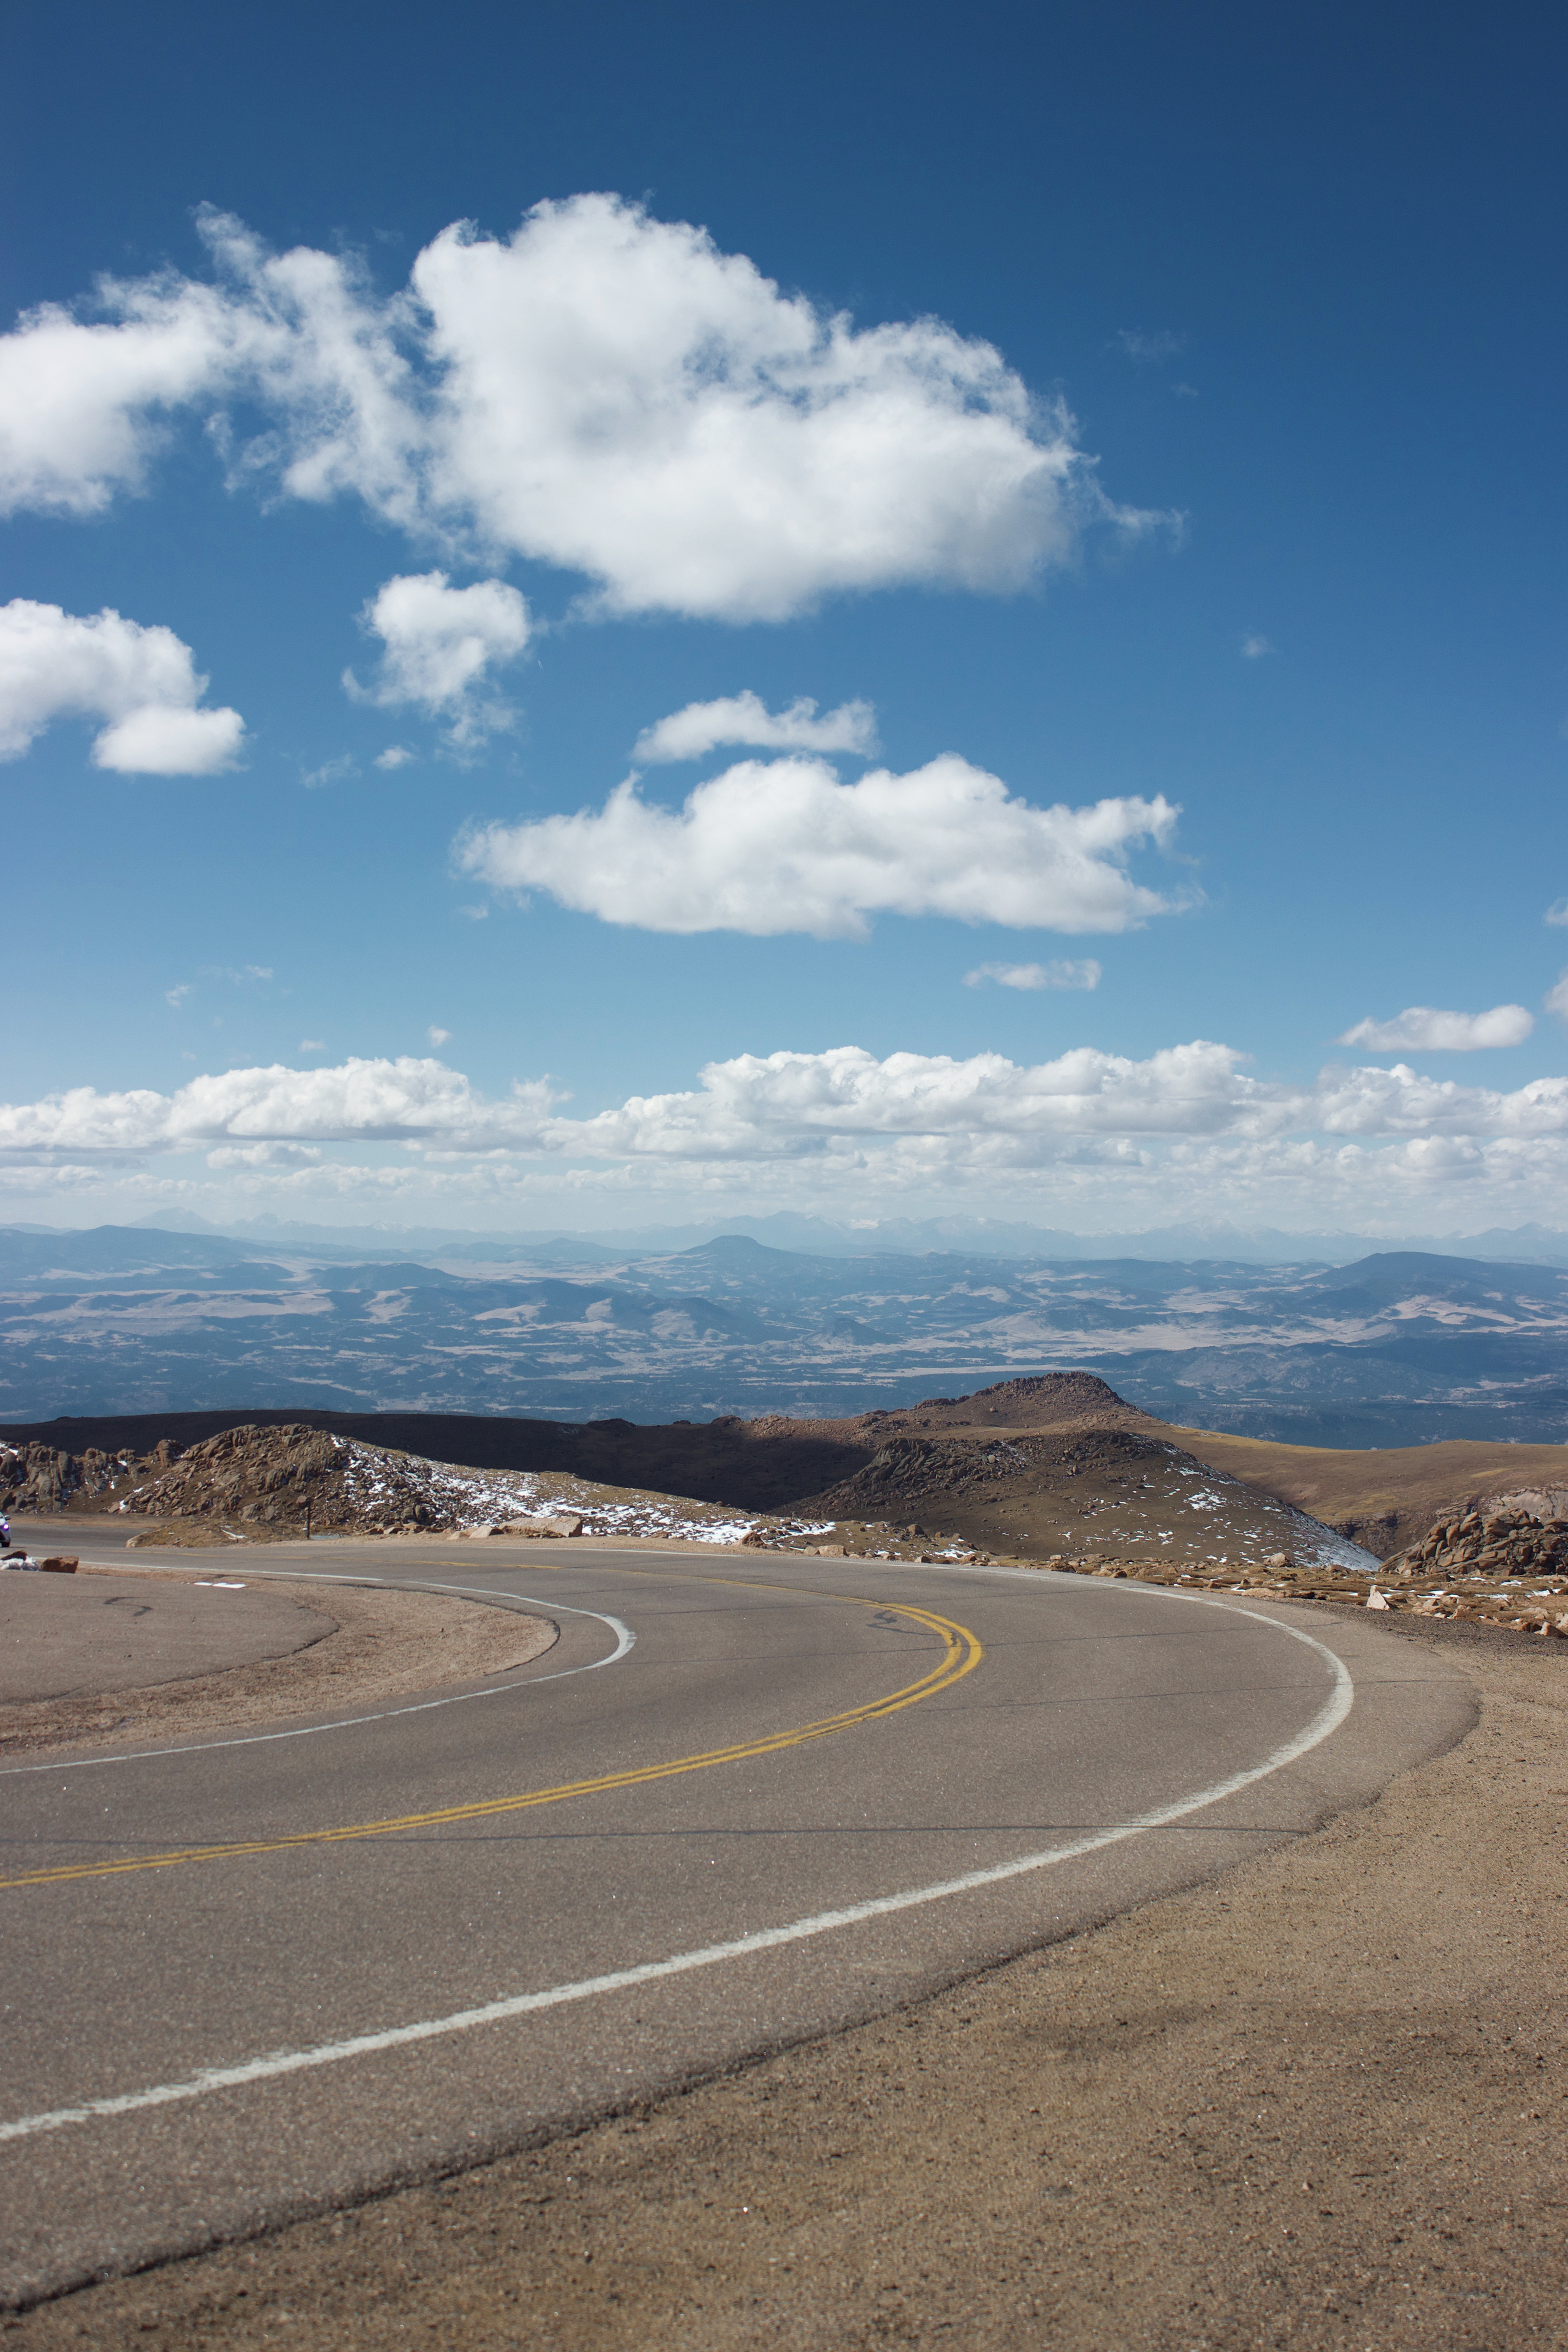
You can’t visit Colorado Springs without going to the top of Pikes Peak! Known as America’s Mountain, it towers 14,115′ in the air. There are several ways to summit Pikes Peak: driving up via Pikes Peak Highway, taking the Cog Railway, or hiking.
If you’re comfortable tackling the steep and winding mountain road, I recommend driving. You’ll have plenty of flexibility to stop at viewpoints along the way and spend as much time at the top as you like. The Summit Visitor Center opened in 2021 and is definitely worth seeing—make sure you try the freshly made donuts.
The Cog Railway is excellent for families who want an immersive Pikes Peak experience. It is a bit pricey, but you’ll get unique views and fun facts from the conductors. Keep in mind you will have limited time at the summit if you buy roundtrip tickets.
Hiking Pikes Peak is incredibly challenging but rewarding. The most popular route is the Barr Trail, which is over 12 miles one way. You’ll gain about 7,800′ of elevation during the hike, so I only recommend it for experienced hikers. This is also the most time-consuming option, as many break the hike up into two days and camp overnight.
Altitude sickness is very common, so watch for symptoms like headaches, fatigue, dizziness, and nausea. Consider turning back and descending in elevation if you start feeling ill and your symptoms don’t improve. Remember to stay hydrated and listen to your body!
Afternoon
After seeing Pikes Peak, grab lunch and spend the afternoon exploring Manitou Springs. This charming city has gorgeous views, Victorian architecture, quirky shops, and delicious restaurants. Some of the most unique activities in Manitou Springs include an old-school Penny Arcade and a castle built in the 1890s!
Evening
Once evening rolls around, it’s time to visit Garden of the Gods. The Visitor and Nature Center is a fantastic place to get information about the park’s history, trails, and wildlife. There’s also a top-notch gift shop with local goods and a tasty cafe where you can grab a coffee to refuel. They host lots of fun events like stargazing parties, ranger-led nature walks, and wildlife workshops.
There are many walking paths throughout Garden of the Gods, making it perfect for visitors of all ages and ability levels. You don’t even have to leave your car to see jaw-dropping views of the striking red rock formations! Watch for bighorn sheep, which you can periodically spot around the park.
Garden of the Gods is conveniently located near several delicious restaurants. Colorado Mountain Brewery and Trinity Brewing Co. are some of my favorites. Even if you don’t drink beer, their food is really yummy. I recommend turning in early so you can be fully rested for tomorrow’s morning hike!
Saturday
Get an early start if you want to embark on a weekend hike in Colorado Springs. Afterward, you can indulge in a tasty brunch before freshening up for an afternoon of shopping. Saturday night is also an excellent time to explore bars and restaurants in the downtown area.
Morning
There are many beautiful and unique hikes in and around Colorado Springs. Here are some of the best hiking areas, depending on how far you feel like driving.
You’ve probably worked up an appetite after your morning hike. If you stayed local to Colorado Springs, I recommend Adam’s Mountain Cafe or Denver Biscuit Co. for brunch. The city has a fantastic variety of coffee shops, too. I love grabbing a cup at these spots:
Take a few hours to rest before going shopping around town. There are some great thrift shops, boutiques, and outdoor stores worth checking out. These are my favorite local shops (most of them are downtown and within walking/biking distance of each other):
Once you’ve shopped til you’ve dropped, spend the evening enjoying downtown Colorado Springs. The city has it all, from Italian to Mexican, Irish, Indian, and more. I personally recommend these restaurants and bars:
The Rabbit Hole – great date night spot and super cool experience because it’s underground and Alice in Wonderland-themed.
You deserve a relaxing day after yesterday’s adventures! Sleep in and keep things low-key with an activity the entire family can enjoy. Then, explore one of my favorite Colorado Springs neighborhoods and visit a top-notch brewery.
Spend your final afternoon in Colorado Springs strolling around Old Colorado City. This historic area has delicious restaurants and eclectic stores. It’s a good place to find farmer’s markets, seasonal festivals, live music performances, and art shows throughout the year.
Evening
End your weekend in Colorado Springs at a local brewery. They’re some of my favorite places to people-watch and catch up with friends. Many breweries are dog-friendly, and you’ll find everyone from families to couples and solo travelers enjoying a brew. Here are some can’t-miss spots:
I hope you have the best getaway with my ultimate Colorado Springs weekend itinerary! Let me know in the comments how you would spend three days in Colorado Springs.
Looking for more fun things to do in Colorado? Check out my other Colorado travel guides:
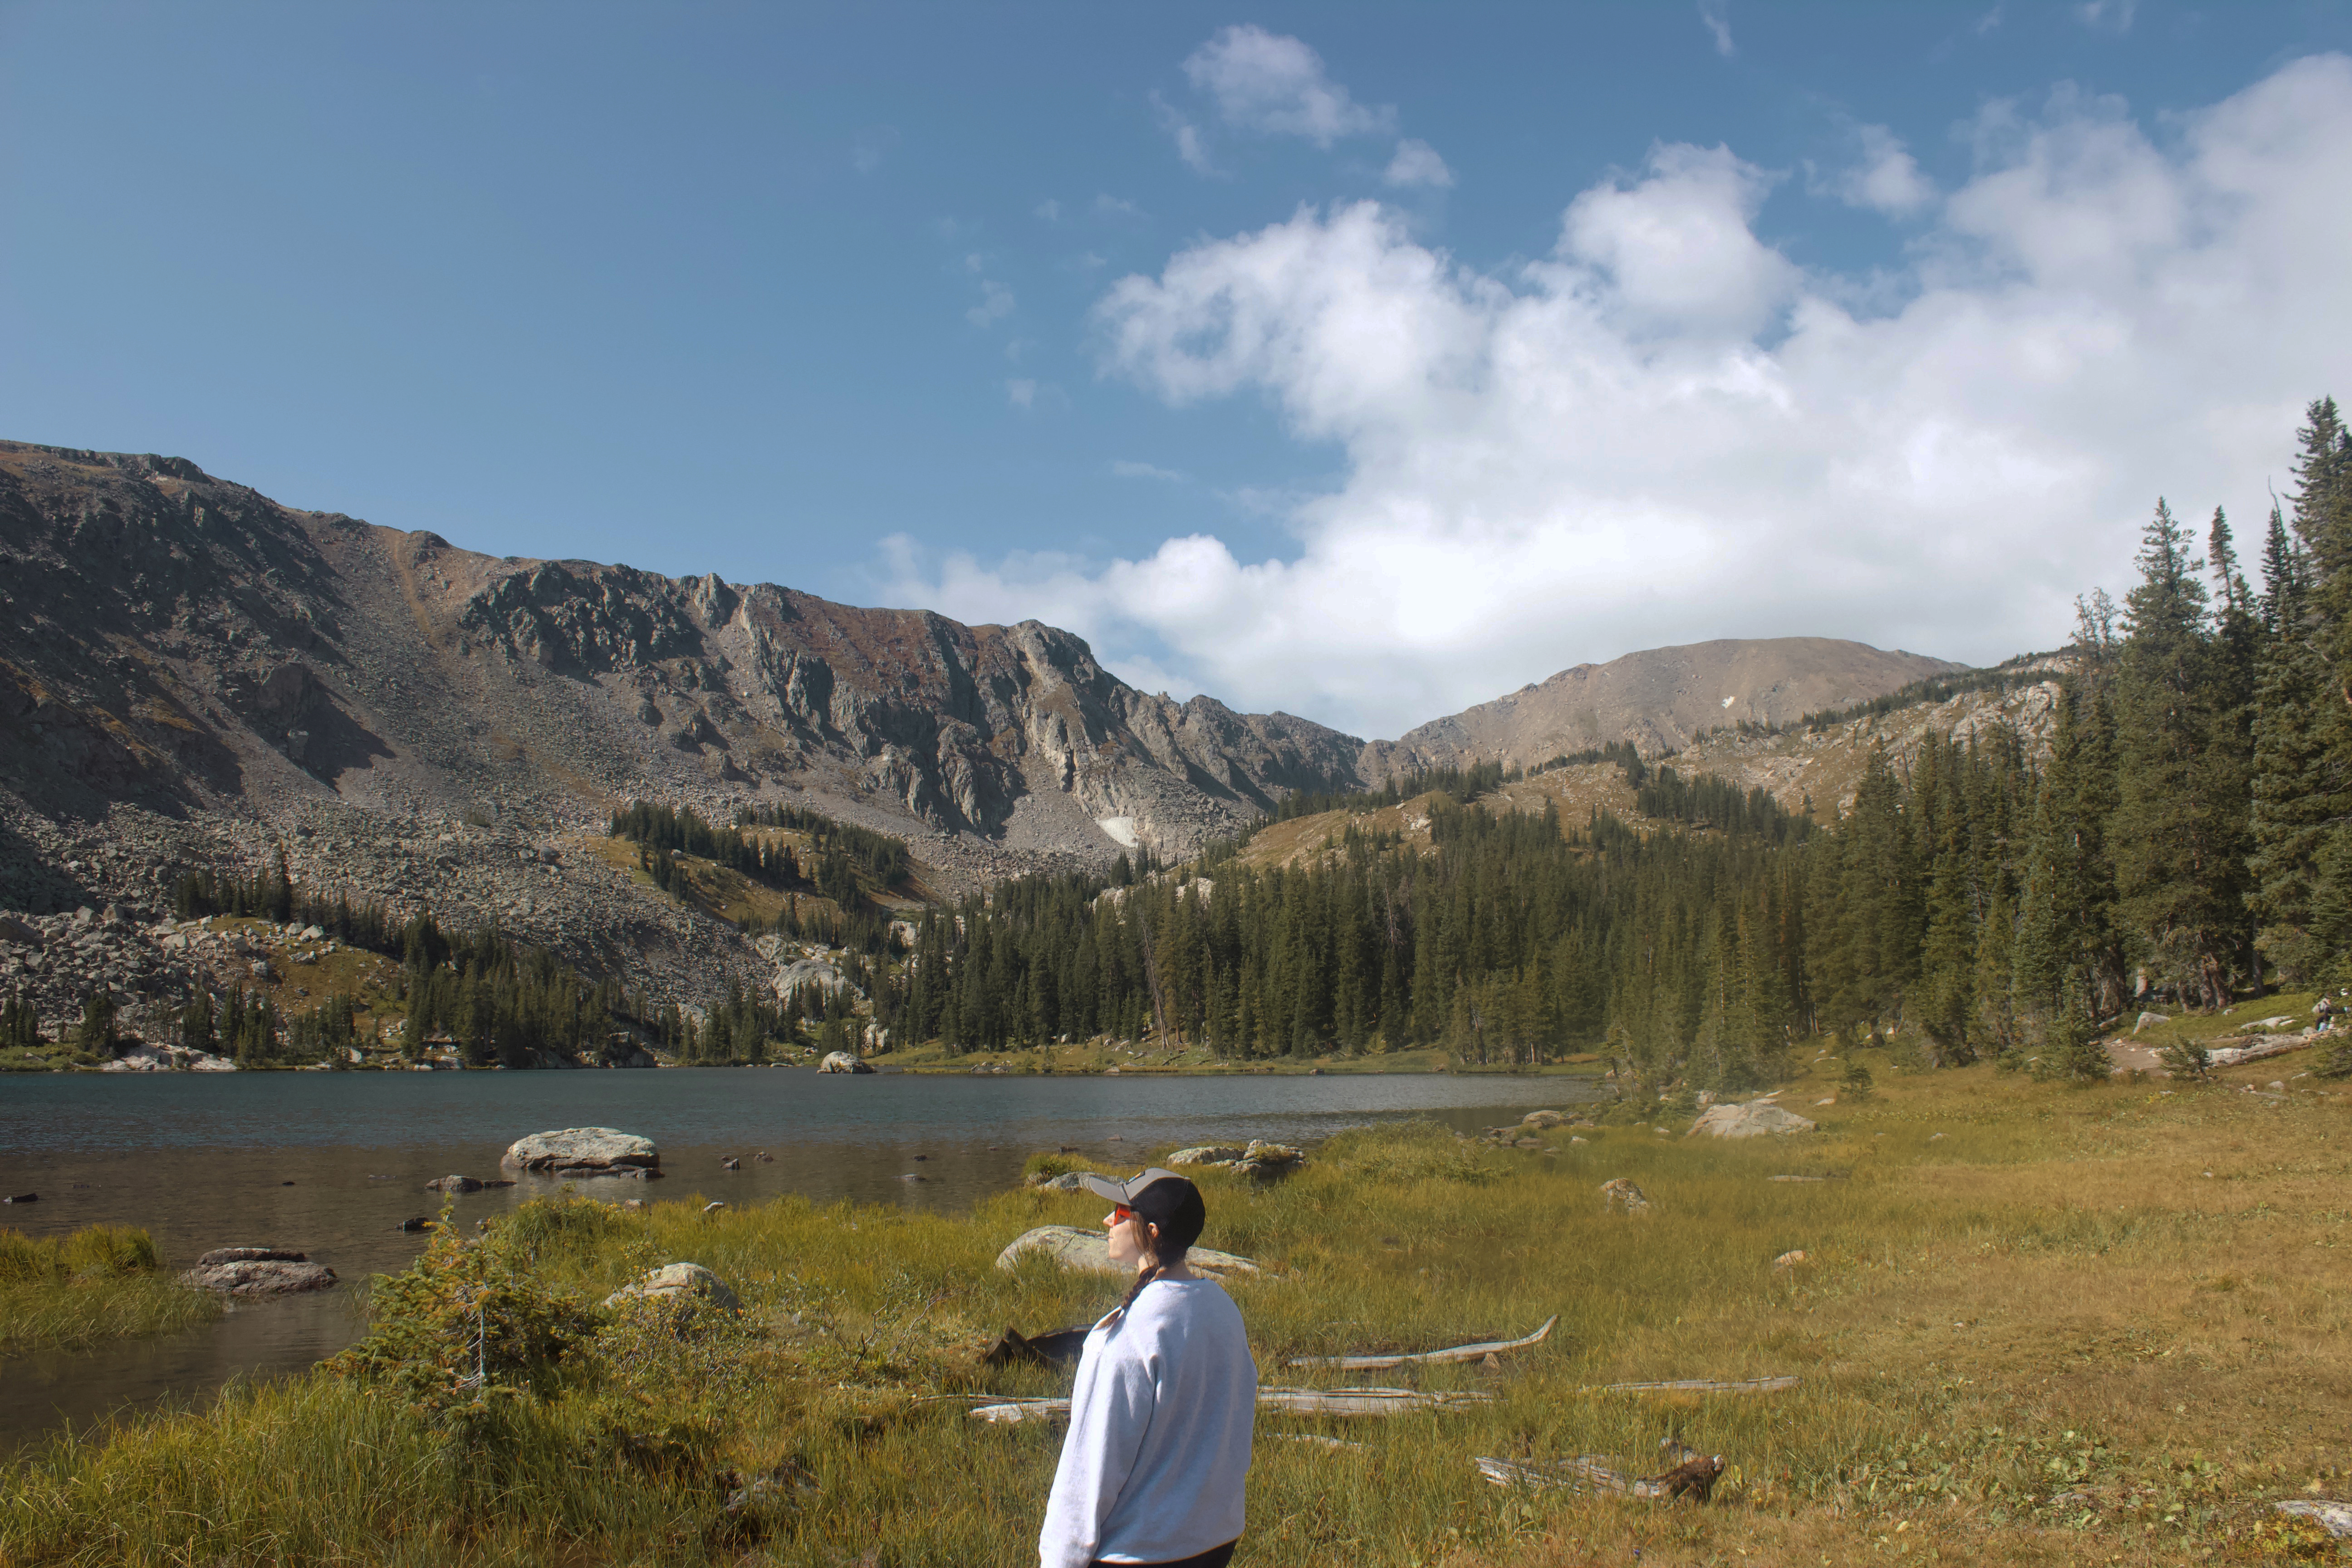
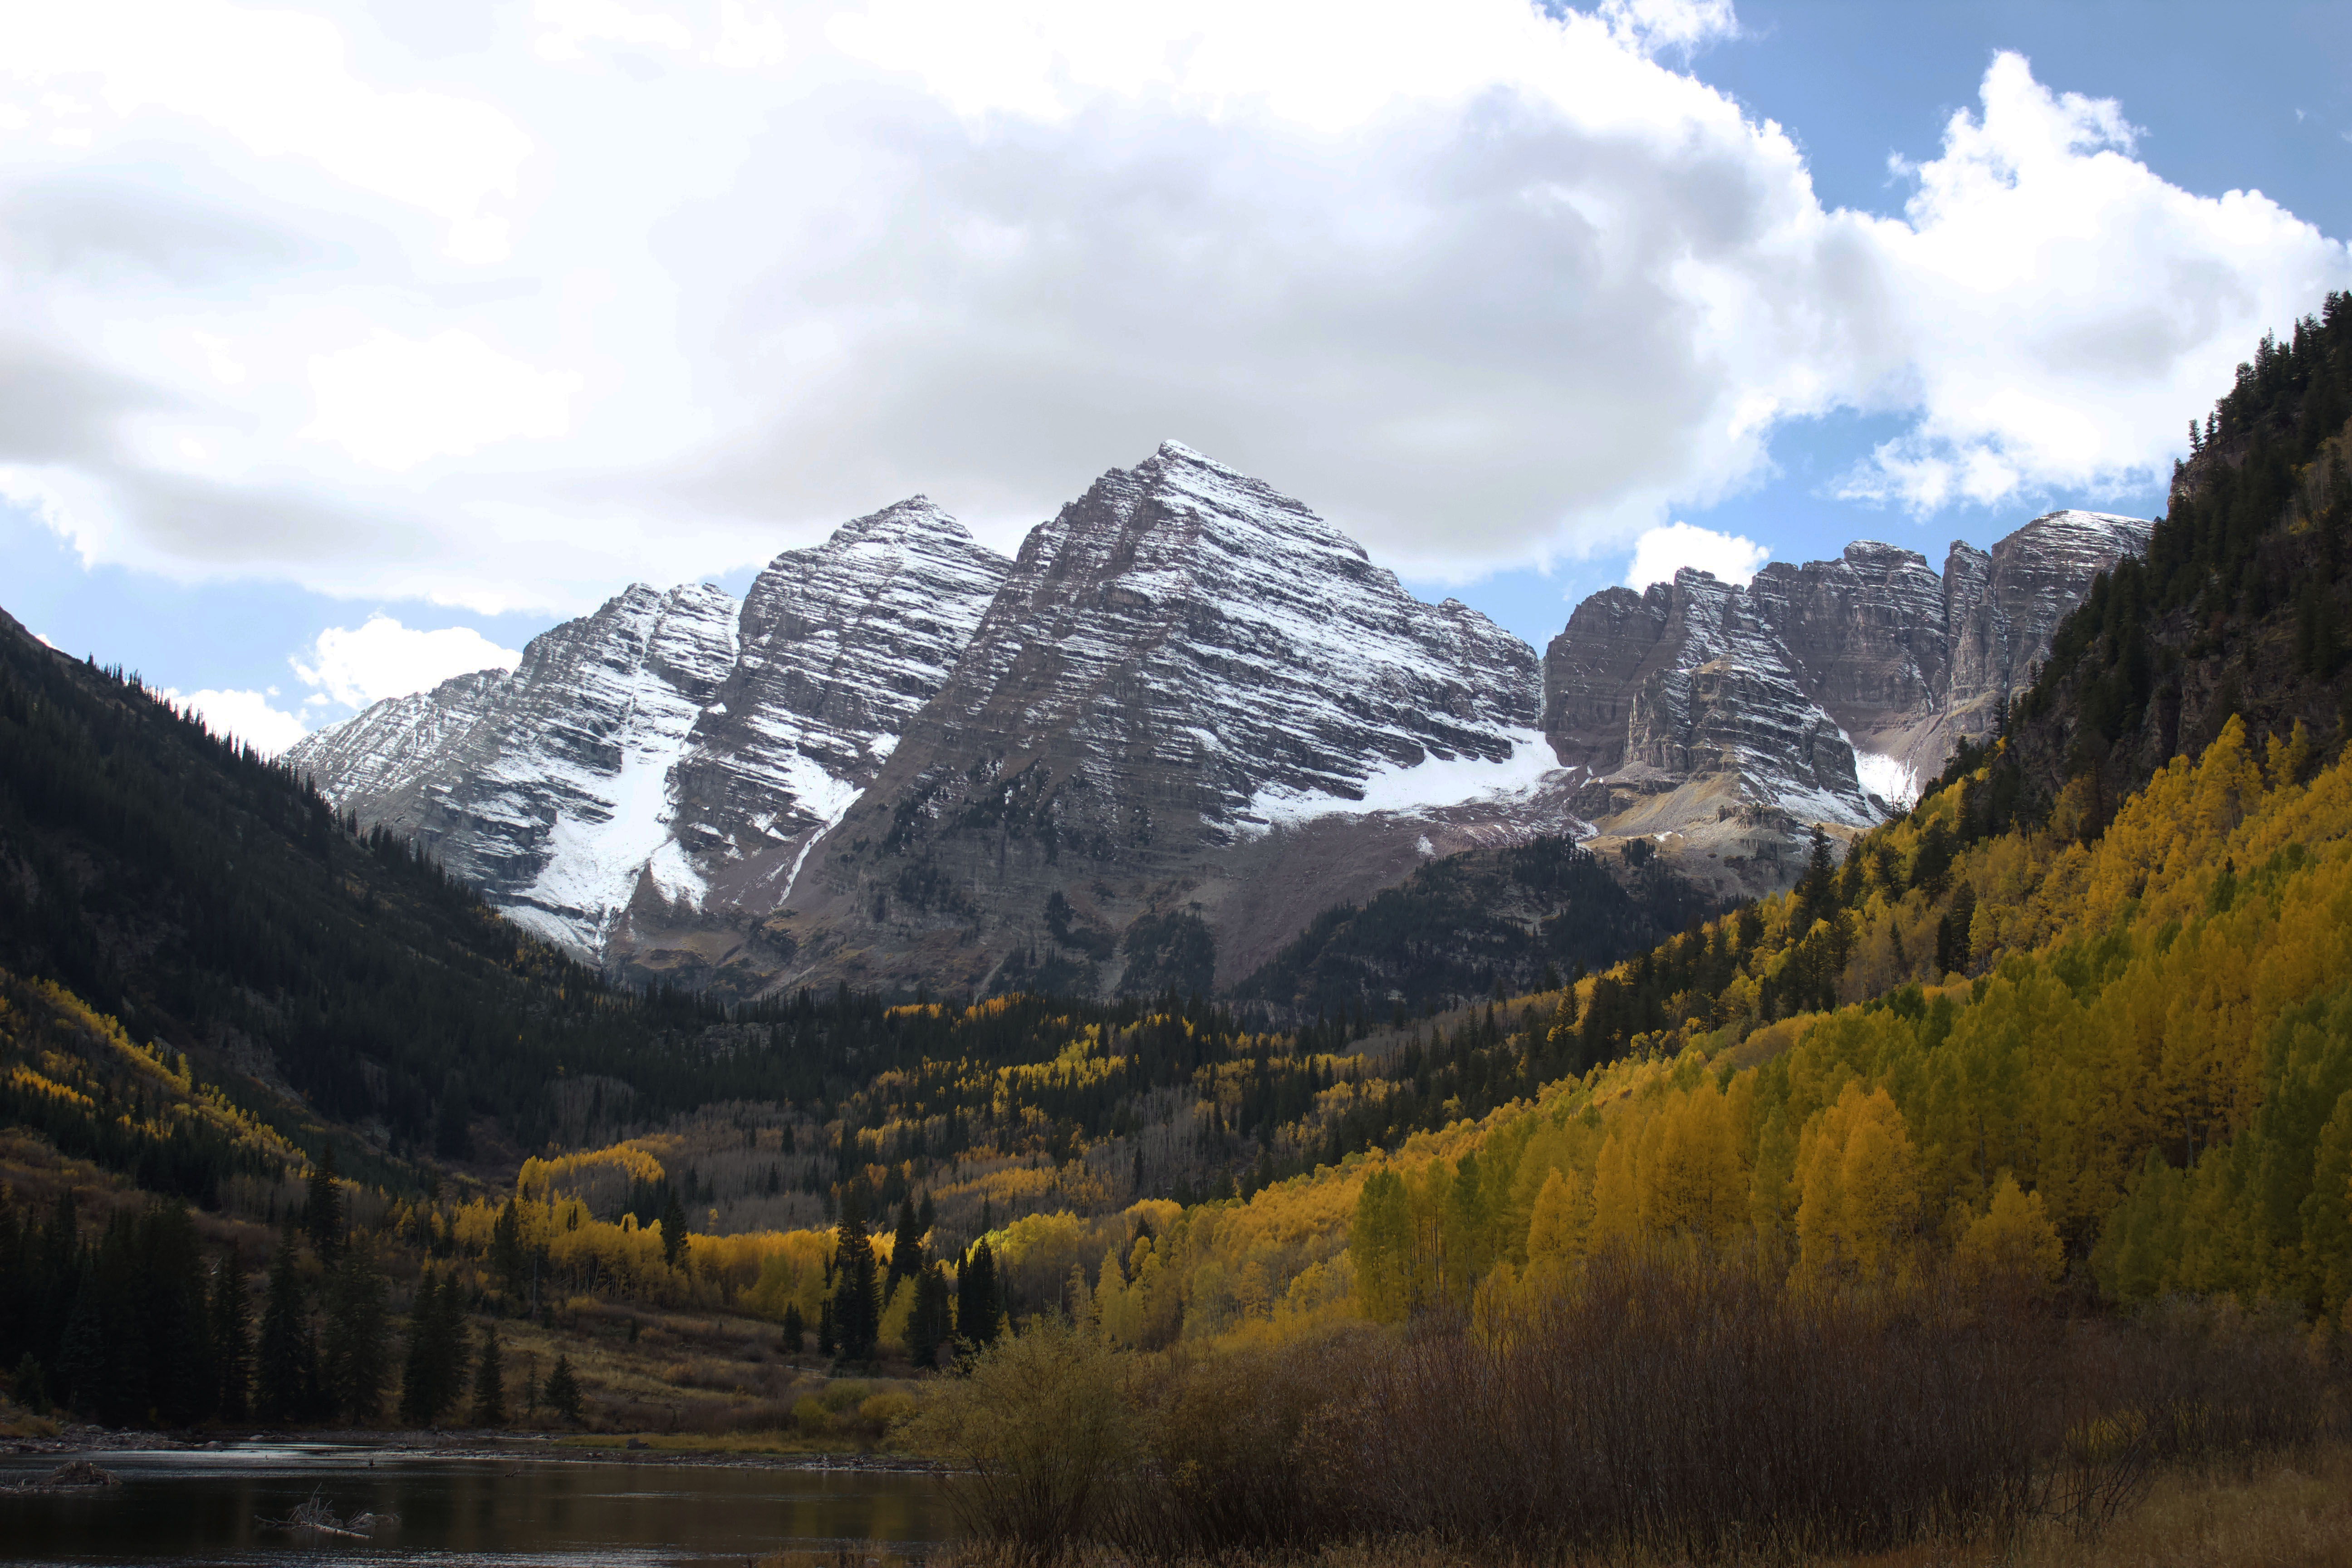
Maroon Bells is an iconic wilderness area in Colorado that is home to some of the most photographed mountains in North America. I’ve wanted to visit Maroon Bells since moving to Colorado in 2020, and my husband and I finally got the chance to go the second weekend of October.
From May to October, peak season at Maroon Bells, you need a reservation to enter the wilderness area. You can either get a reservation to drive into Maroon Bells and park there yourself, or a reservation to park in Aspen and take the shuttle. We weren’t able to snag a parking reservation but we did book a spot on an 11am Saturday shuttle.
Maroon Bells is about 3.5-4 hours from Colorado Springs, so we got up bright and early to make our way to Aspen. We arrived in Aspen early enough to spend about an hour grabbing coffee and exploring the town a bit. There was a farmer’s market going on which we strolled through, and we also popped into a couple shops. We ended up parking in the garage at Aspen Highlands Village which was pretty expensive but very convenient. The shuttle system was very straightforward, and soon we were pulling up to one of the most beautiful views I’ve ever seen in person.
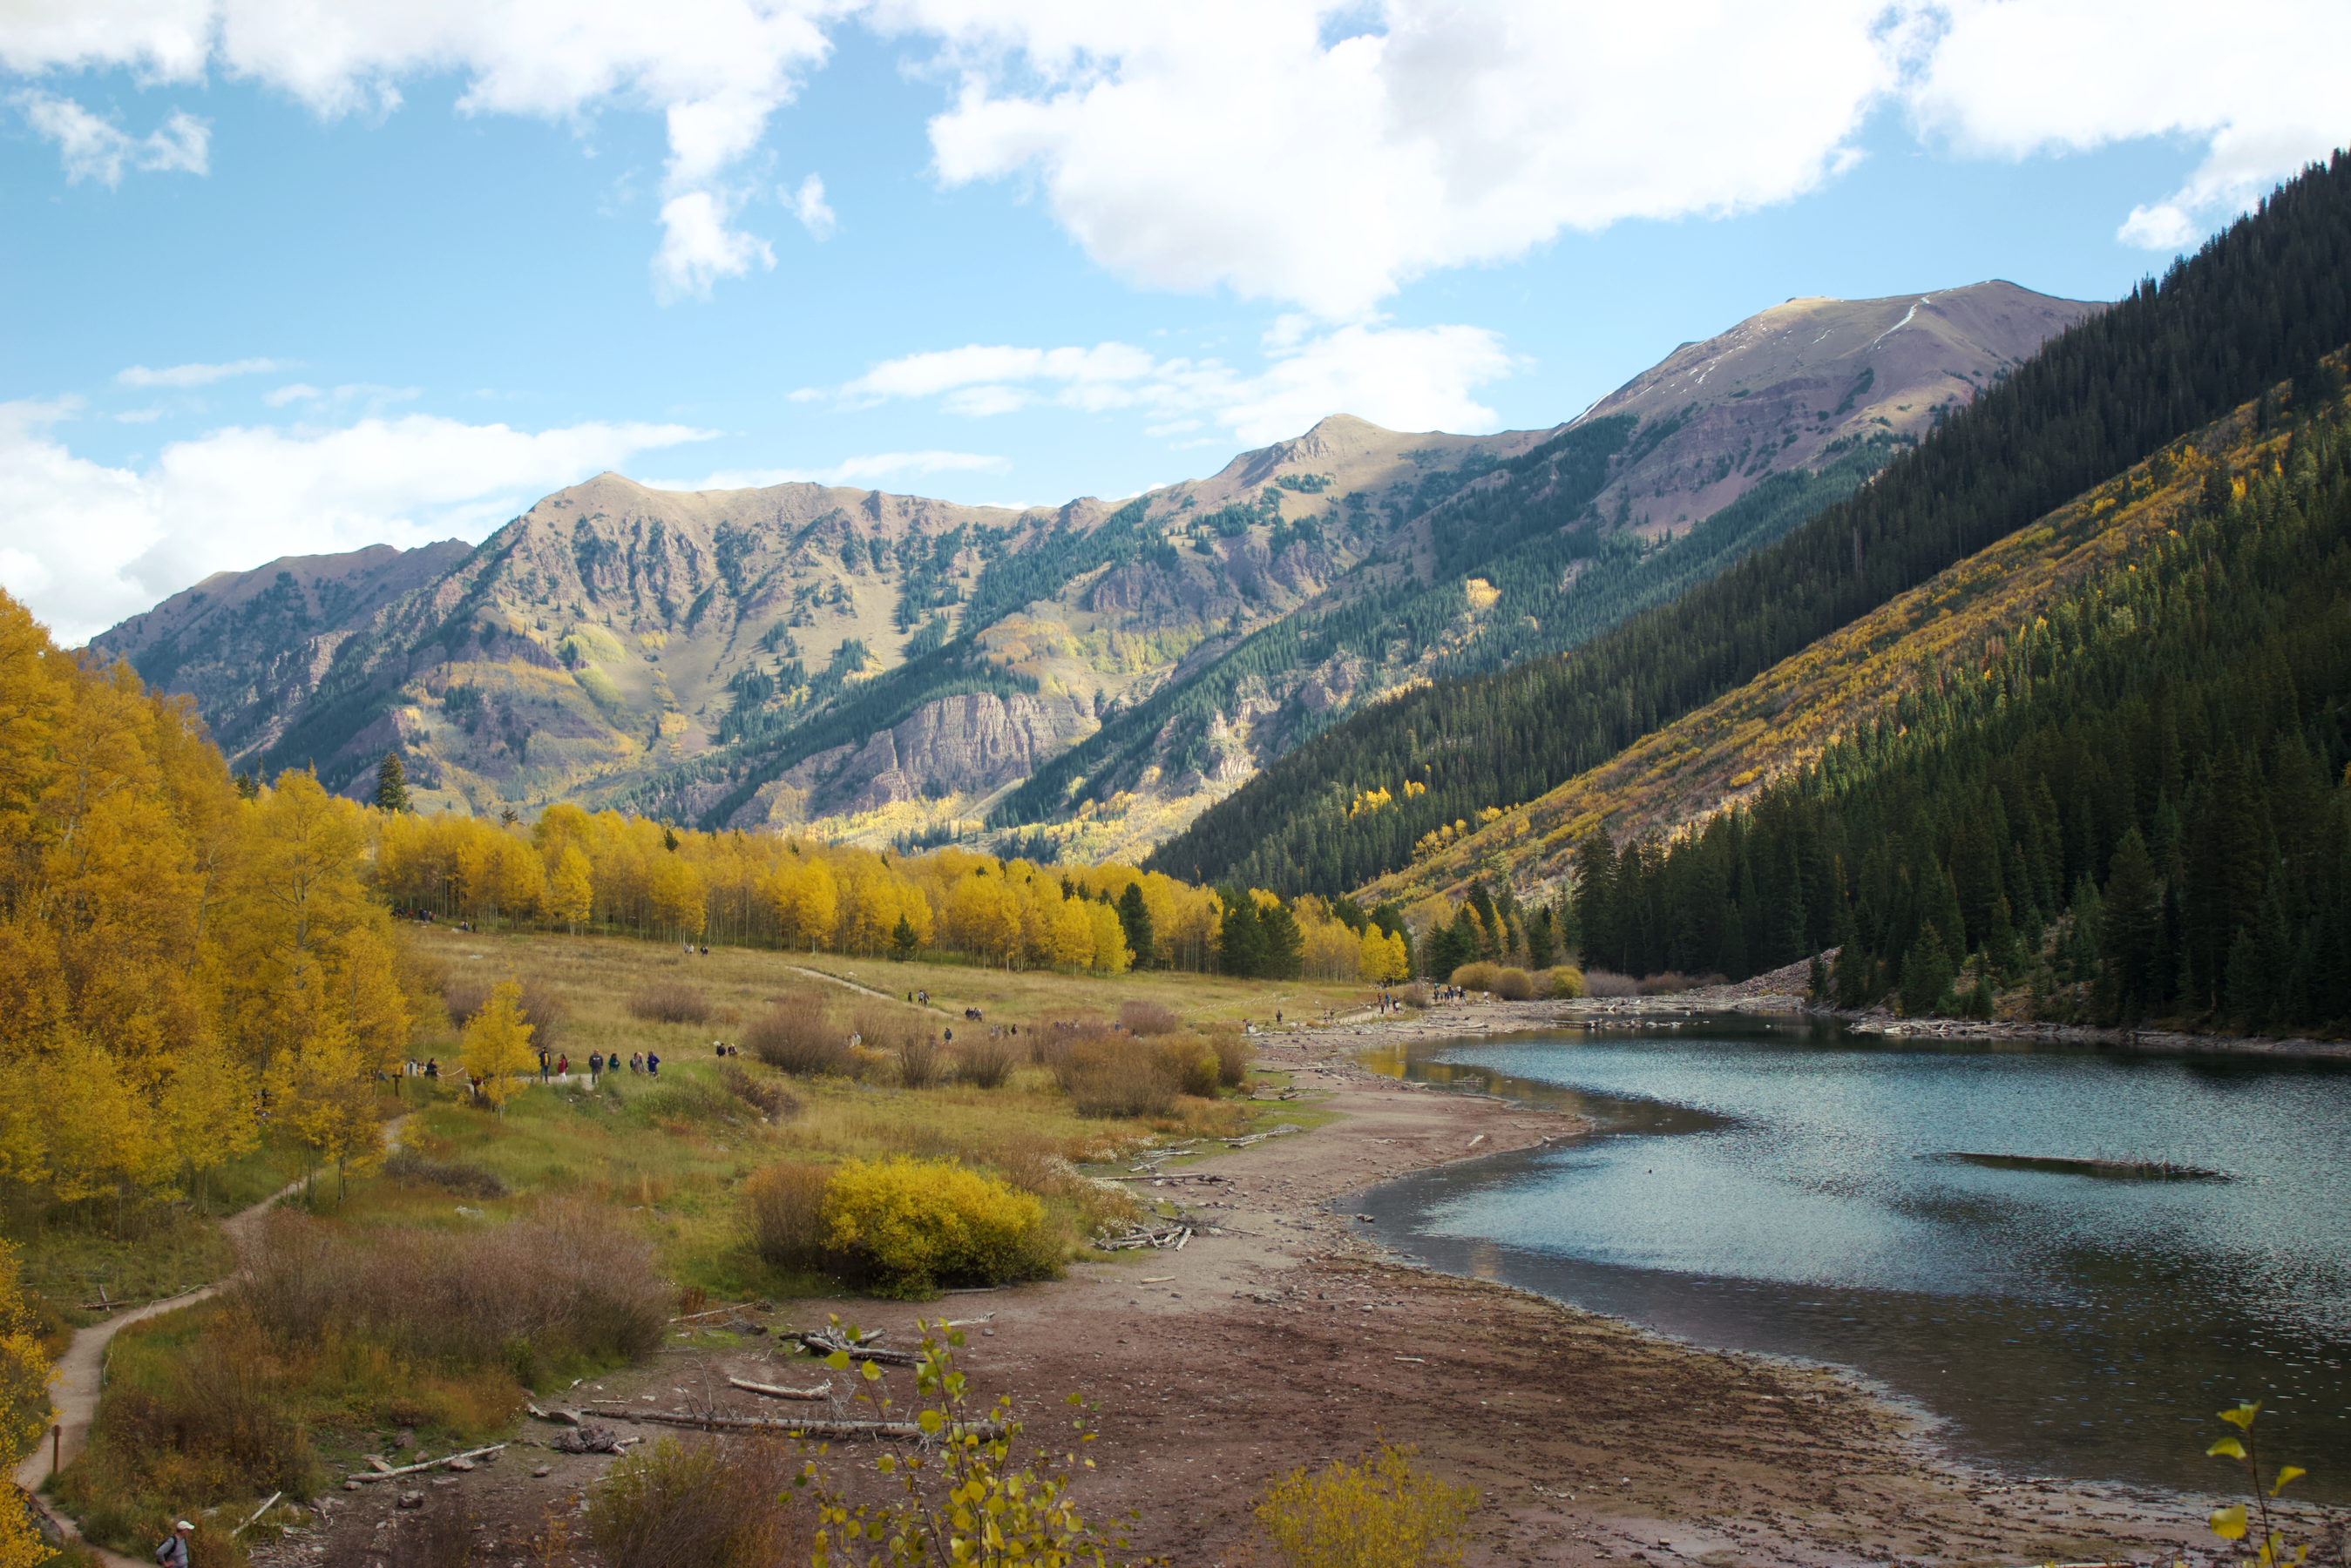
We decided to take the less than 4 mile out-and-back trail to Crater Lake. The trail begins gradually ascending through a gorgeous aspen grove before heading into a forested area. The trail gets pretty rocky for the last half mile or so to the lake, but is fairly easy with less than 700′ of elevation gain in total.
Crater Lake was very low when we visited given the time of year, but the views were absolutely stunning. We stopped to eat some PB&J’s before heading back down the trail to the visitor’s center. We had to wait for the return shuttle for about 10 minutes which wasn’t bad at all.
I’m so glad we took the time to visit Maroon Bells, and I’d love to return and explore it even more. Have you visited this beautiful wilderness area yet?
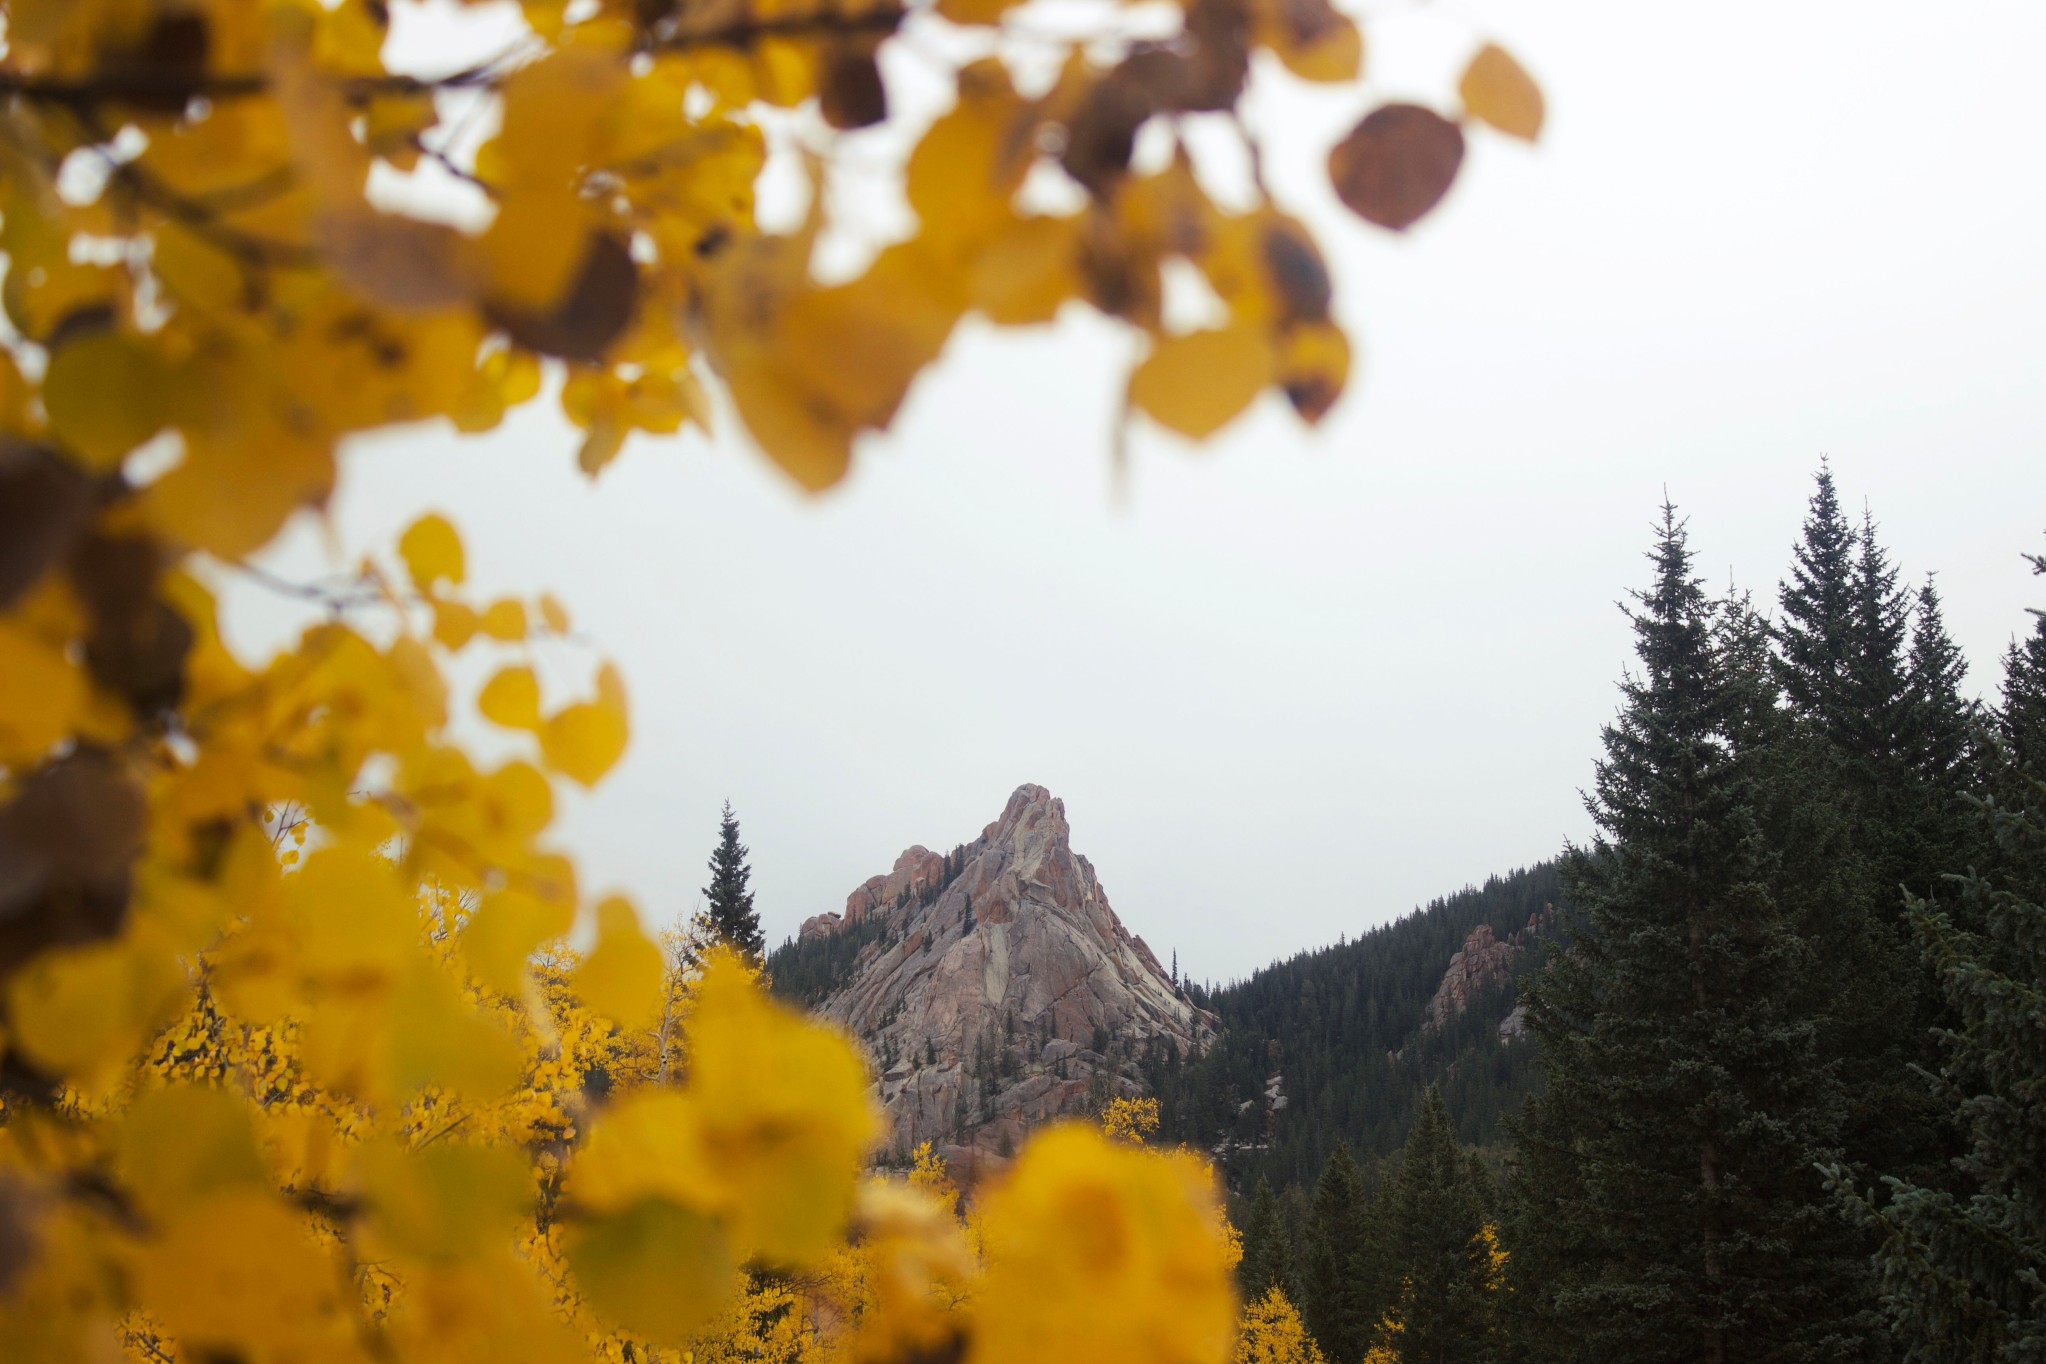
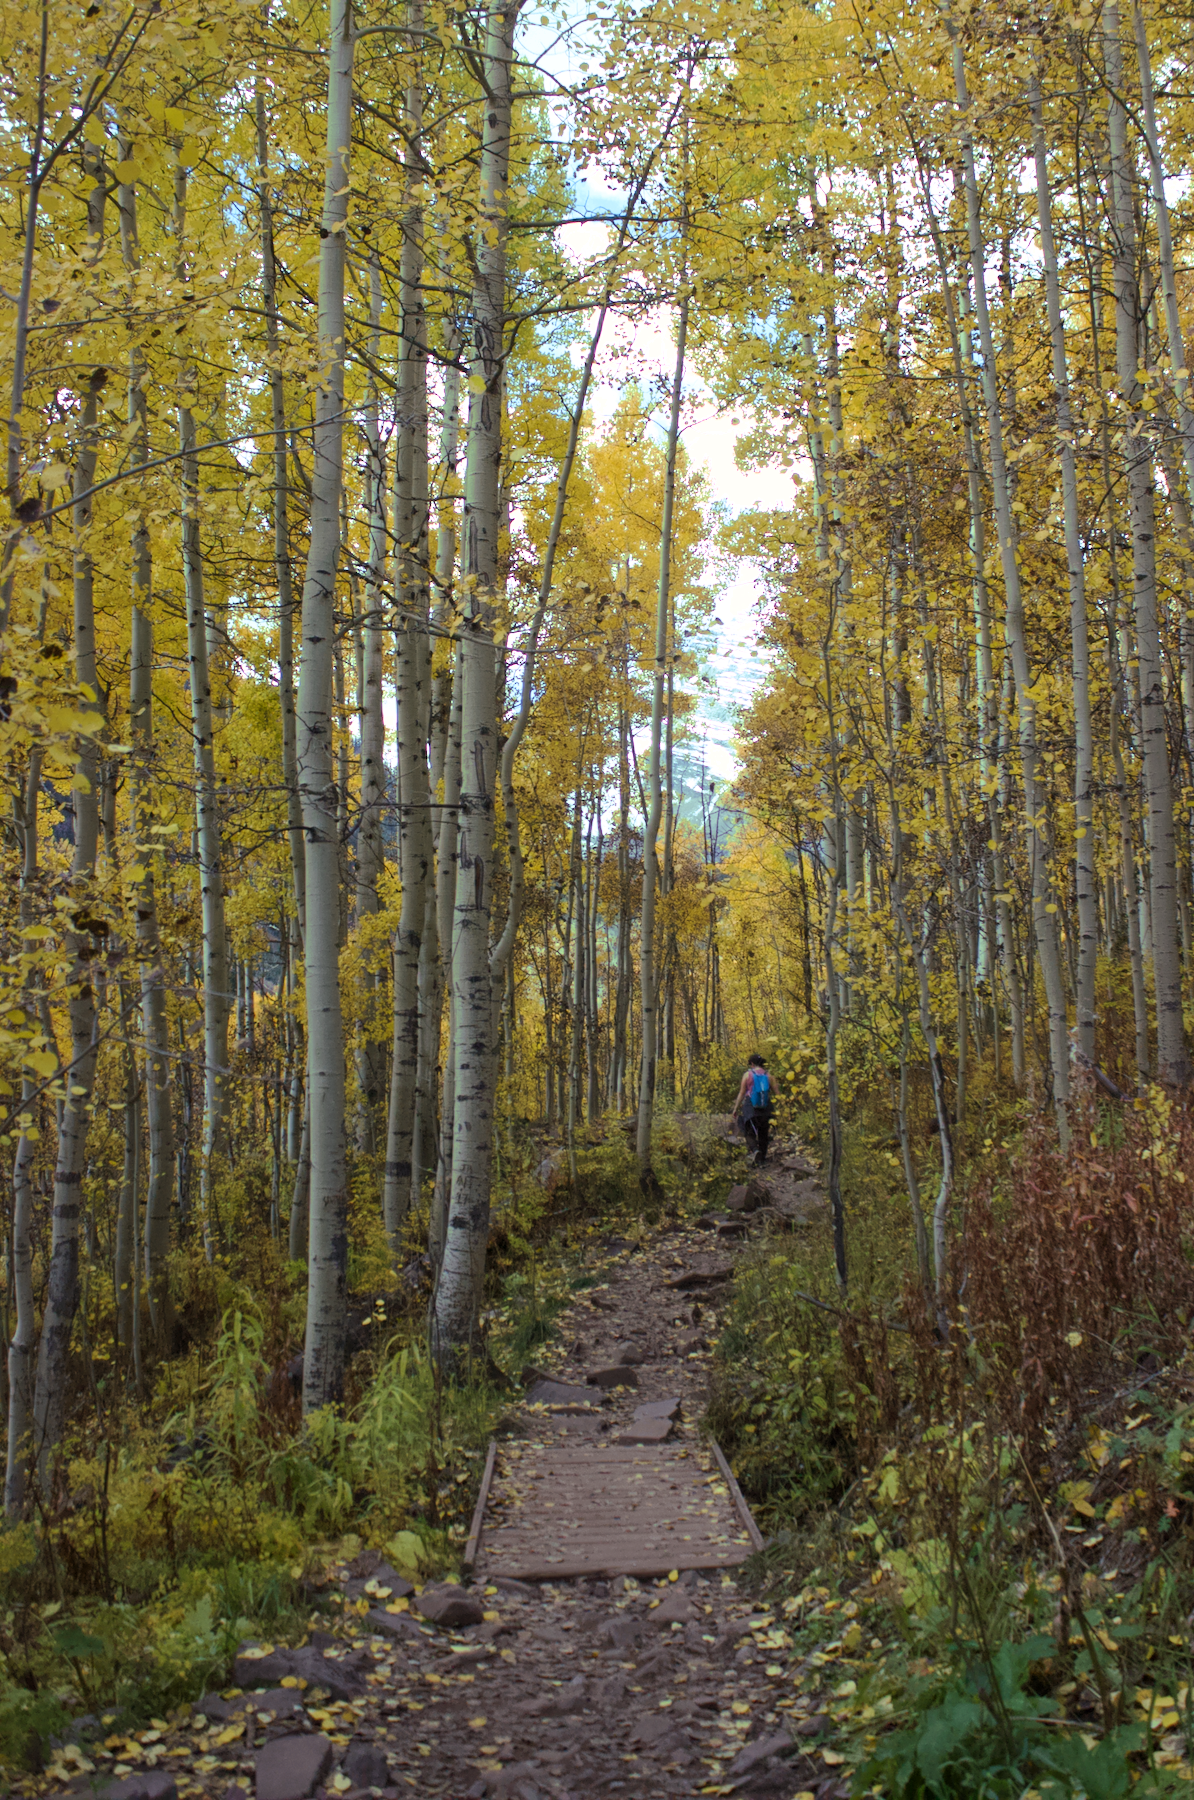
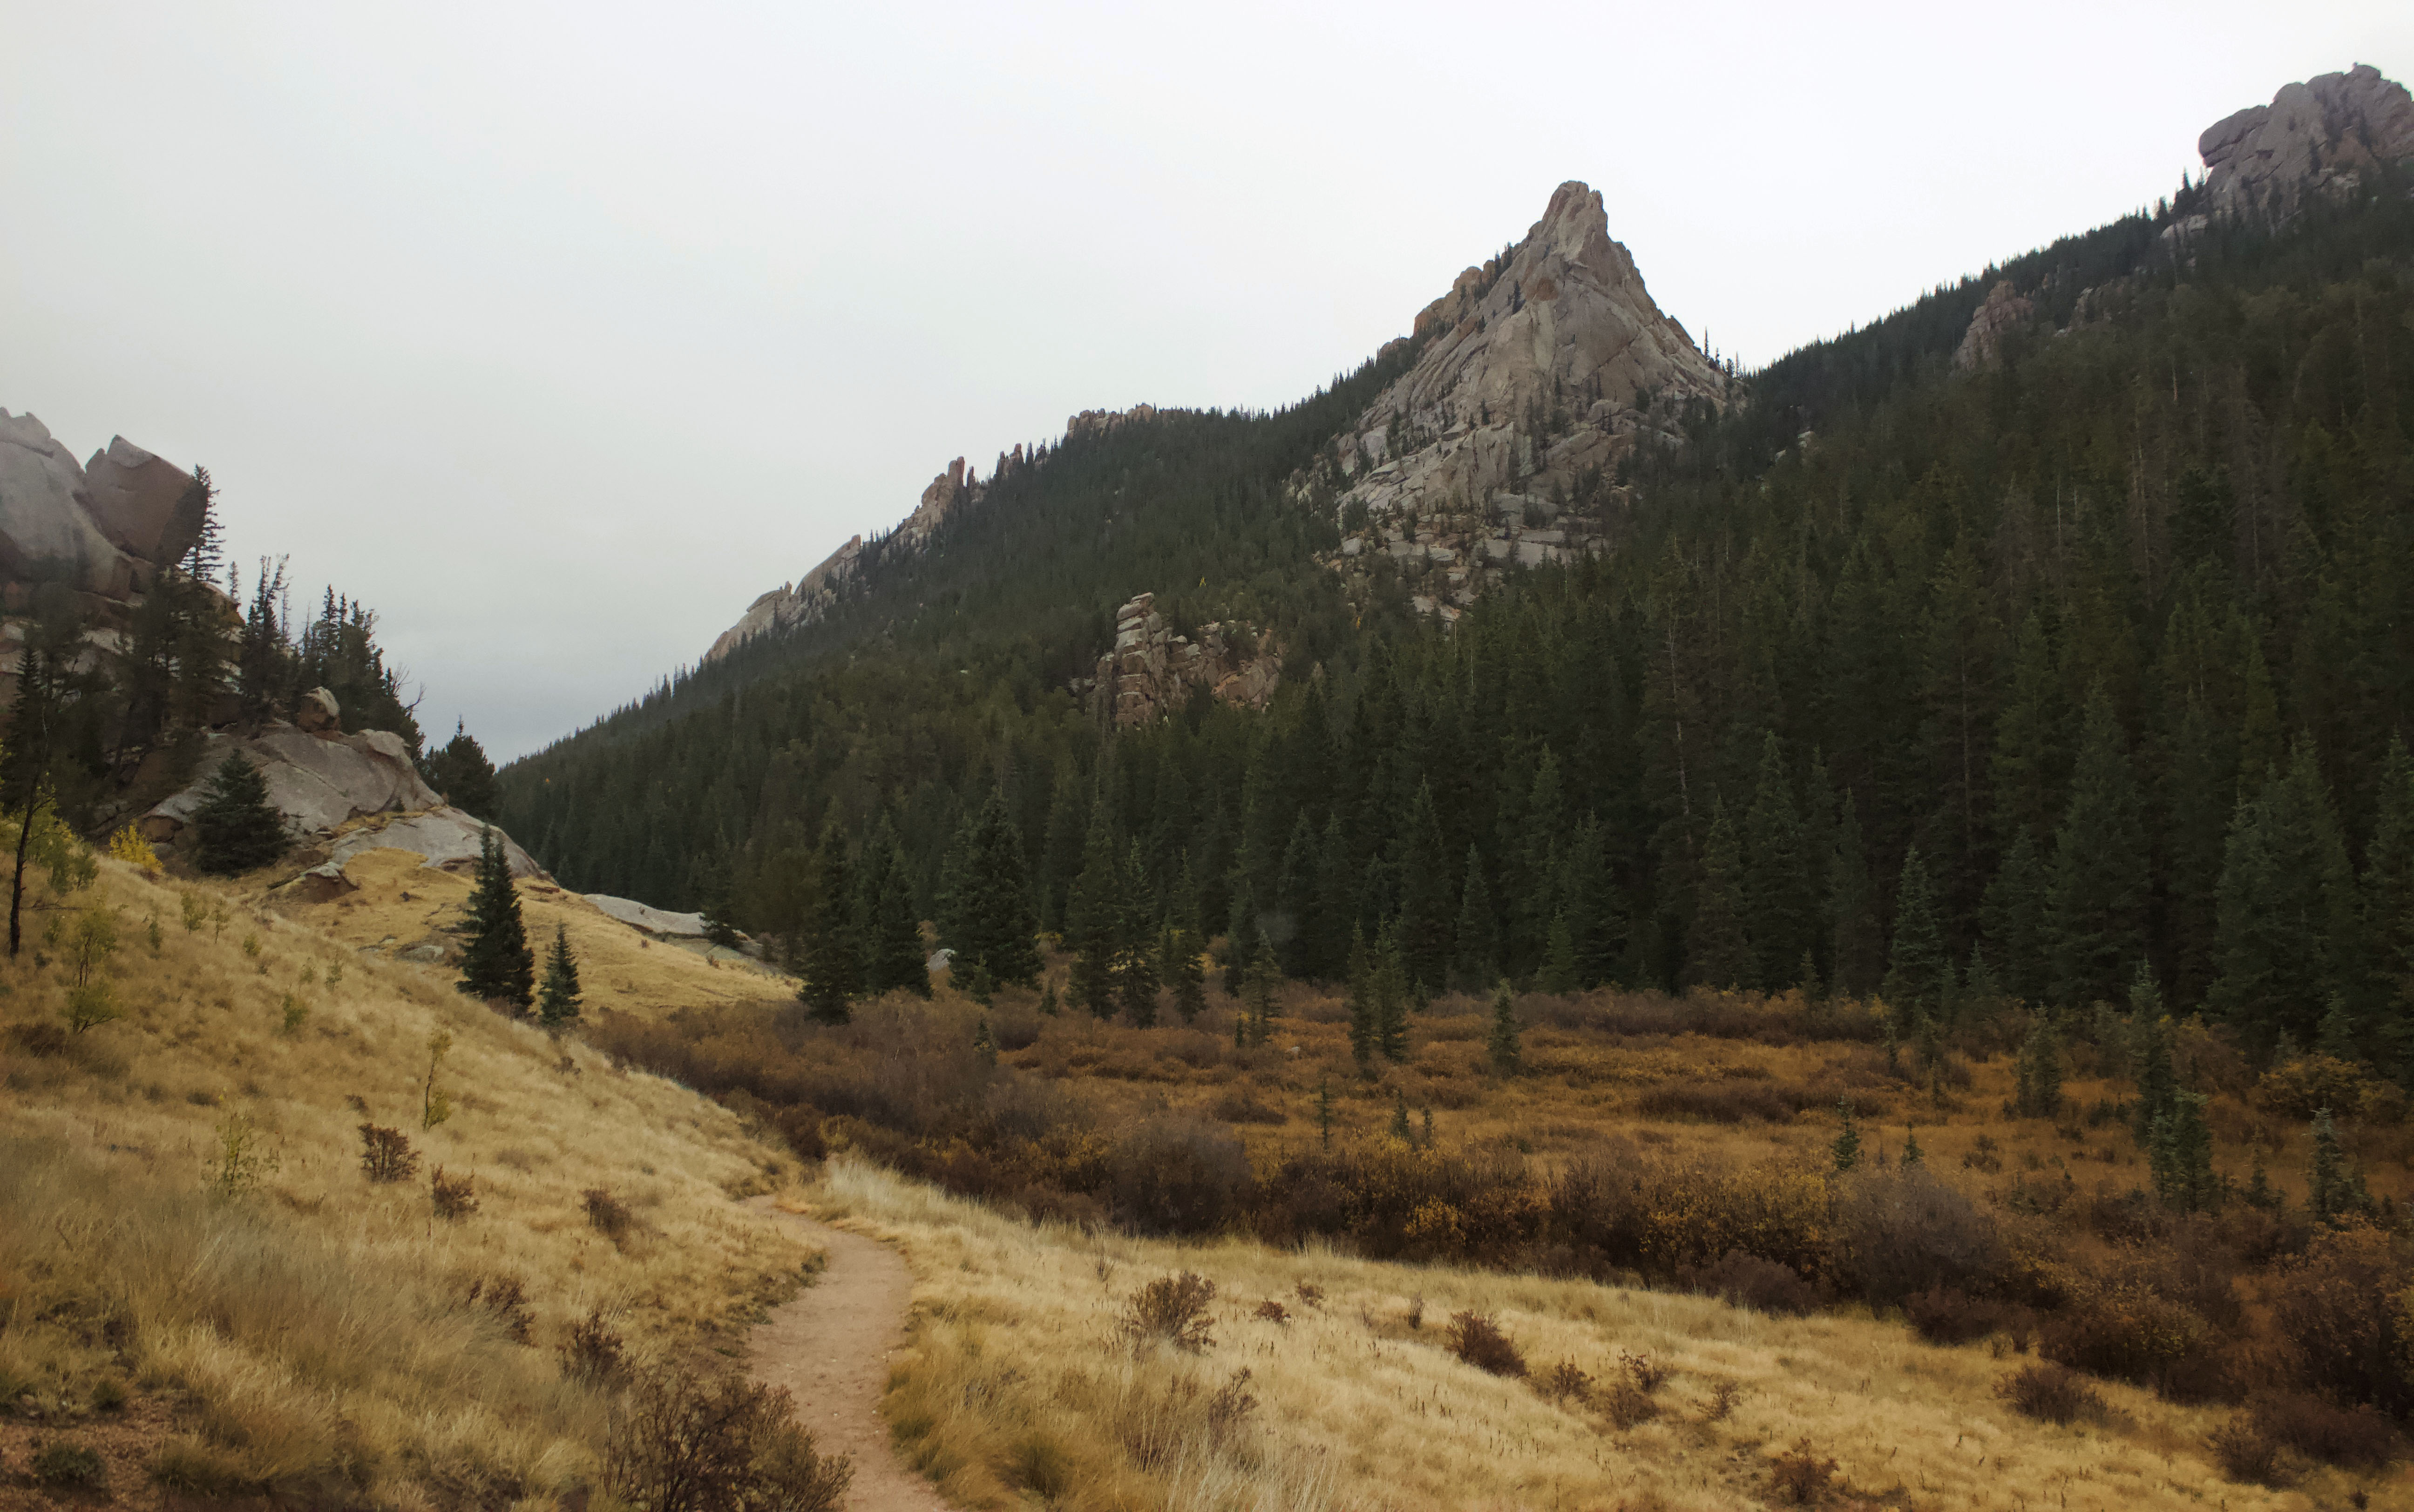
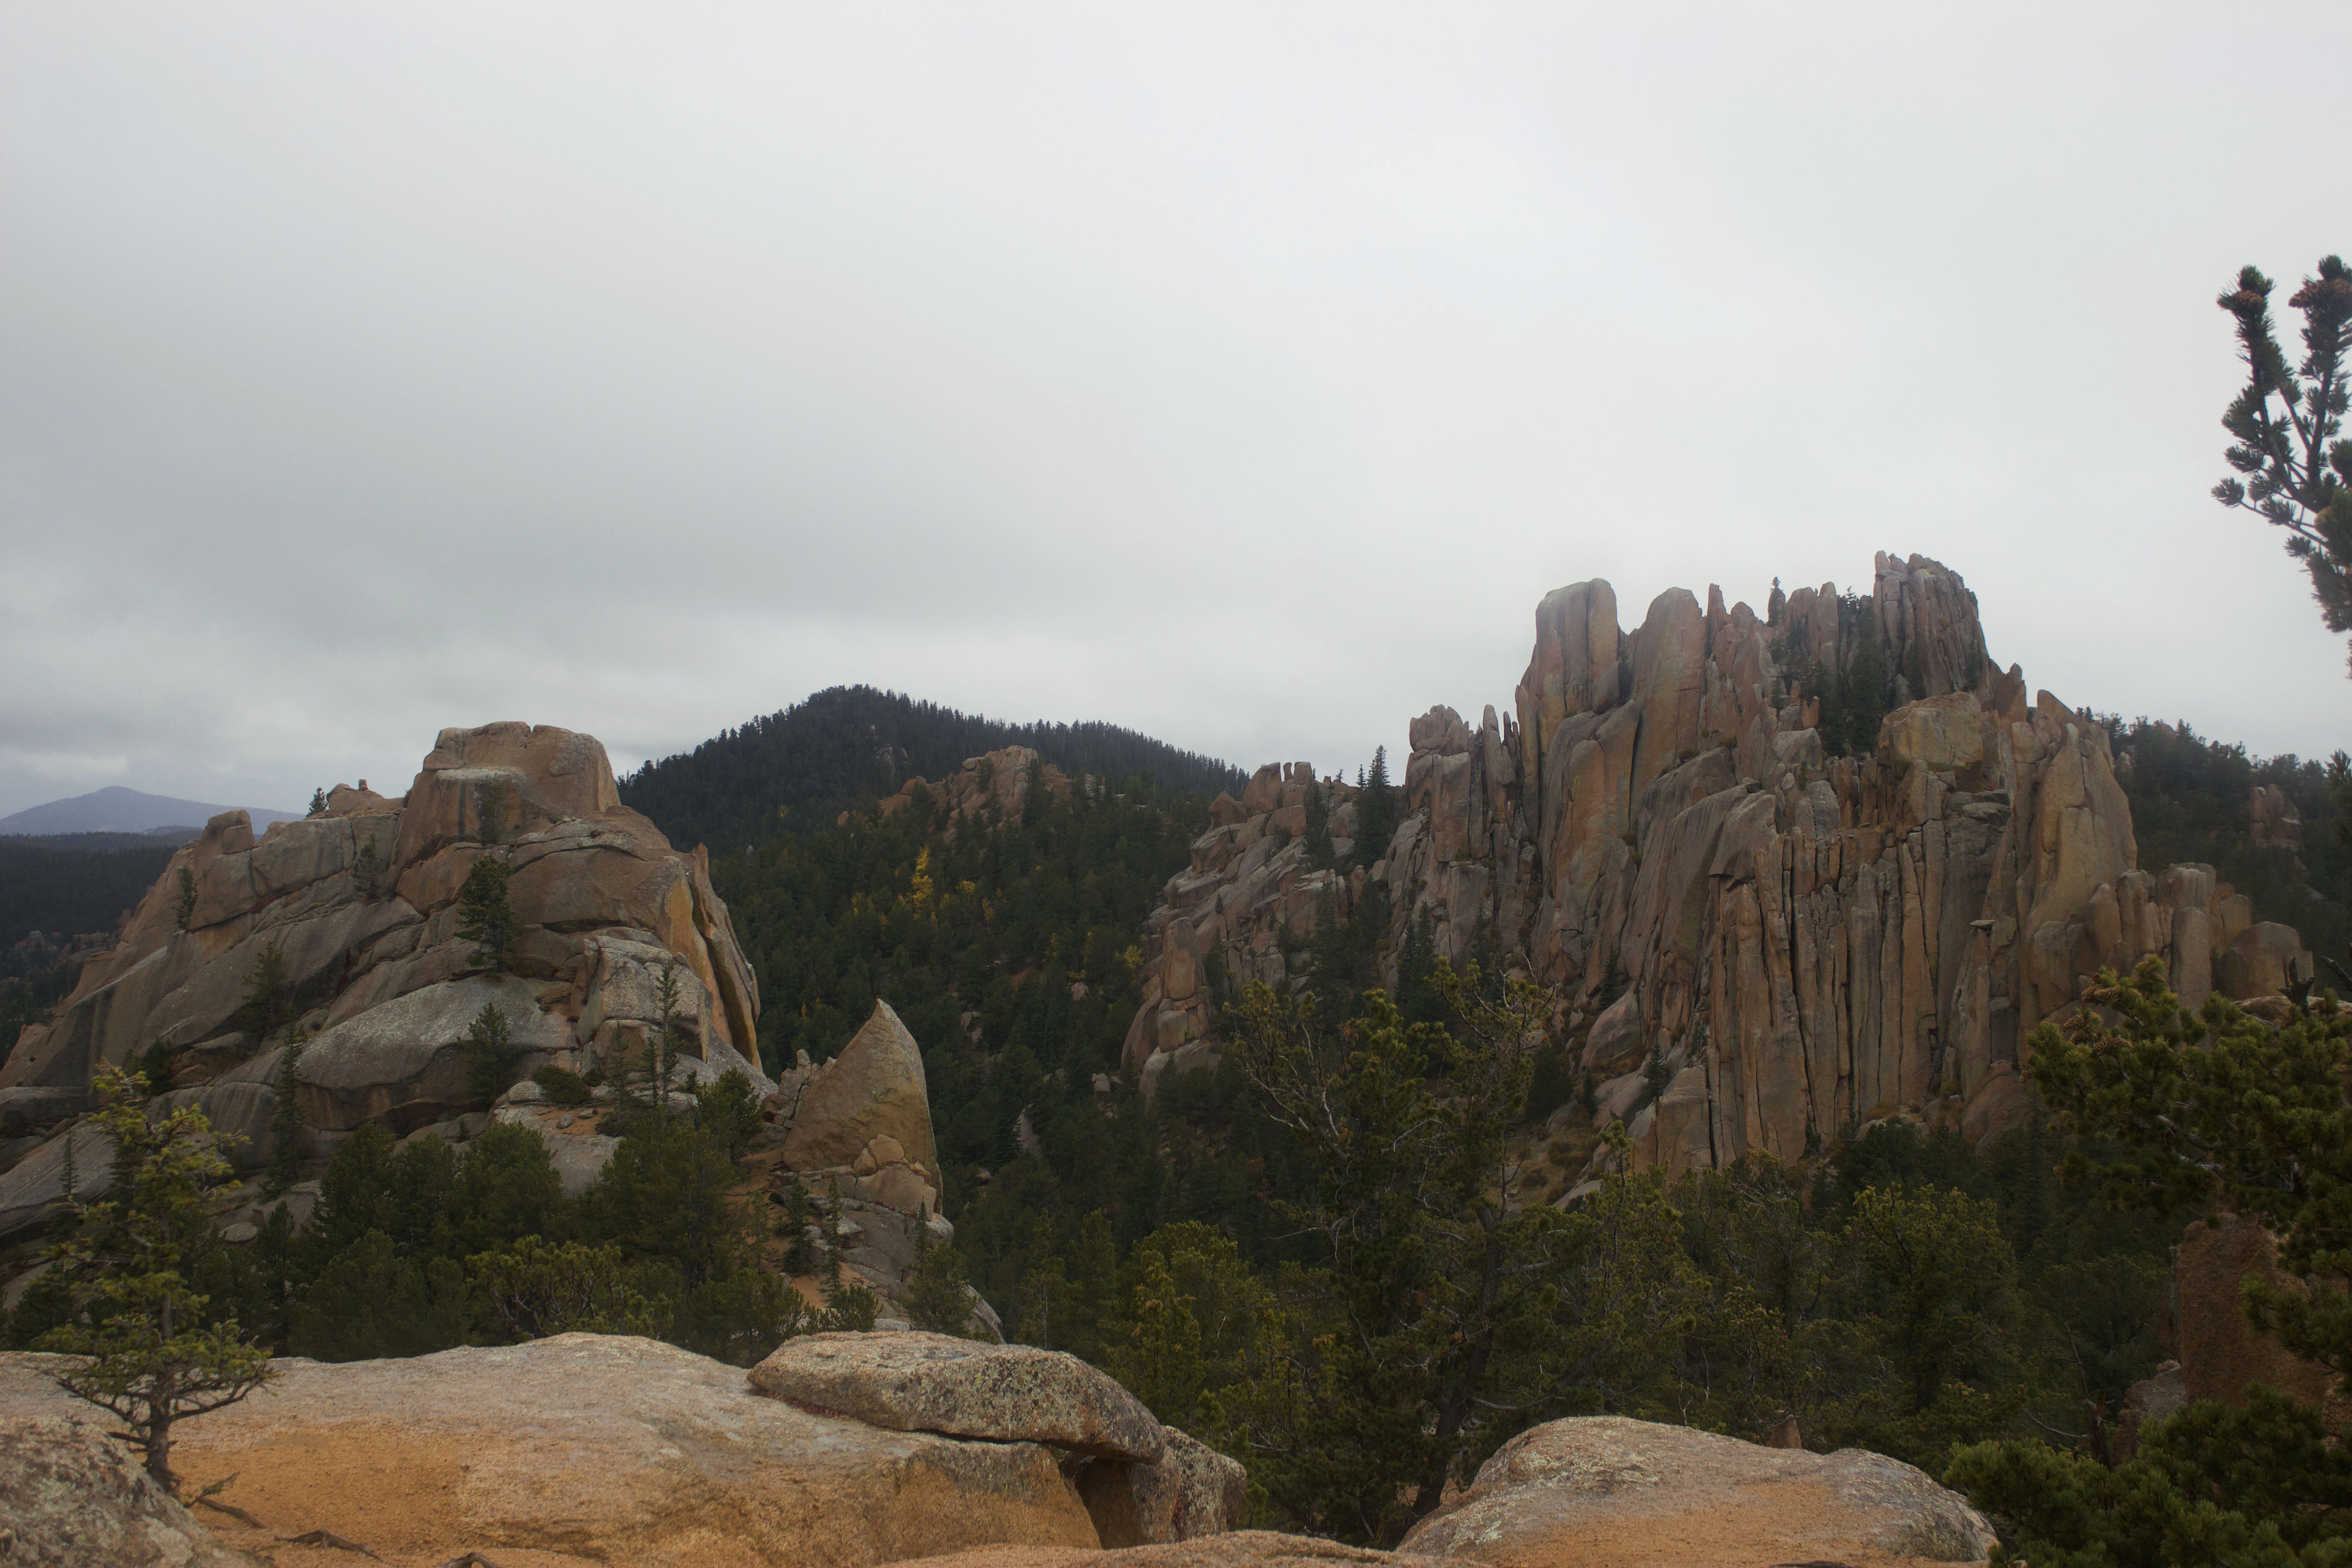
The aspens are still beautifully vibrant here in Colorado, so last weekend my husband and I decided to check out the Crags Trail. The weather was supposed to be chilly and misty, but the trail is only a little over an hour from our house, and we figured it might be less crowded because of the conditions. We began the hike around 8:30am – there were a handful of other cars in the parking lot when we arrived, but we didn’t see anyone until two miles in or so.
The trail begins with a moderately steep ascent through the forest before giving way to open meadows. The trail leads you through what feels like a gentle valley with rock formations and forested hills on either side. We actually saw a family of three moose about 1.5 miles in! This stretch of the trail is mostly flat and a nice break after the initial push.
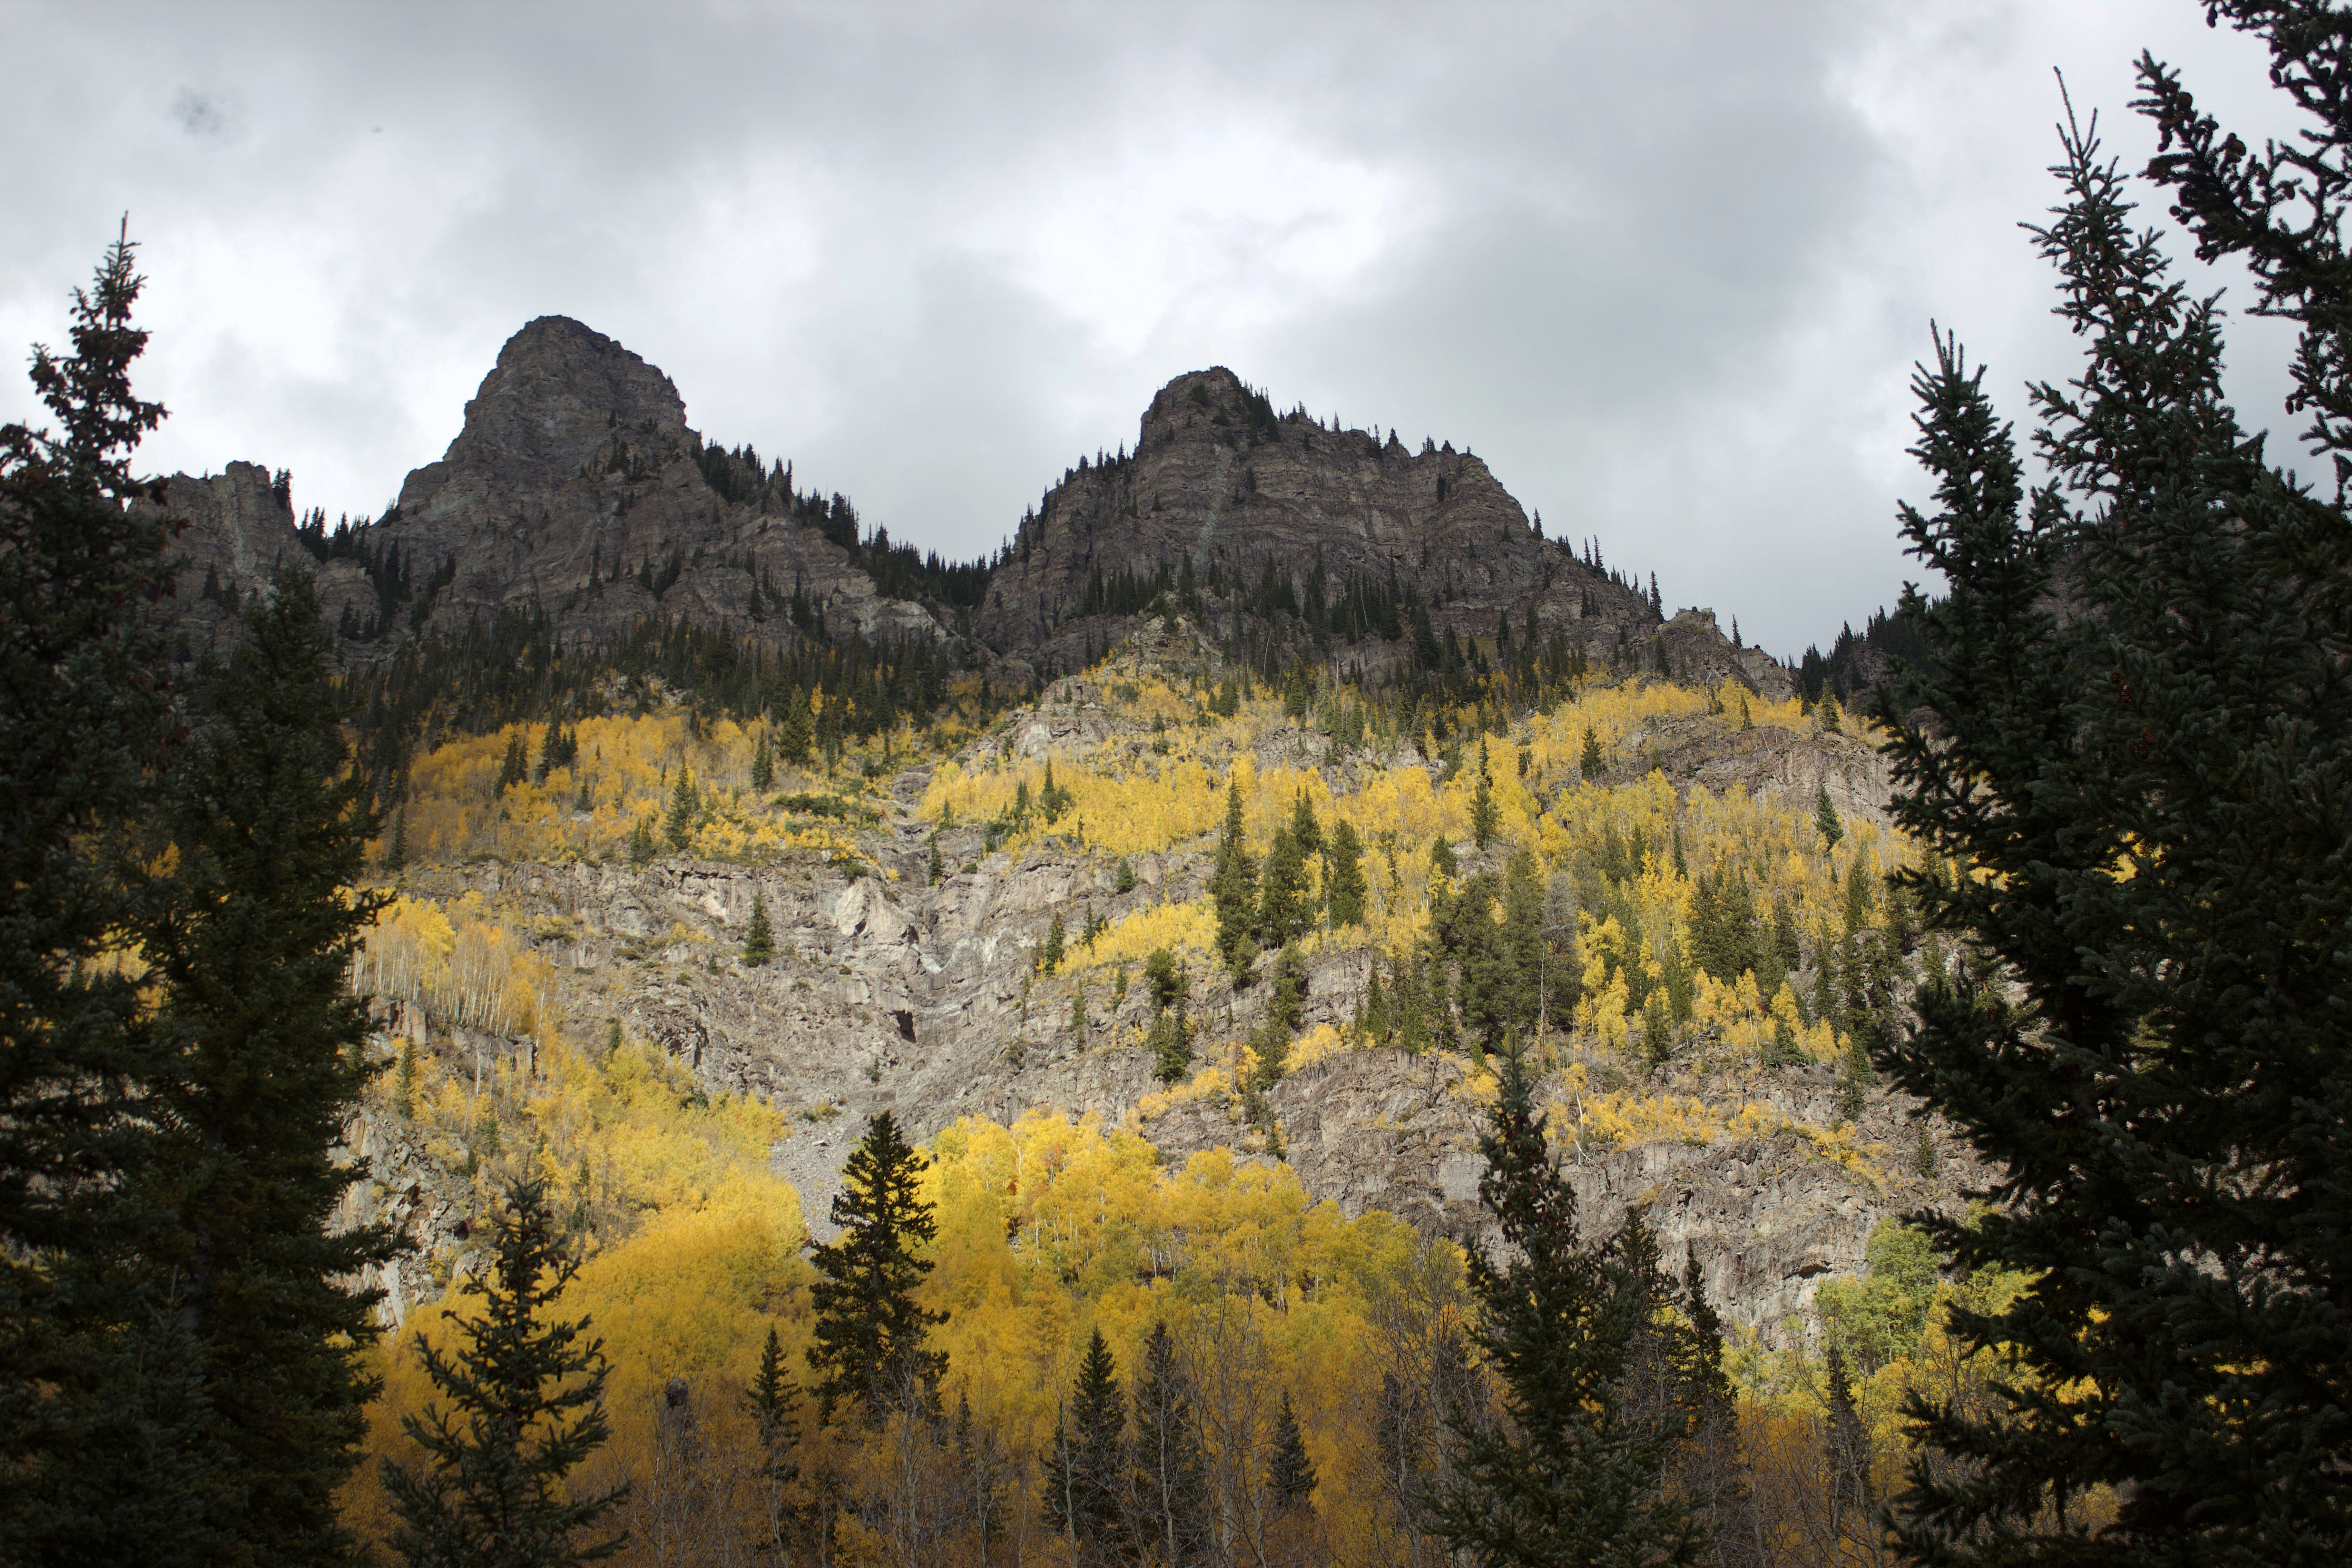
The last half mile or so quickly ascends through another forested area before reaching a rocky outlook. The views were a bit obstructed by clouds when we visited, but were still incredibly beautiful with the changing leaves. In total, the trail is roughly 5 miles in length with 800+ feet of elevation gain, making it moderately challenging but thoroughly enjoyable.
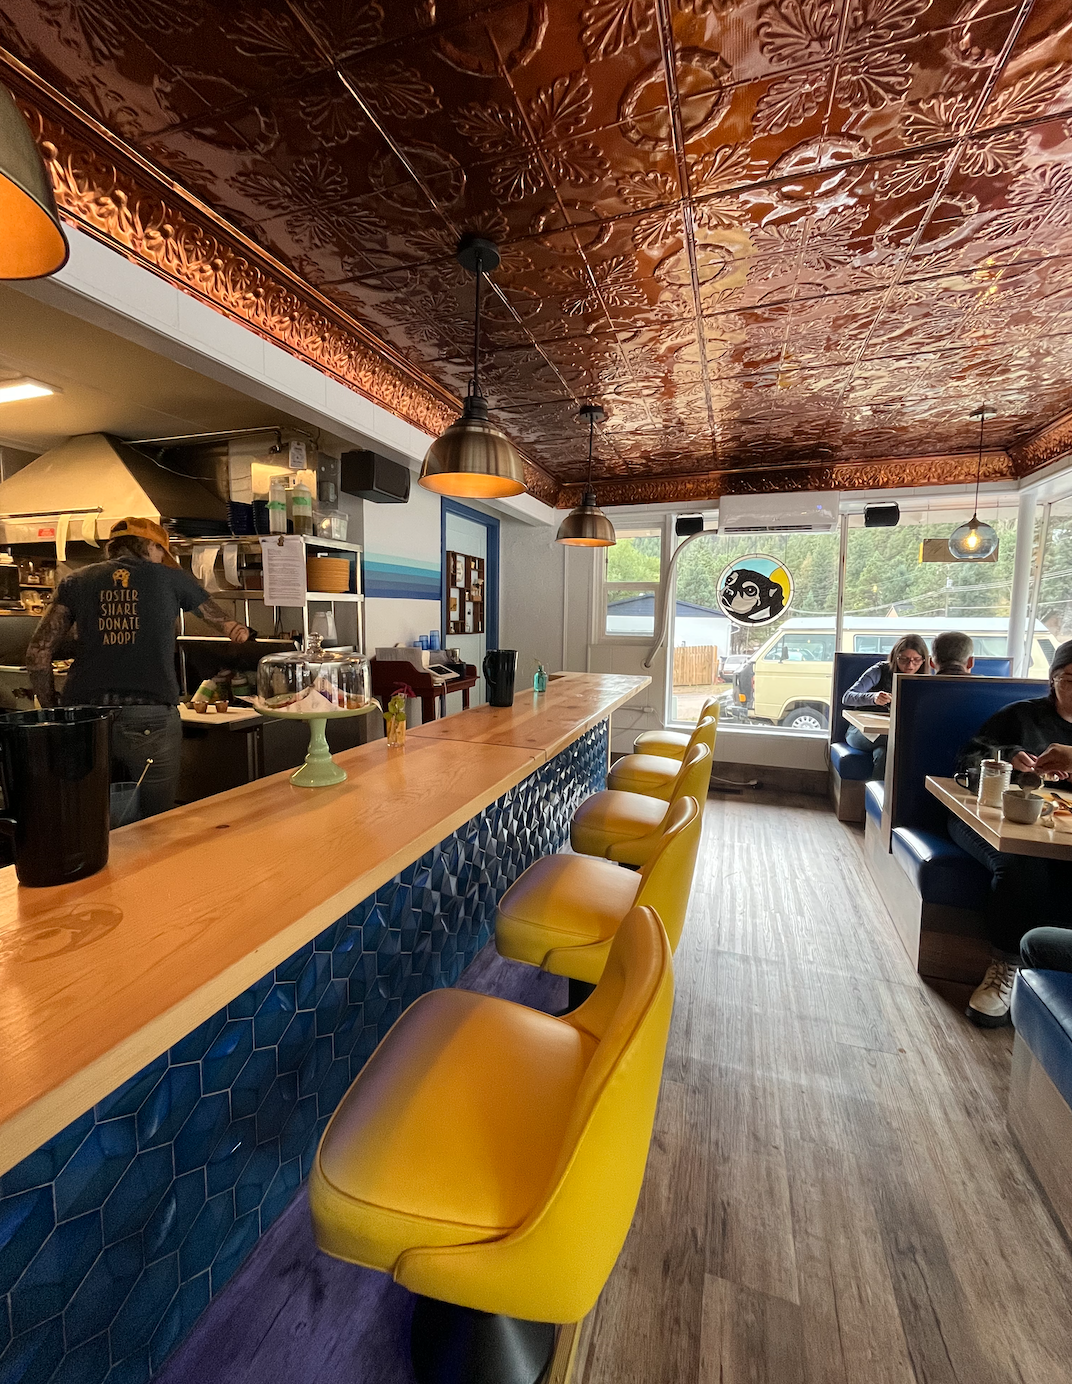
On the drive back to Colorado Springs we stopped at Fern’s Diner in Cascade so I could pick up a vegan lunch. I tried the 80’s burger – a Beyond burger topped with fried onions and blue cheese crumbles (all vegan!) – with tots, and a cup of green chili. All of it was incredibly delicious, and the diner itself was super cute. I definitely plan to return to try the breakfast menu!
Fall is in full swing here in Colorado and I wanted to share some ideas for fun seasonal activities to do throughout the state before winter kicks in!
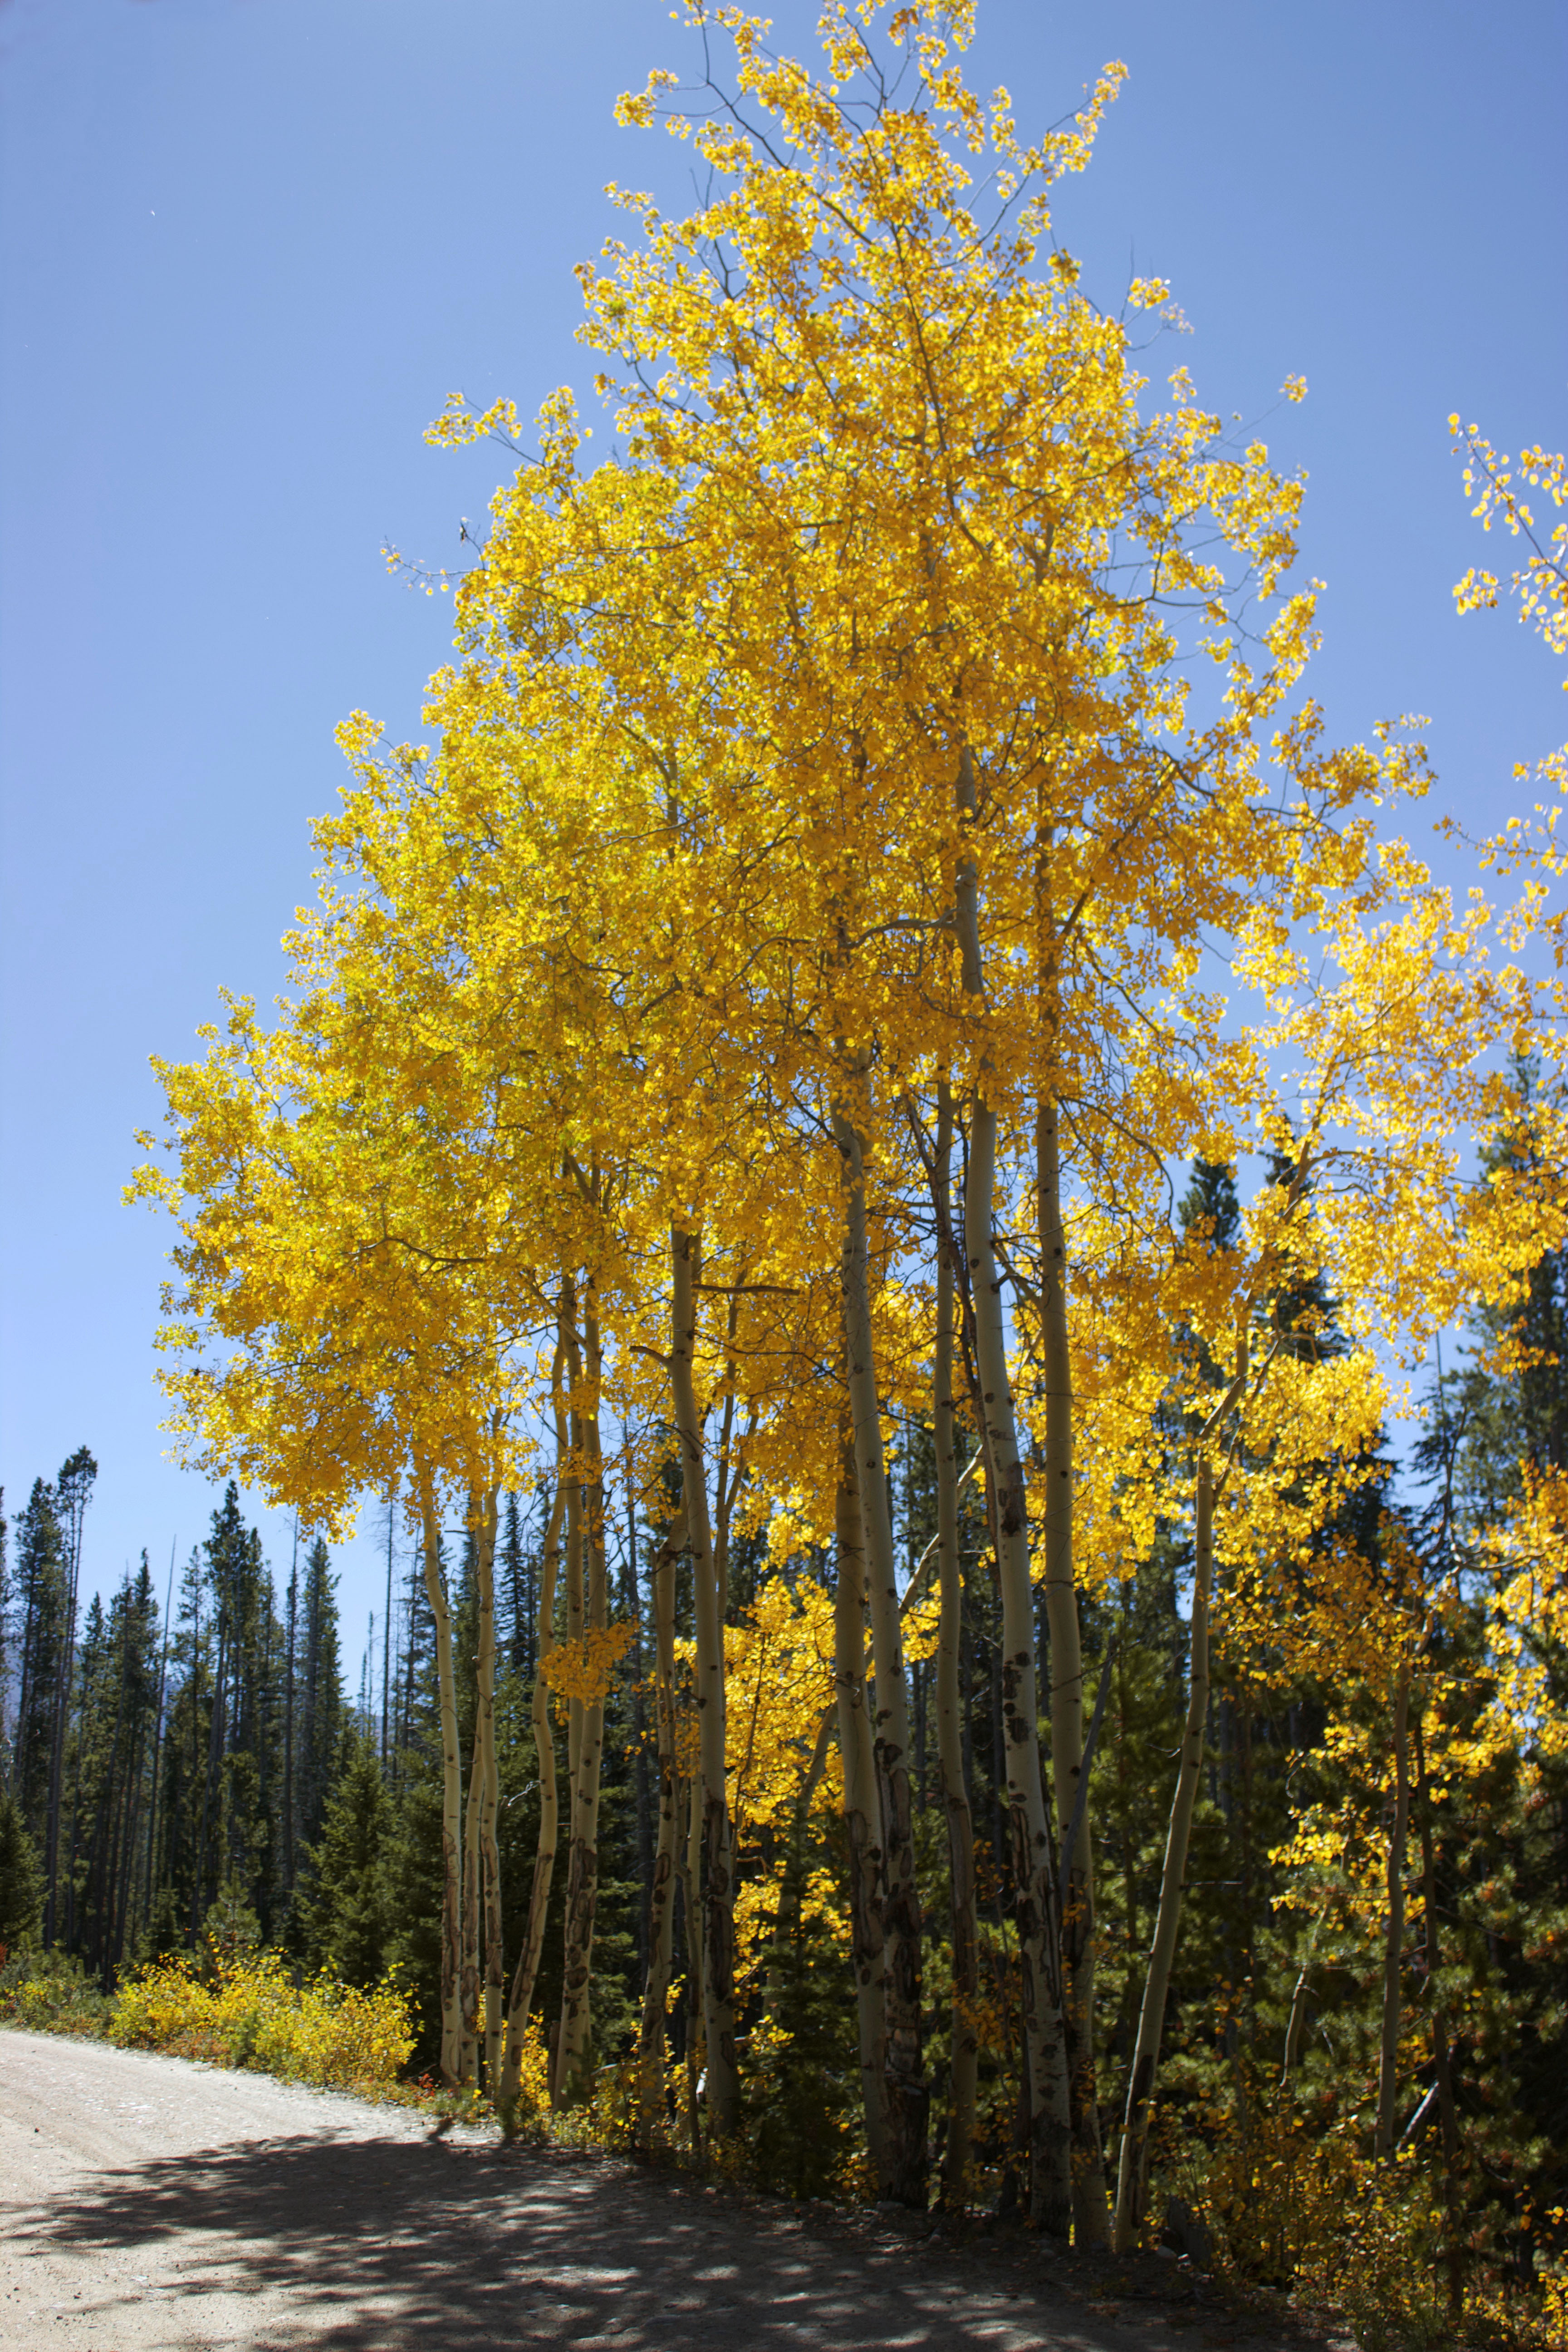
Leaf-Peeping
A signature Colorado fall activity is leaf-peeping, or venturing out to admire the changing leaves. Aspens in particular can be found all throughout the state and turn vibrant shades of yellow and orange in the fall. You can enjoy leaf-peeping by going on a hike (check out my 2022 and 2021 leaf-peeping blogs for ideas) or taking a drive along a scenic road, such such as Guanella Pass (more ideas here).
Scenic Train Ride
Another fantastic way to enjoy the changing leaves in Colorado is by embarking on a scenic train ride. There are tons of train ride options tht range from short, family-friendly rides to longer adventures that take you all across the state. Popular fall train ride options include the Georgetown Loop Railroad and Royal Gorge Railroad, but you can find more here.
Haunted Towns and Roads
If you want to tap into your spooky side, consider visiting one of Colorado’s many ghost towns or (allegedly) haunted roads. From Gold Camp Road in Colorado Springs to the abandoned town of St. Elmo near Buena Vista, there are all kinds of spooky places to explore in Colorado, and many have very rich and fascinating histories. Check out this Colorado Ghost Towns guide to plan your visit!
Fall Festivals
There are all kinds of fall festivals throughout Colorado that offer fun and unique activities for the whole family. Whether you want to pick some pumpkins and apples or sample a variety of beer and wine, there’s a Colorado fall festival out there for everybody to enjoy. You can find a full list of this year’s fall festivals on the official State of Colorado website.
What are your favorite fall activities in Colorado?
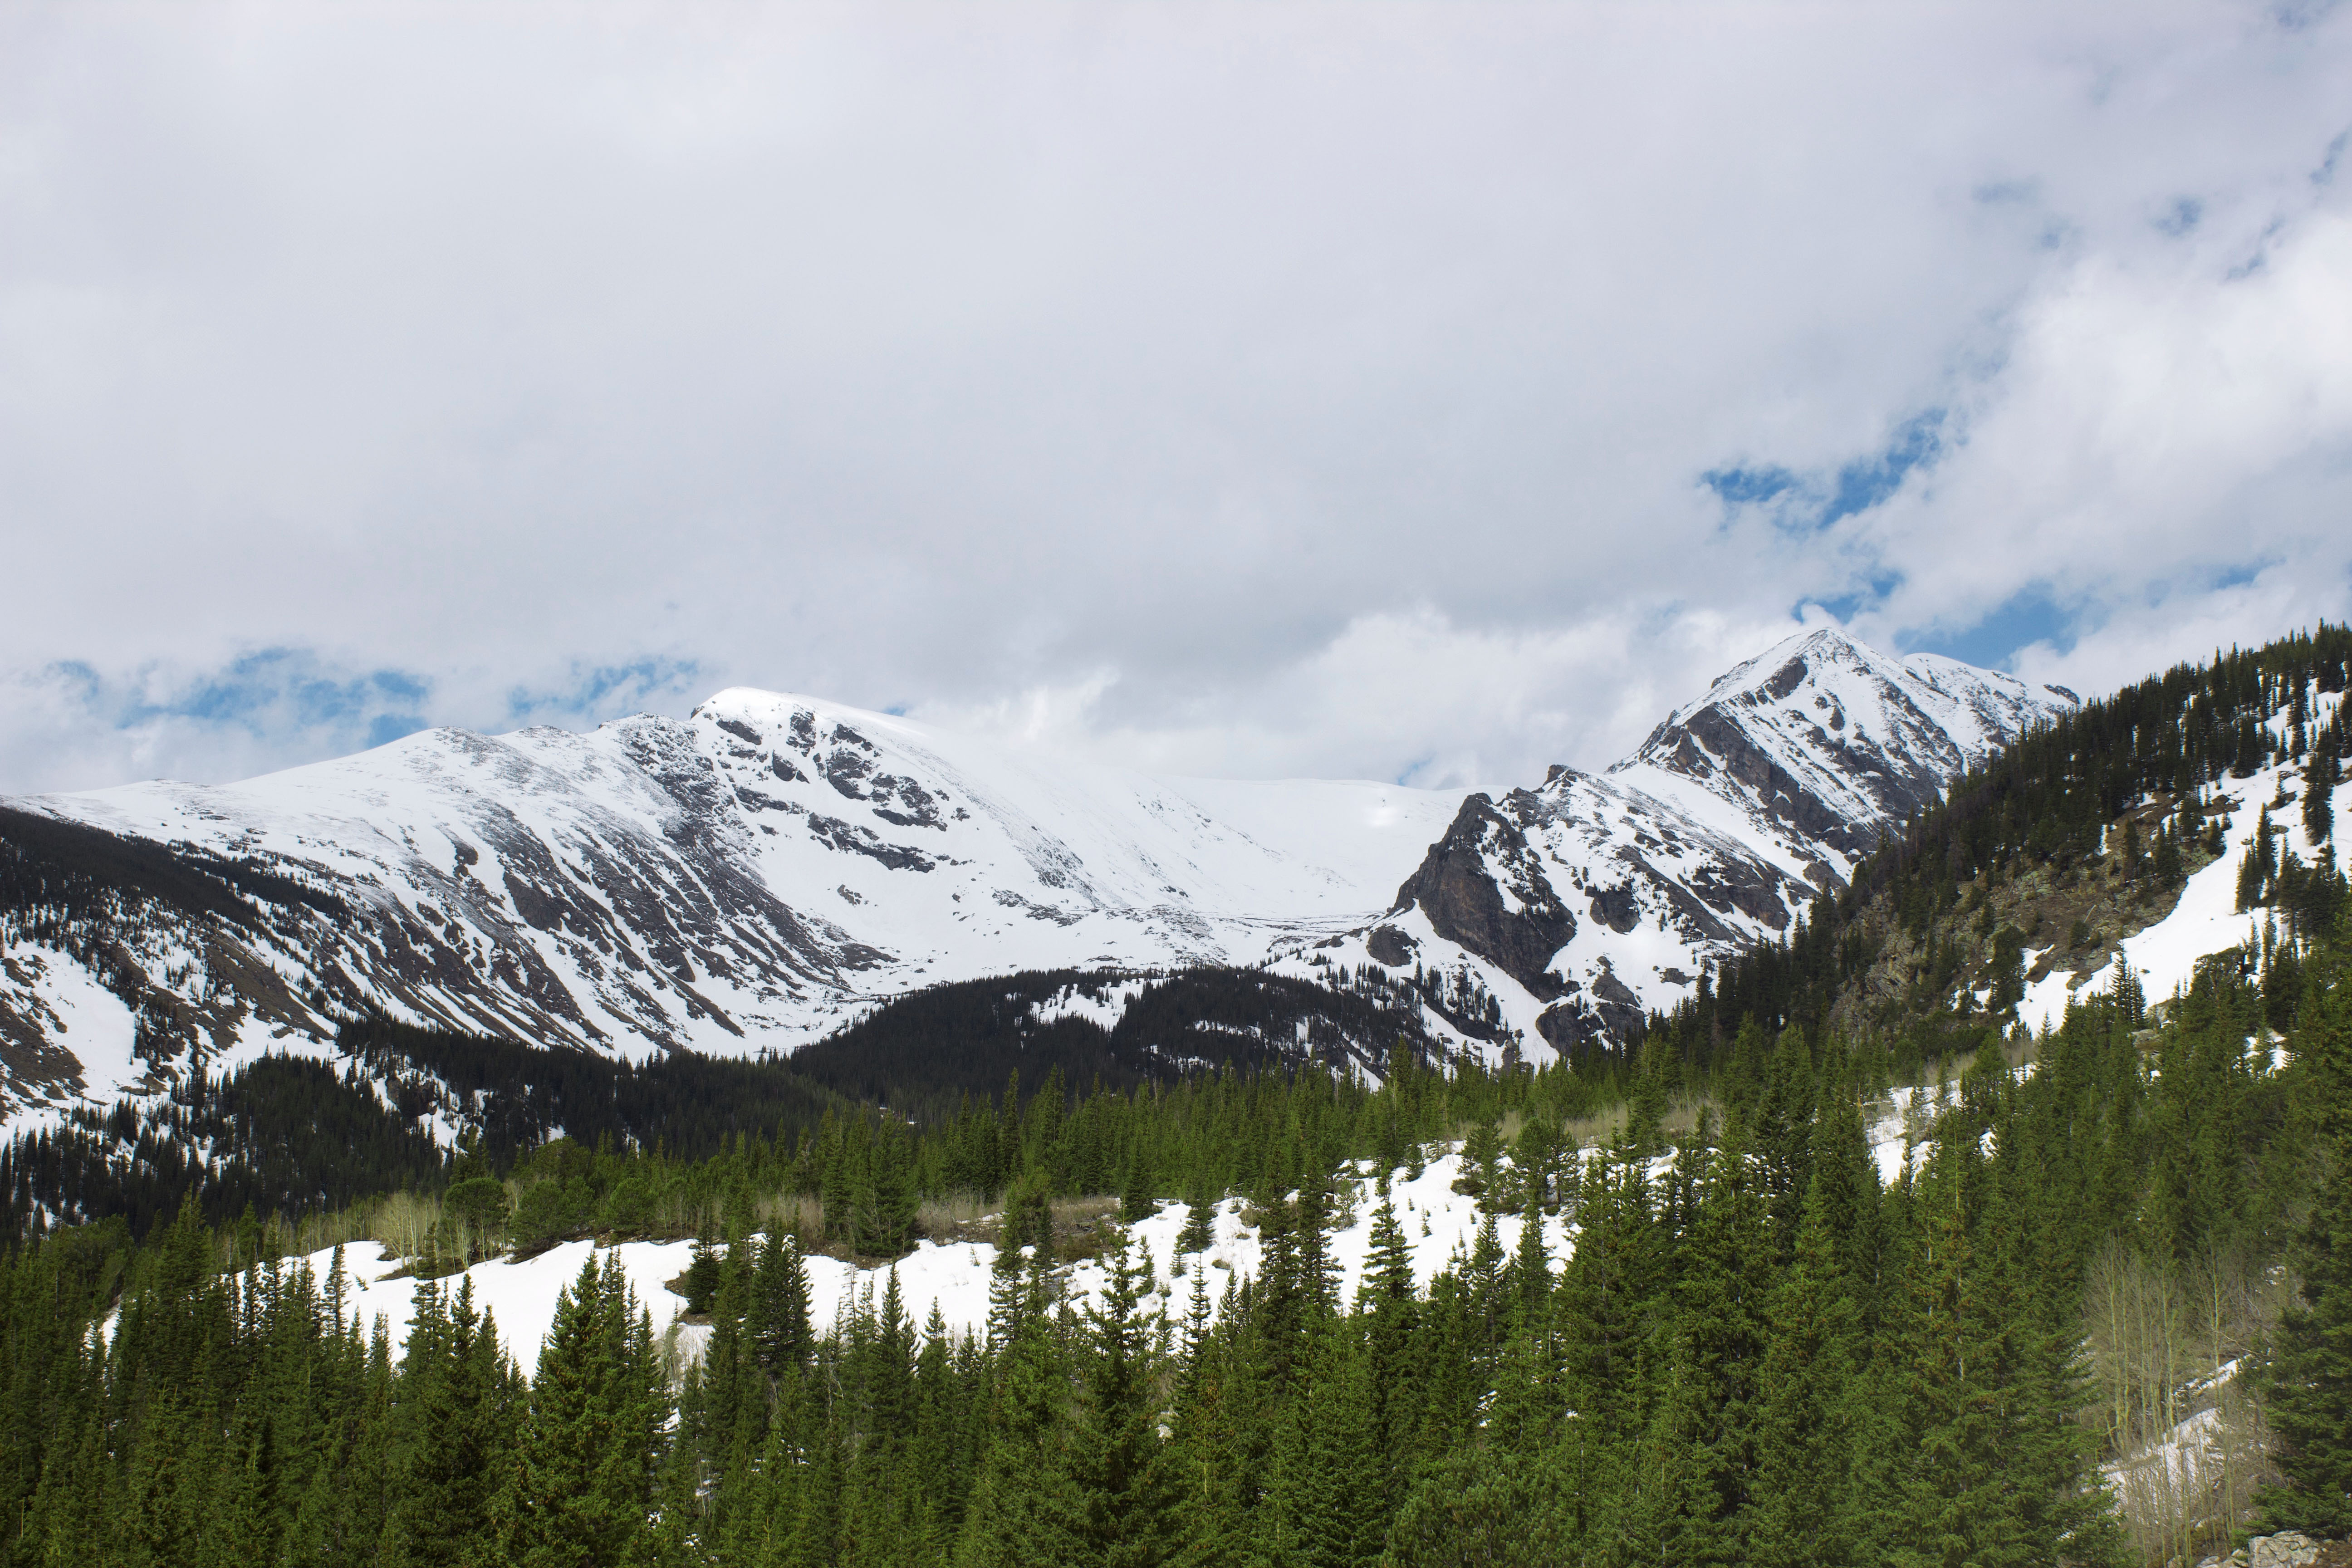
Fall is in full swing here in Colorado so my husband and I ventured up to the mountains to go on a hike and do some leaf peeping along the way as well. We settled on Rogers Pass, a 5-mile out-and-back hike located just 45 minutes outside of Winter Park. With less than 1000 feet of elevation gain, this hike is very moderate and great for hikers of all experience levels.
The trailhead for Rogers Pass is located along CR-80, a very rough road with lots of rocks and holes. We made it up just fine in our Subaru Outback, but make sure you drive slow and watch where you’re going! The drive up was beautiful thanks to all the aspens that were changing colors. One really cool feature about this hike is the historic train trestle located at the trailhead.
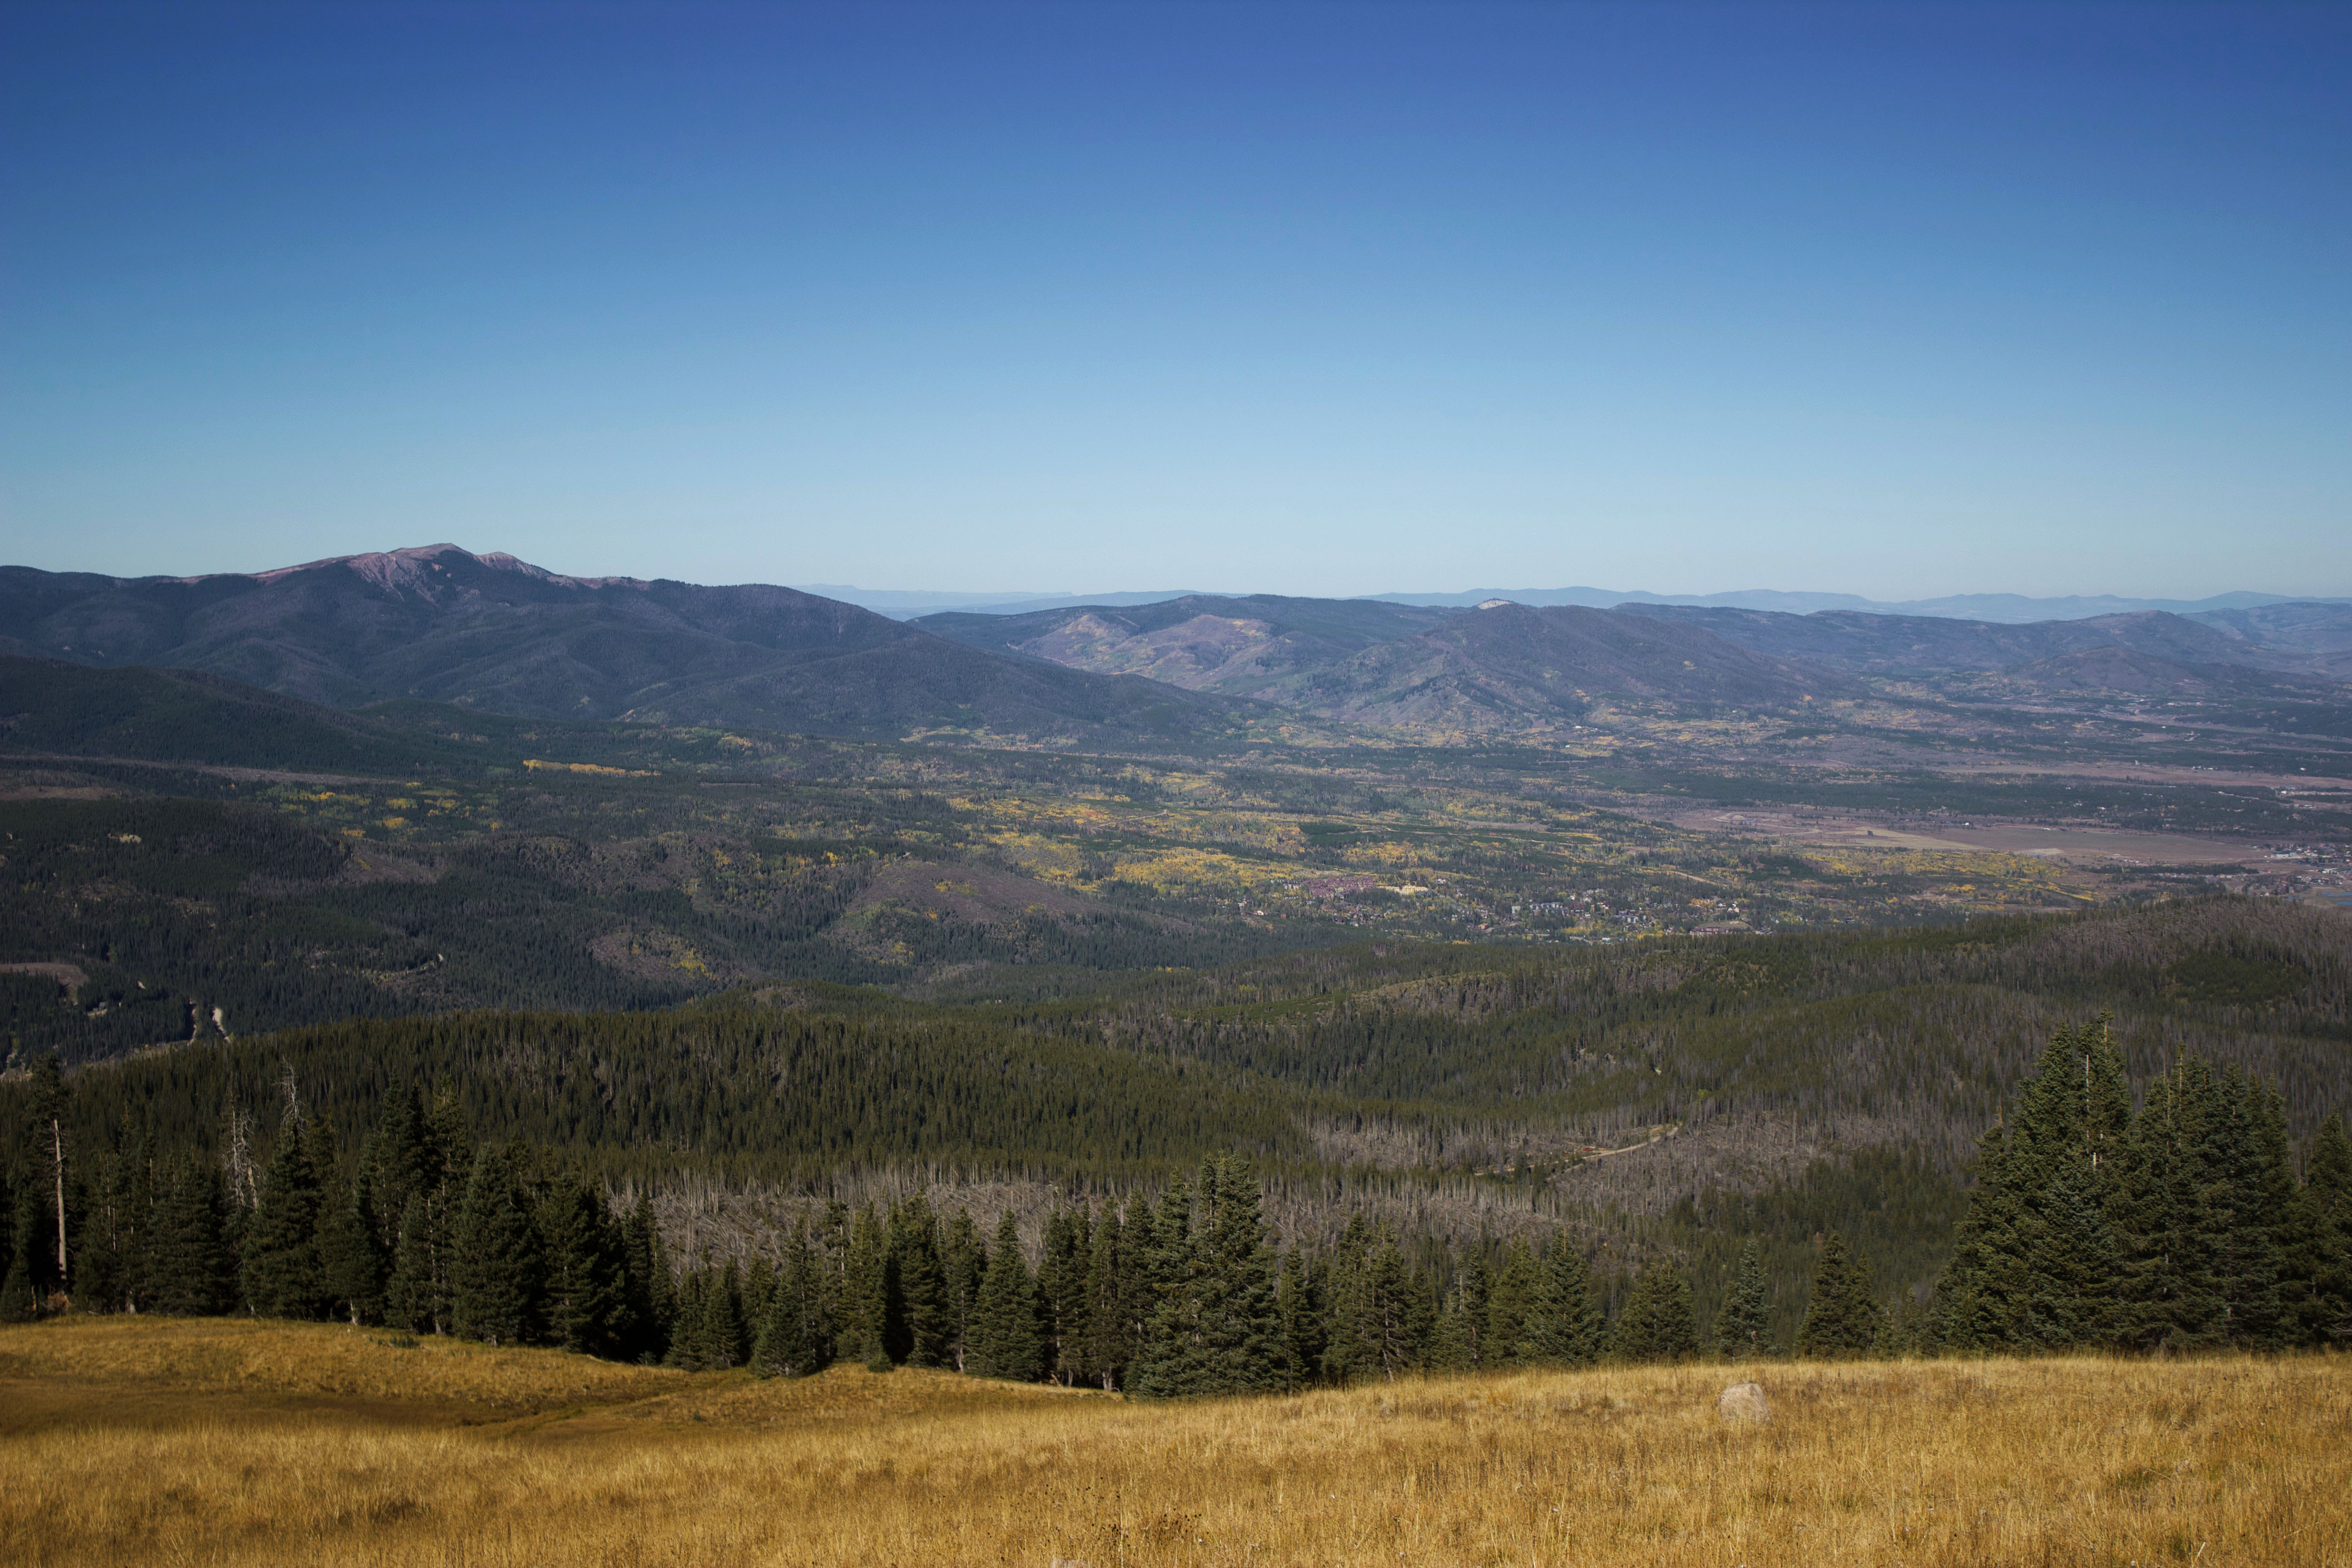
The hike begins with a gradual ascent up through the forest before soon emerging above the treeline. Along the way, you’ll be treated to beautiful views of Winter Park and Fraser. The rest of the hike consists of several meandering switchbacks up a grassy ridge which eventually gives way to stunning views of James Peak.
At 2.5 miles, you’ll reach the end of the trail, though you could continue on to James Peak if you wanted to. We explored for a bit at the top, which was incredibly windy, before making our way back down the trail to the car.
This hike is not very popular so you won’t have to worry about battling crowds – we were the only ones there when we arrived around 9am on a Saturday! I think the Rogers Pass hike is super underrated, and it’s one of my favorite easy hikes in the state.
My husband and I recently had some friends in town and one of their goals was to summit a 14er during their visit. We were ready for a challenge, so I suggested checking out the DeCaLiBron Loop, a well-known trail in Colorado that covers four 14ers in one hike! The loop leads you up and over Mount Democrat, Cameron, Lincoln, and Bross (though the official summit of Bross is technically on private property and closed to hikers). I wasn’t sure if I wanted to do the entire loop this time around, but I set a goal for myself to do at least one of the 14ers, which ended up being Mount Democrat.
We arrived at the trailhead around 6am, which many in the Colorado hiking community would probably consider a late start. Thankfully, we scored the very last parking spot in the lot so we didn’t have to park along the road. There is a $5 fee to park and you will get a ticket if you choose not to pay, so don’t skip out!
Technically, you can hike the DeCaLiBron Loop either clockwise (starting with Democrat and ending with Bross) or counterclockwise (starting with Bross and ending with Democrat). I read mixed opinions on which way is easier – many commented that the descent from Bross (or ascent, if you begin with that 14er) is very rough as it mostly consists of gravel and loose rock. With that in mind, we decided to start with Democrat.
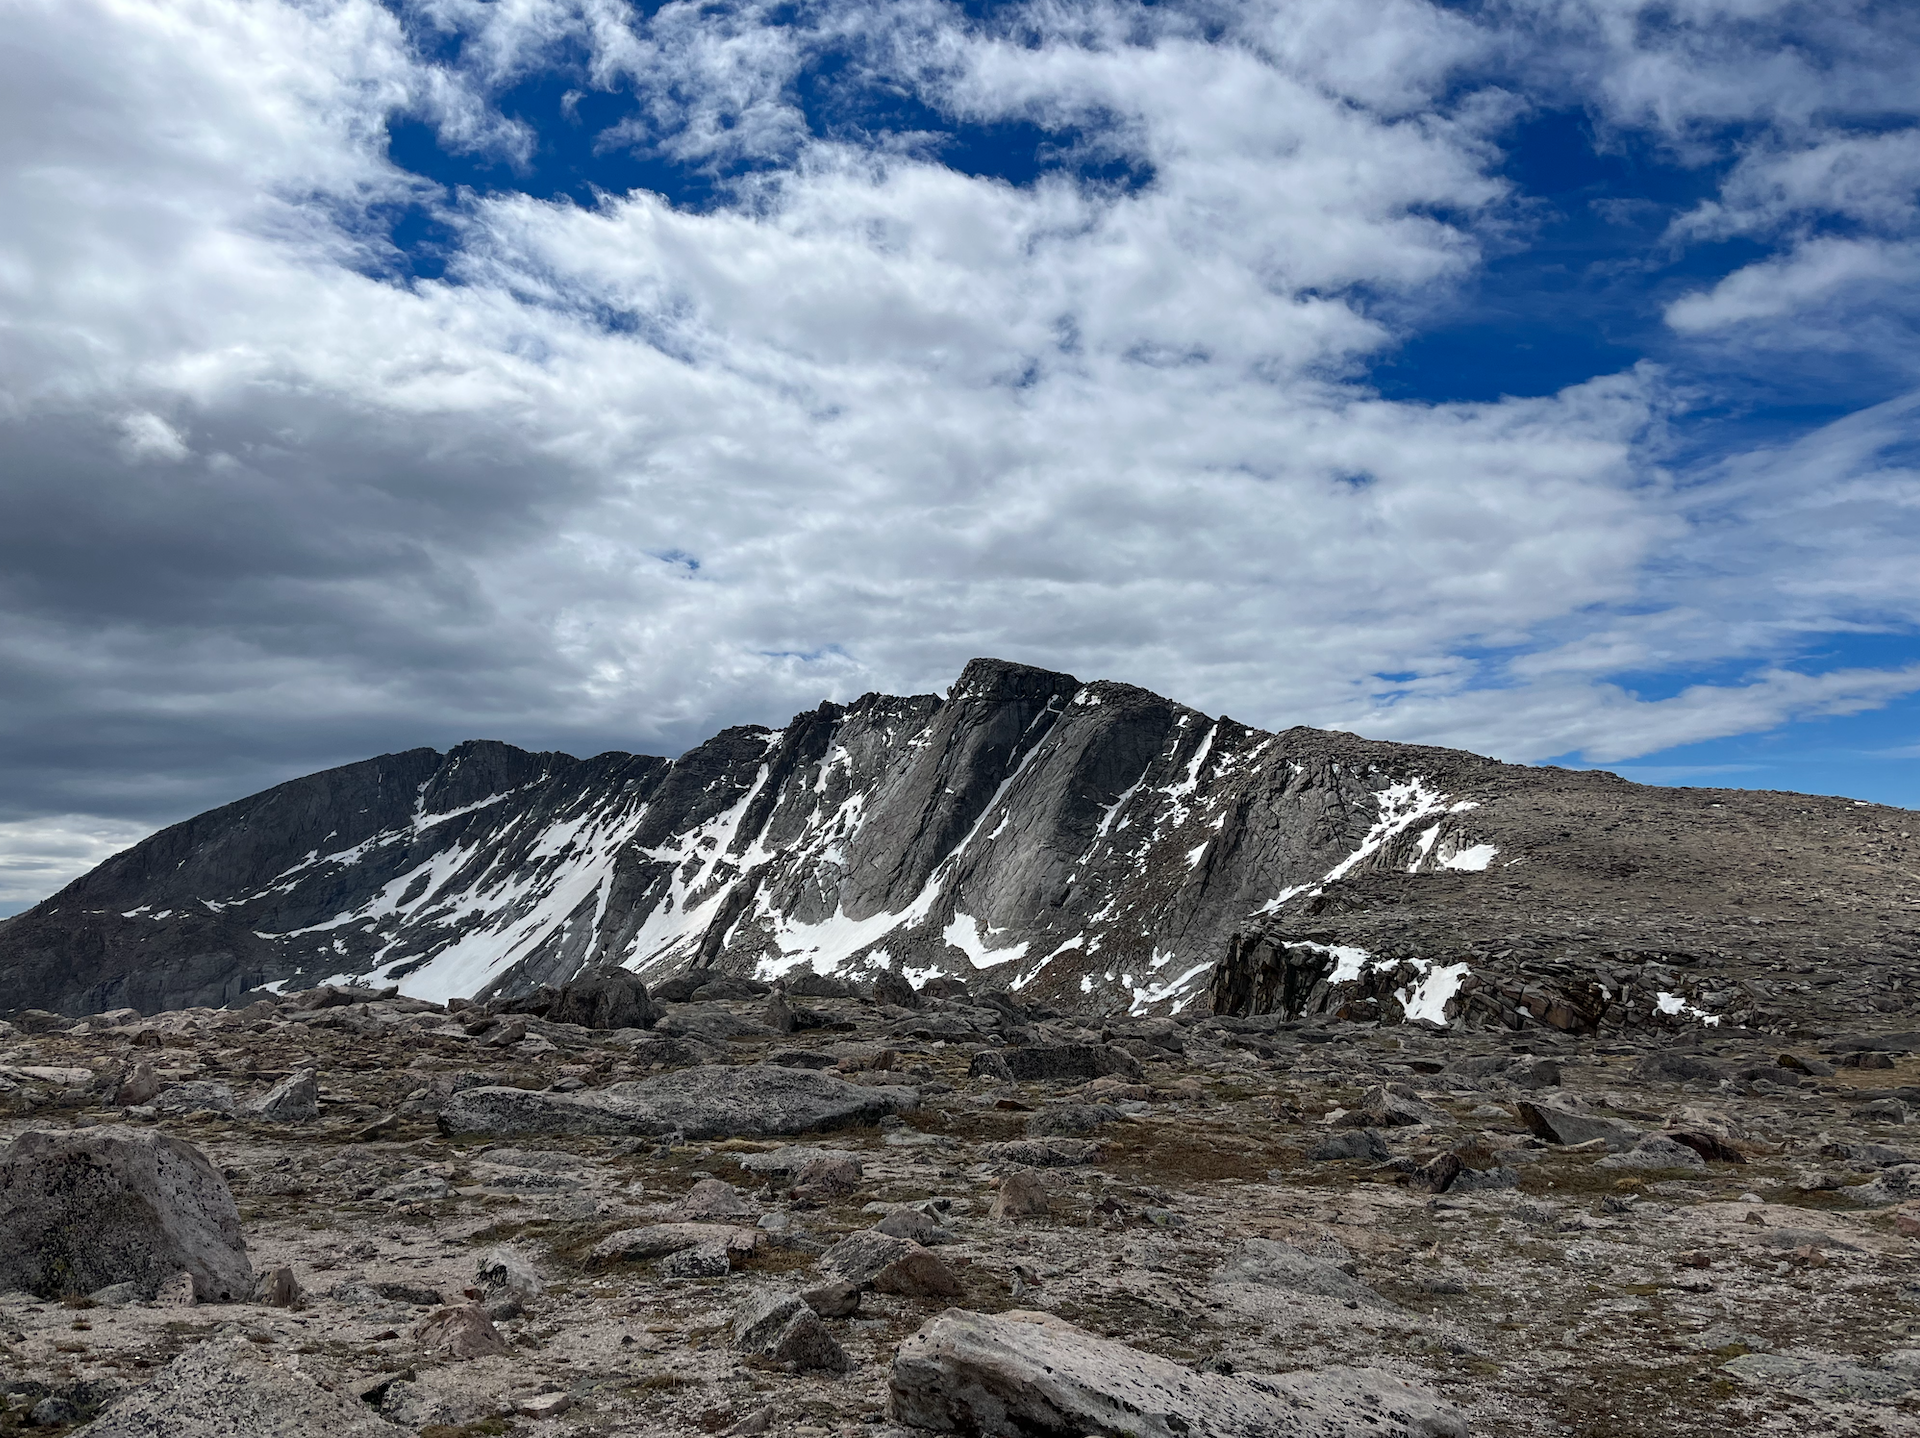
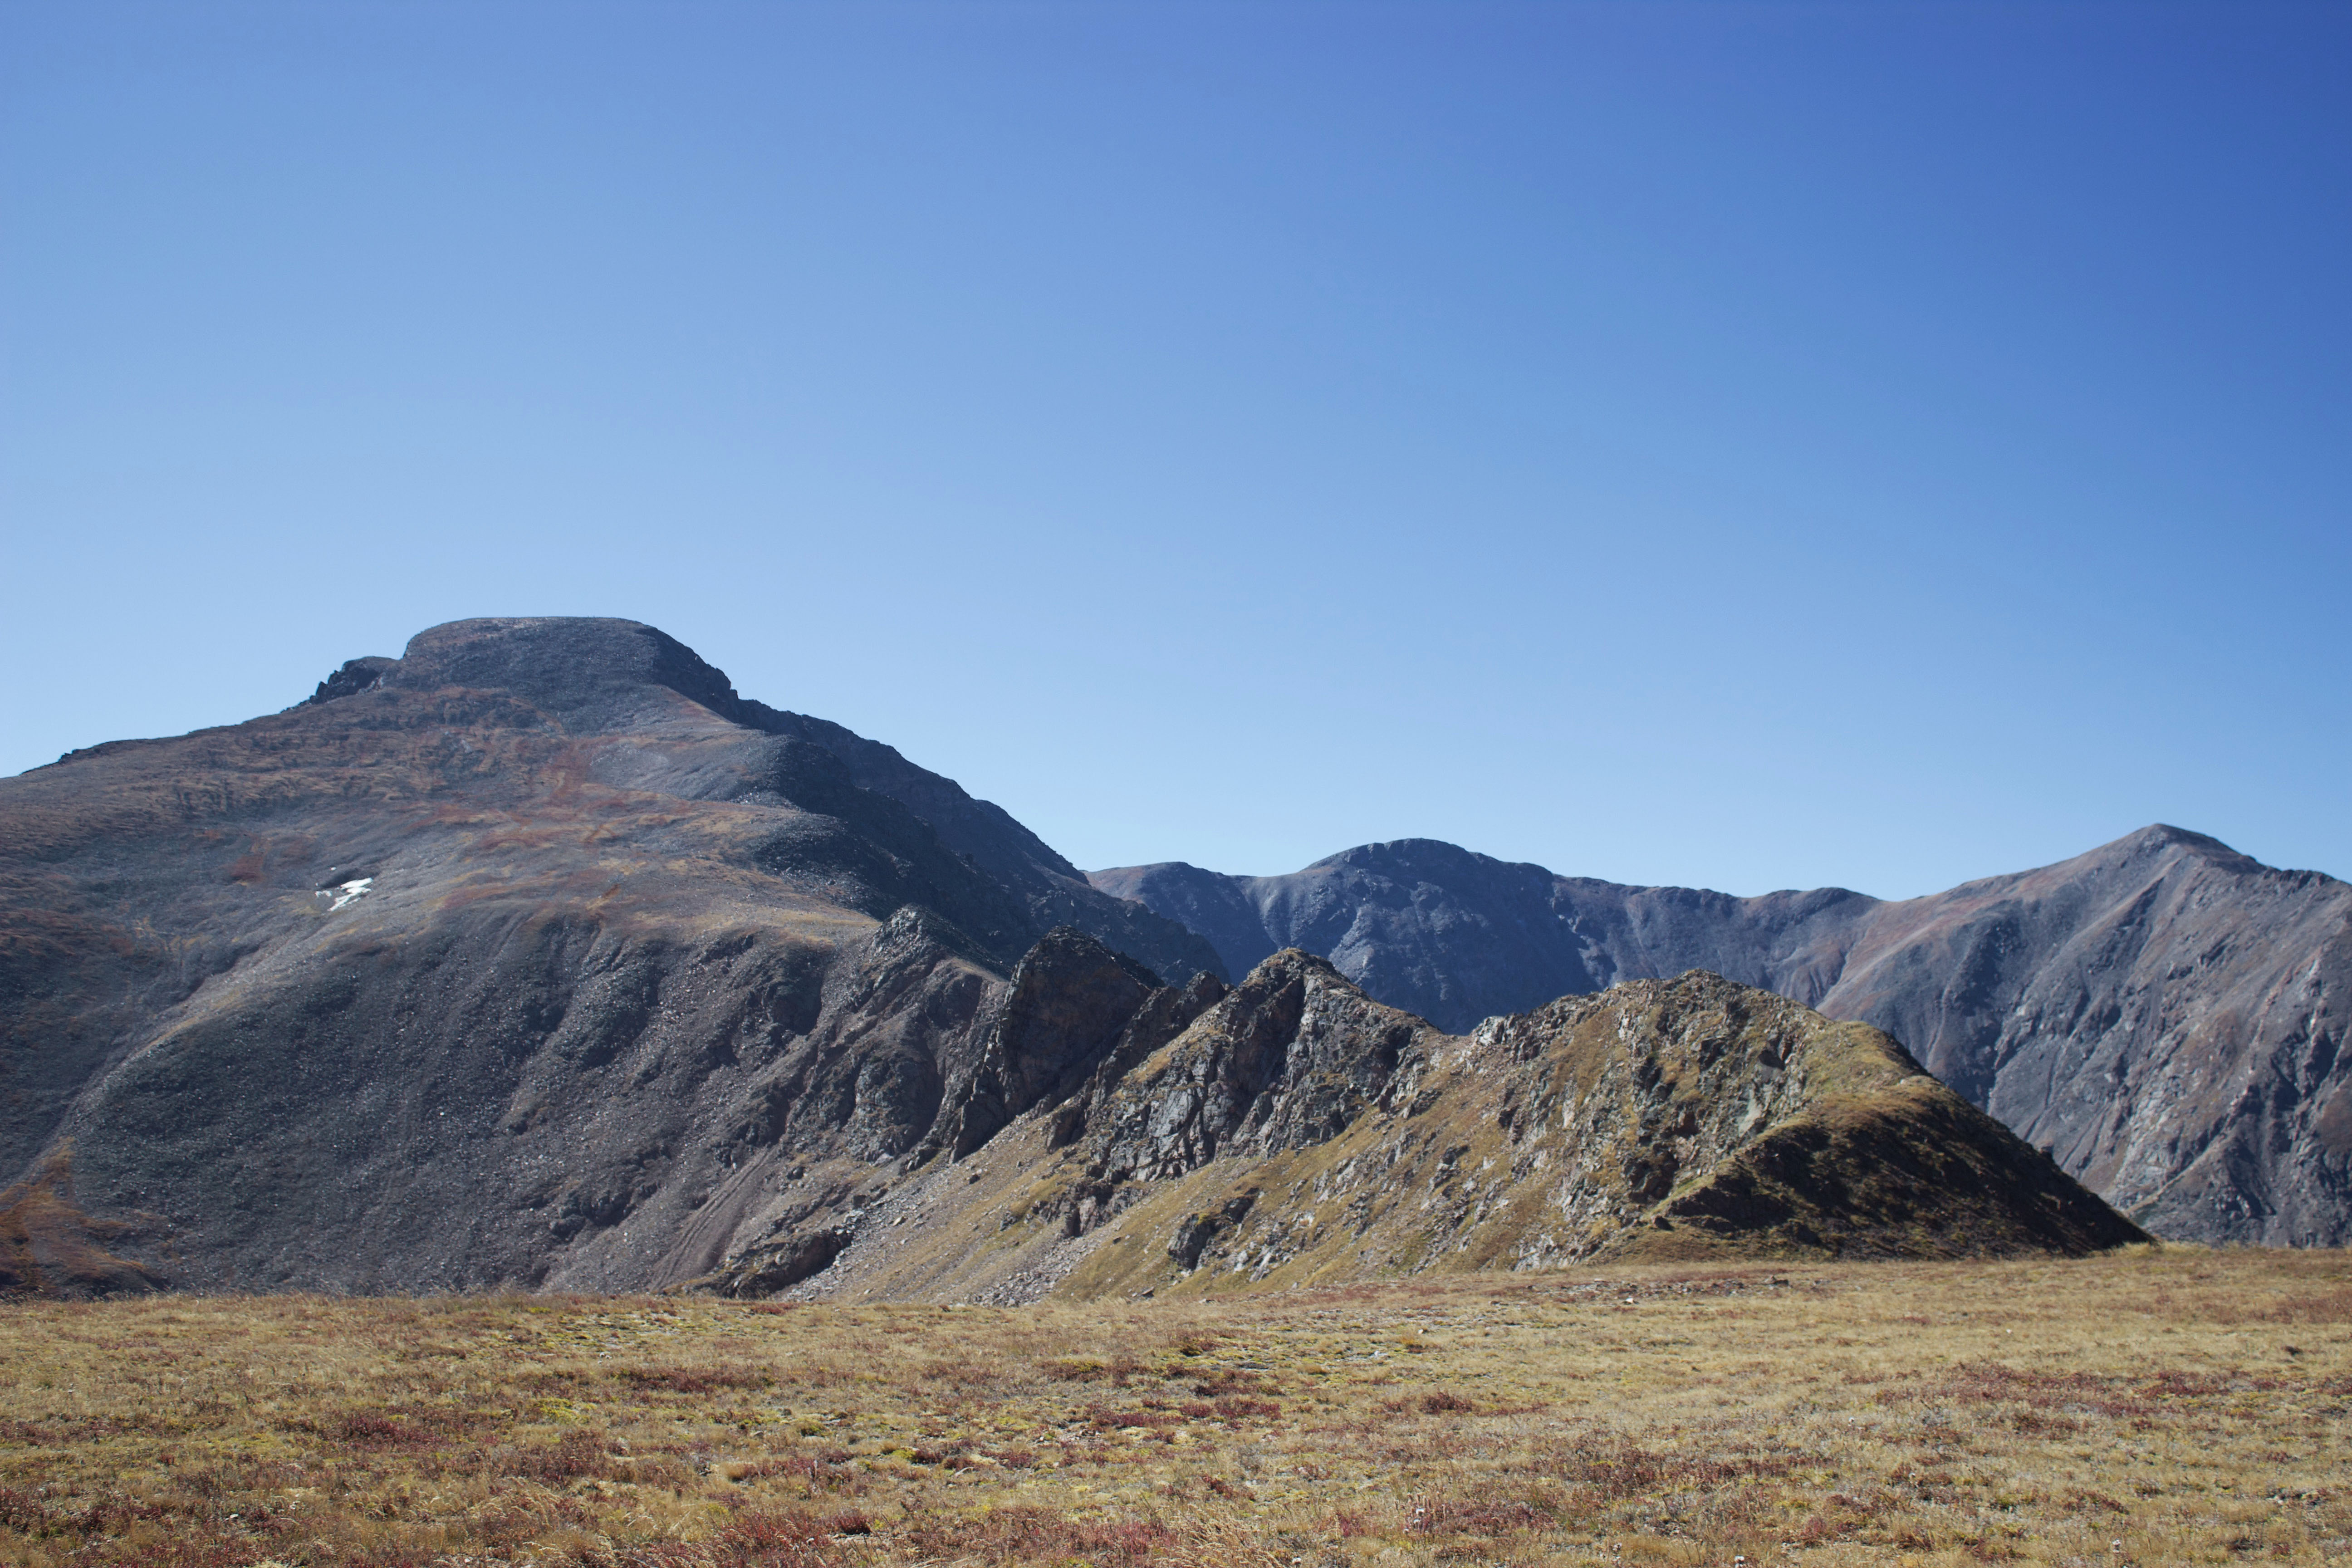
The trail to Mount Democrat (the leftmost peak)
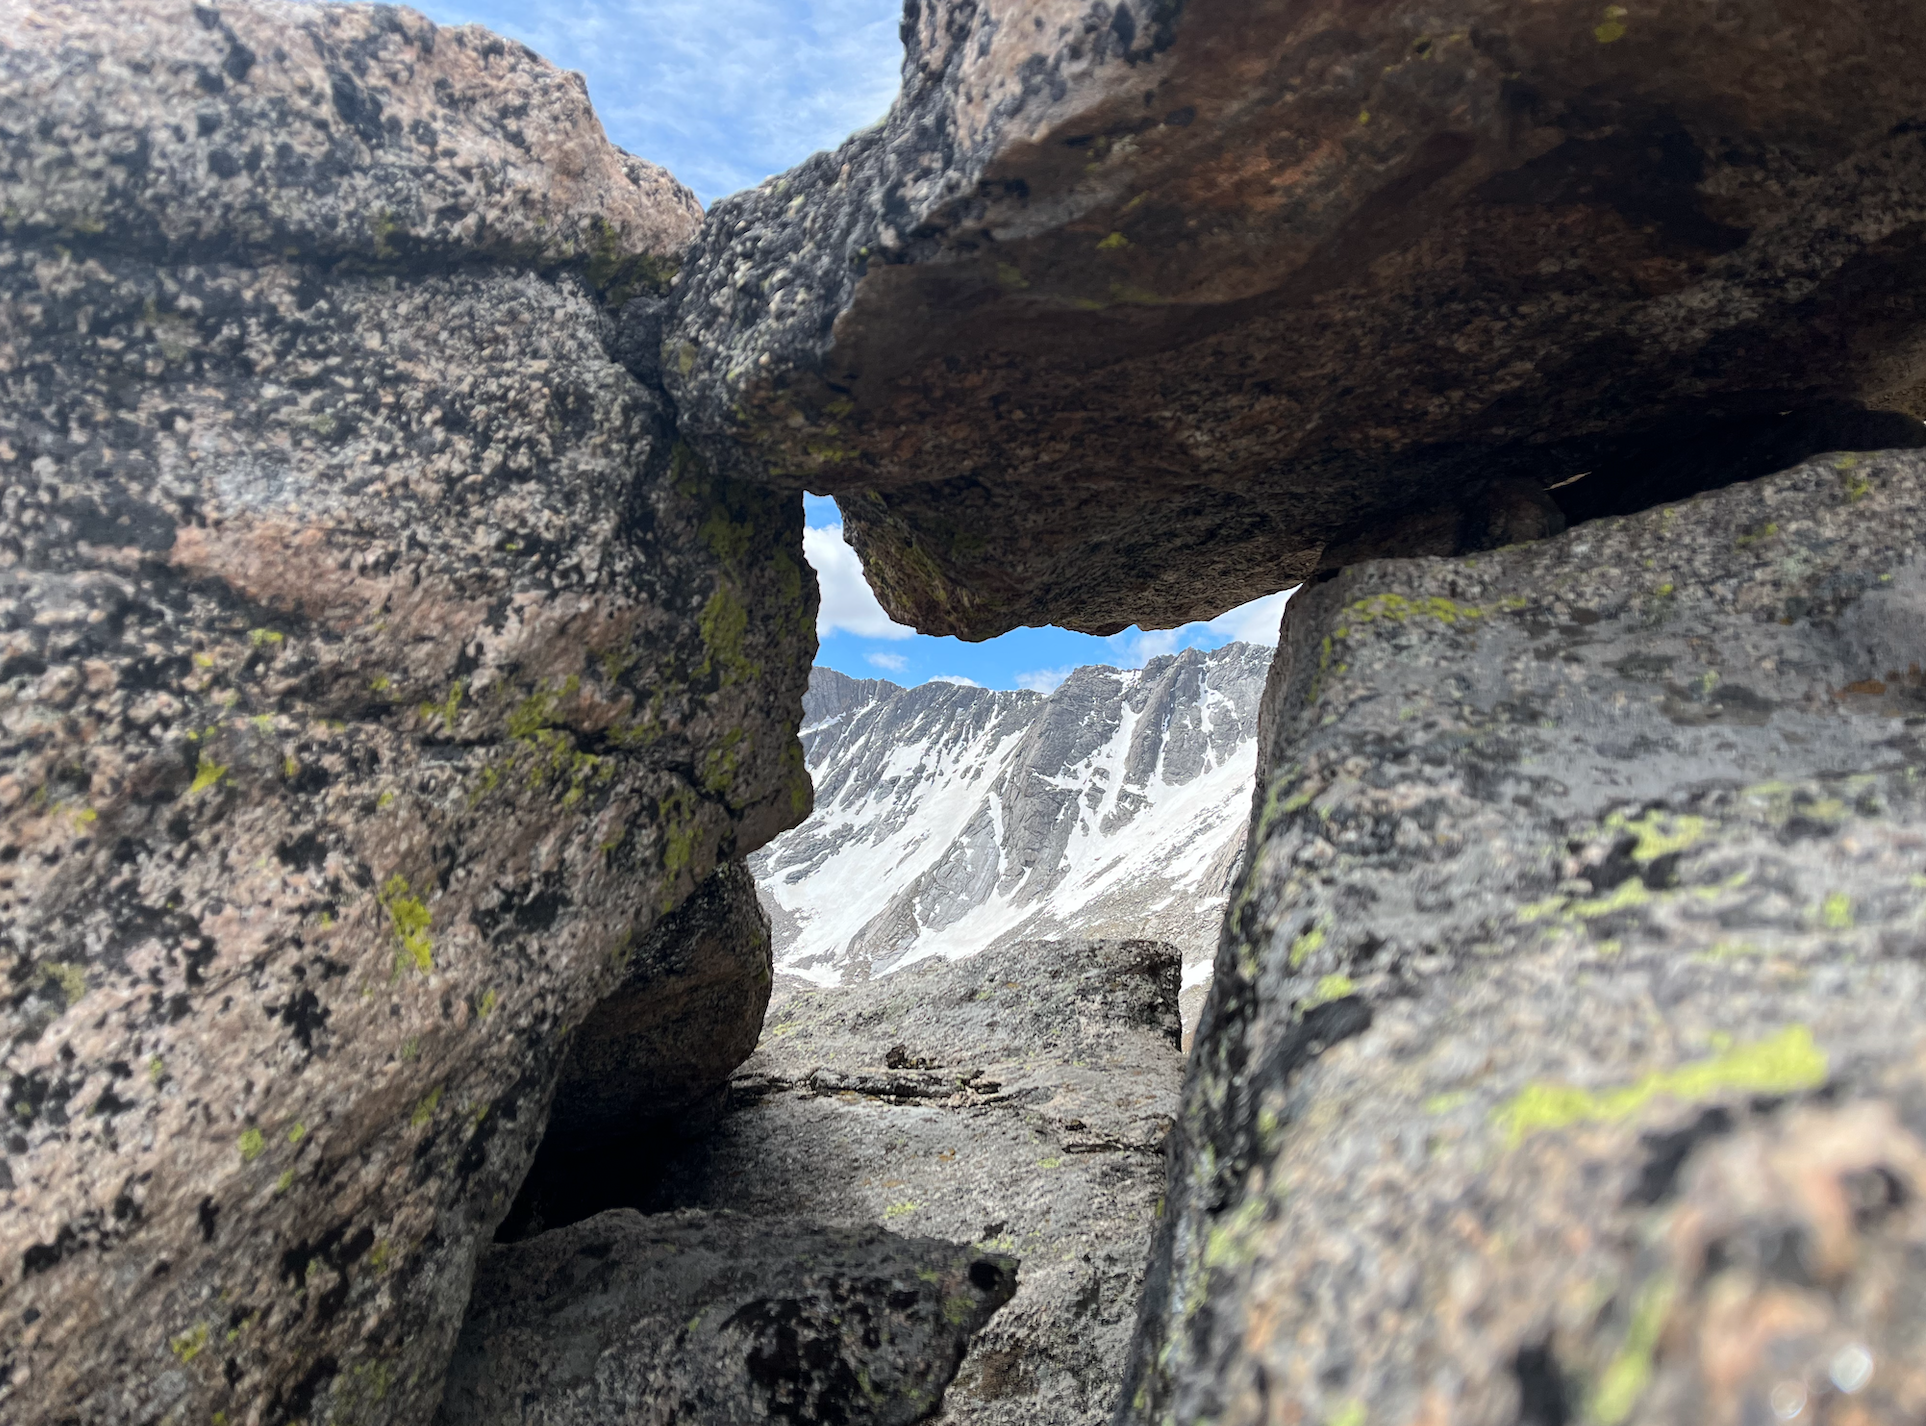
The trail to Mount Democrat begins at Kite Lake Trailhead, which sits at 12,000′ in elevation, and meanders upward as you near the base of Democrat. You start gaining elevation almost as soon as you leave the trailhead, so don’t expect much of a warmup for this hike! You’ll eventually reach a saddle between Mount Democrat and Mount Cameron, which is a good place to catch your breath.
Views from the saddle between Mount Democrat and Cameron
From the saddle, the trail turns into rocky switchbacks as you begin the final ascent up to the summit. There is a false summit before a short stretch of relatively flat trail that leads you up the last 100′ or so to the actual summit of Mount Democrat. From here, you’ll be rewarded with incredible sweeping views of the surrounding mountains.
The summit of Mount Democrat
I decided to head back to the car after Democrat while the rest of my group pushed on to complete the full loop. On the way down, I encountered a family of mountain goats which was a real treat to see! In total, the hike from Kite Lake Trailhead to Mount Democrat ended up being about four miles in length with over 2,000′ of elevation gain. The hike was tough but relatively short and sweet, and I’m so glad we all got to summit together.
Mountain goats and a view of Kite Lake
I’m super proud that the rest of my group pushed on and completed the DeCaLiBron Loop. Their pictures looked amazing and they all had a blast, but they did agree the descent off Bross was pretty brutal and unpleasant. I can’t wait to return and finish the loop for myself by summiting Cameron, Lincoln, and Bross!
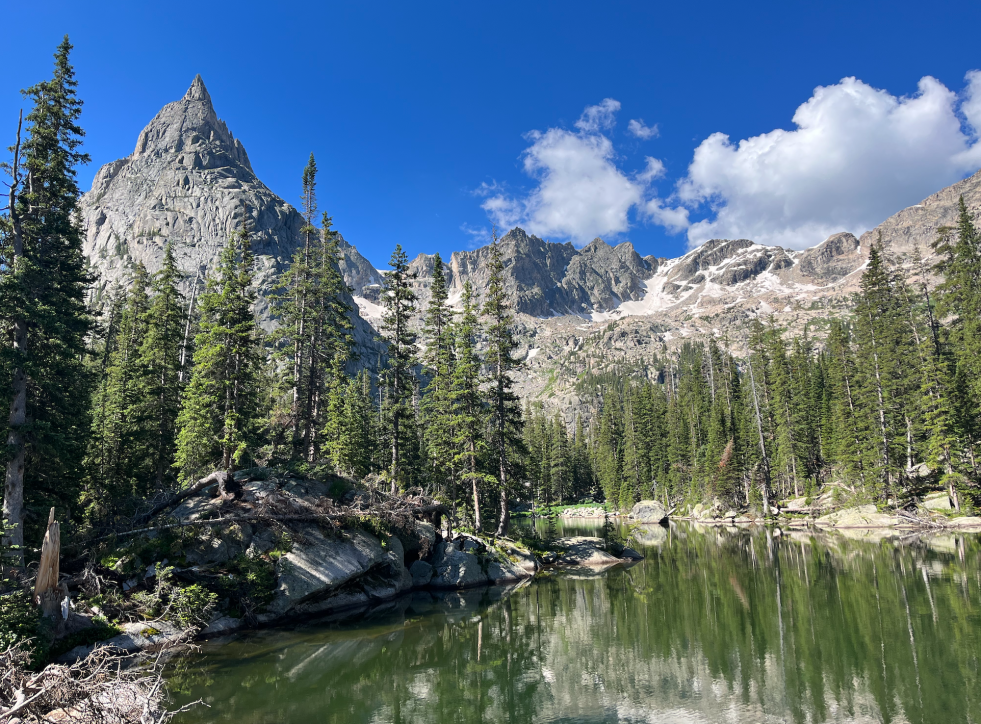
When I first heard of the Cascade Creek Trail to Mirror Lake and Crater Lake hike, I knew it was a challenge I wanted to take on in 2022. The scenery looked so surreal and picturesque that I set a goal to experience this hike for myself before the summer was over! The hike to Crater Lake is about 7.5 miles one-way, and most people opt to camp overnight before making the return trip. Unfortunately, all of the camping permits were booked up for days I was free to camp, so I decided to take on the additional challenge of doing the entire 15 miles in one day (and I dragged my husband and dog along as well). With around 2300′ of elevation gain in total, I figured the hike would be challenging but doable if we got an early enough start – and it ended up being quite the adventure!
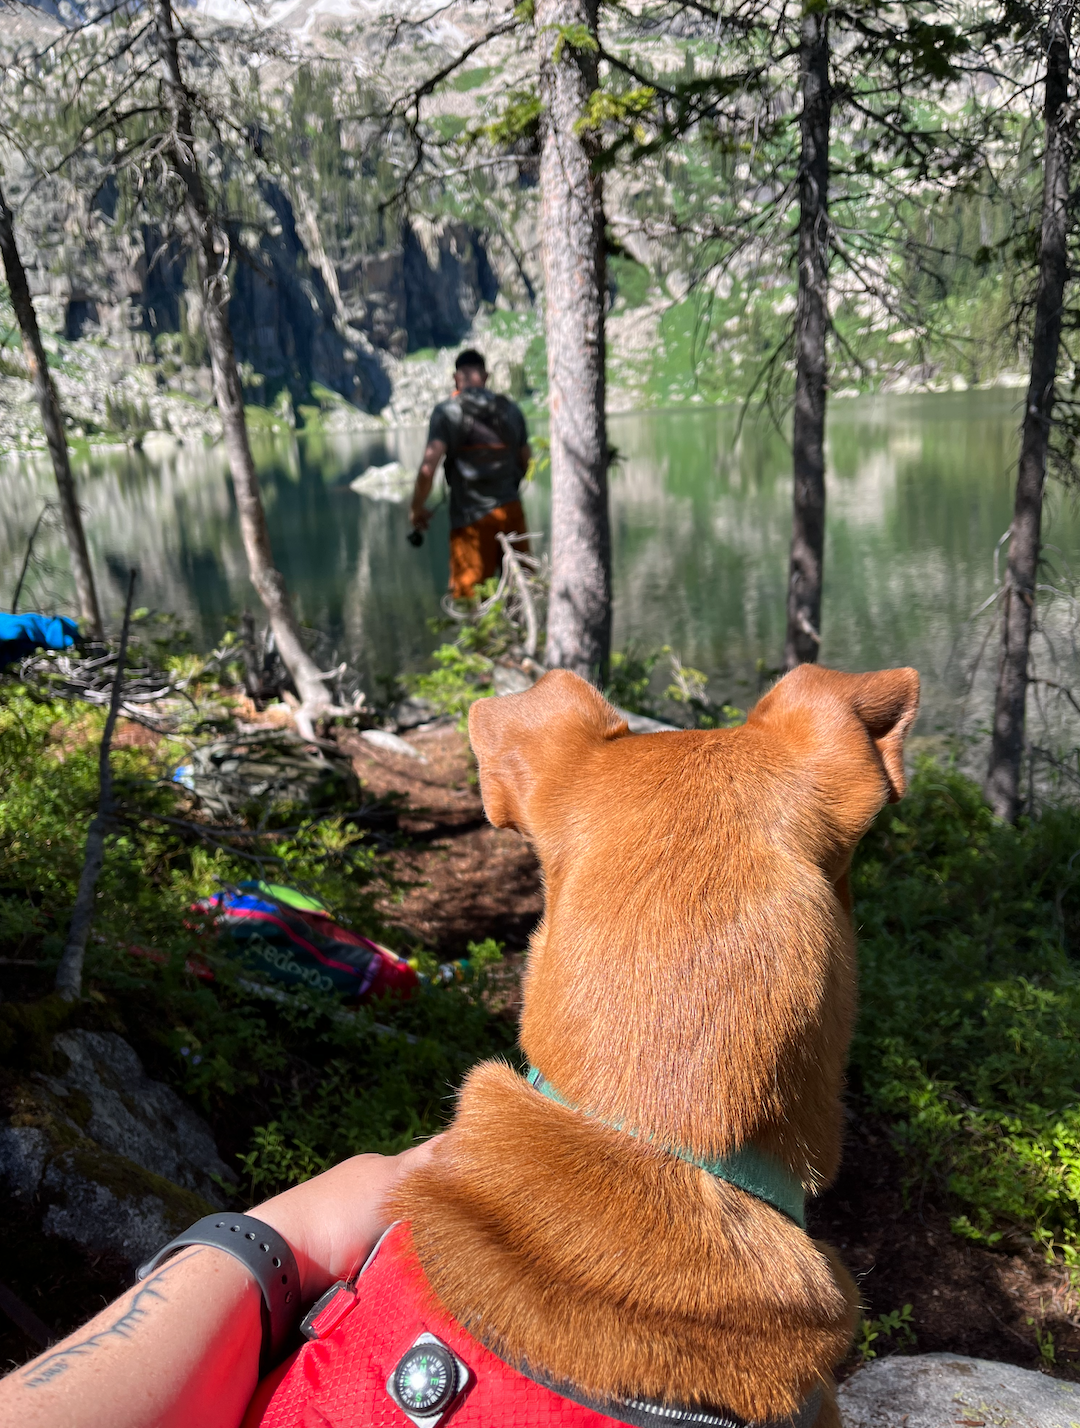
We decided to car camp at the Monarch Lake Trailhead the night before so we could get a full night’s rest and a super early start. Monarch Lake Trailhead is located in Indian Peaks Wilderness, and you will need to purchase a parking pass in advance or at the trailhead itself. Our dog, Willie Nelson, kept us up part of the night so we didn’t get as much sleep as we were hoping for, but we still managed to hit the trail around 6am.
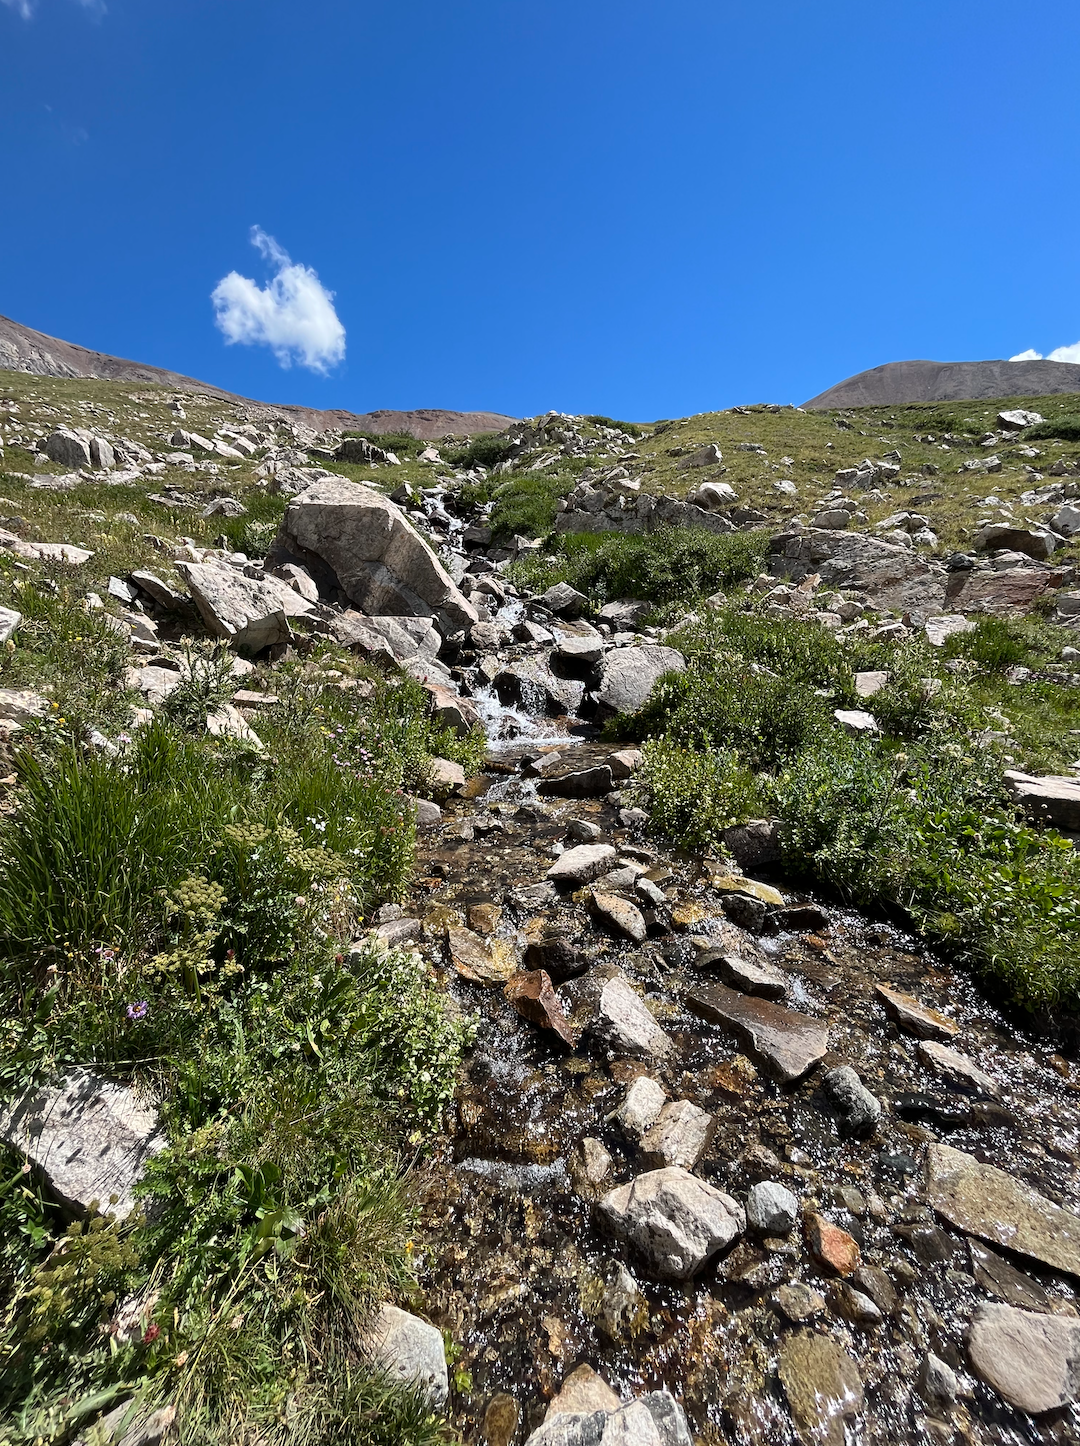
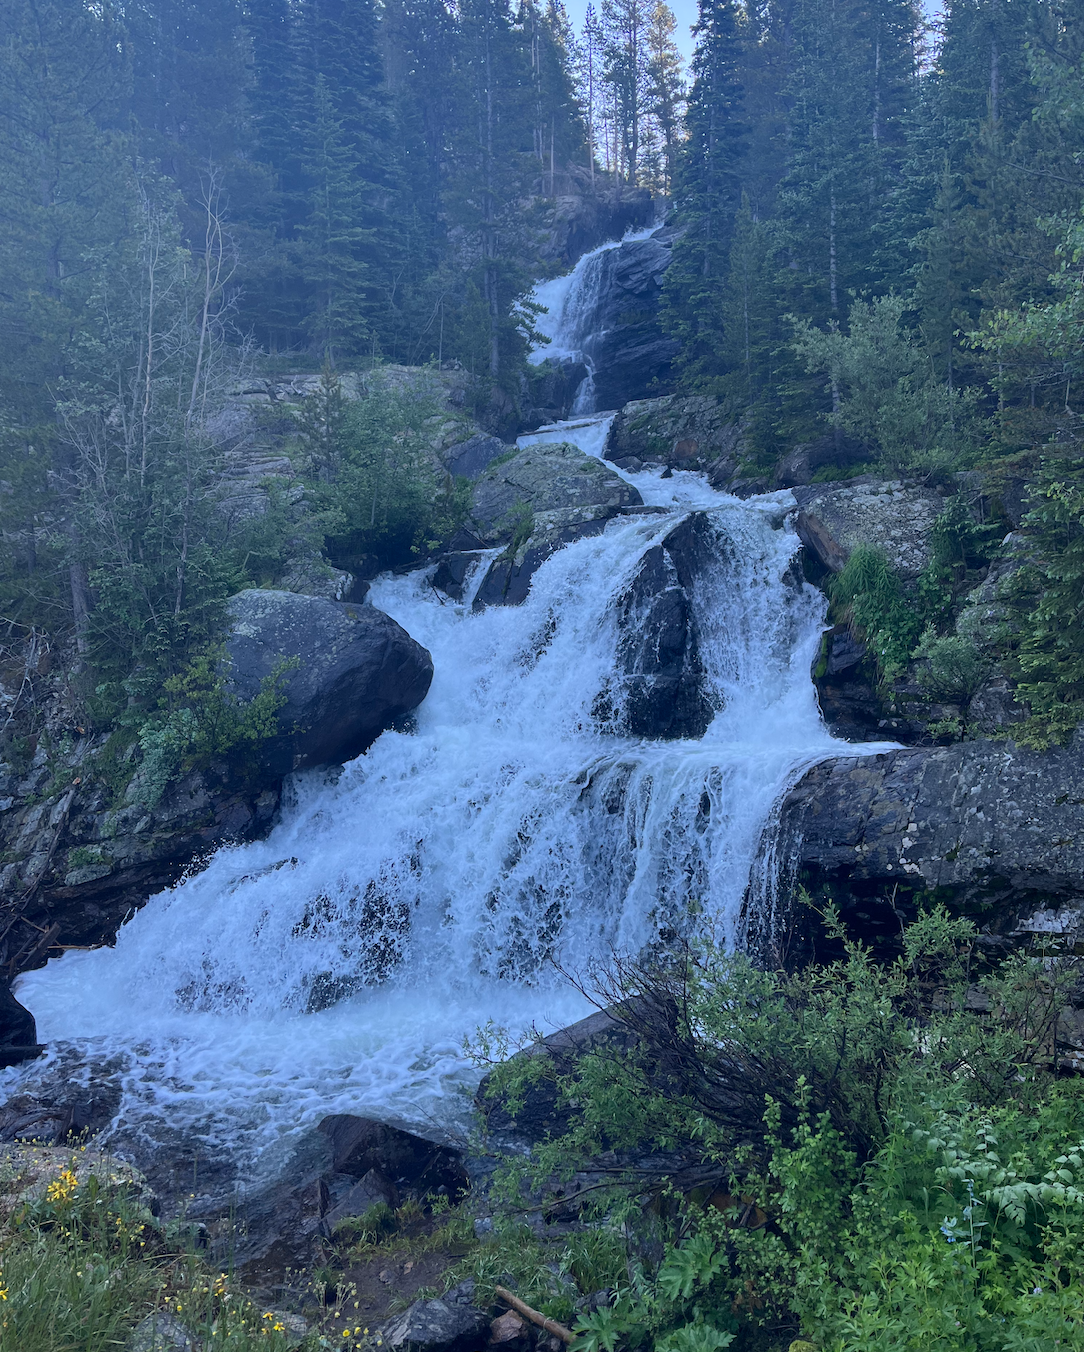
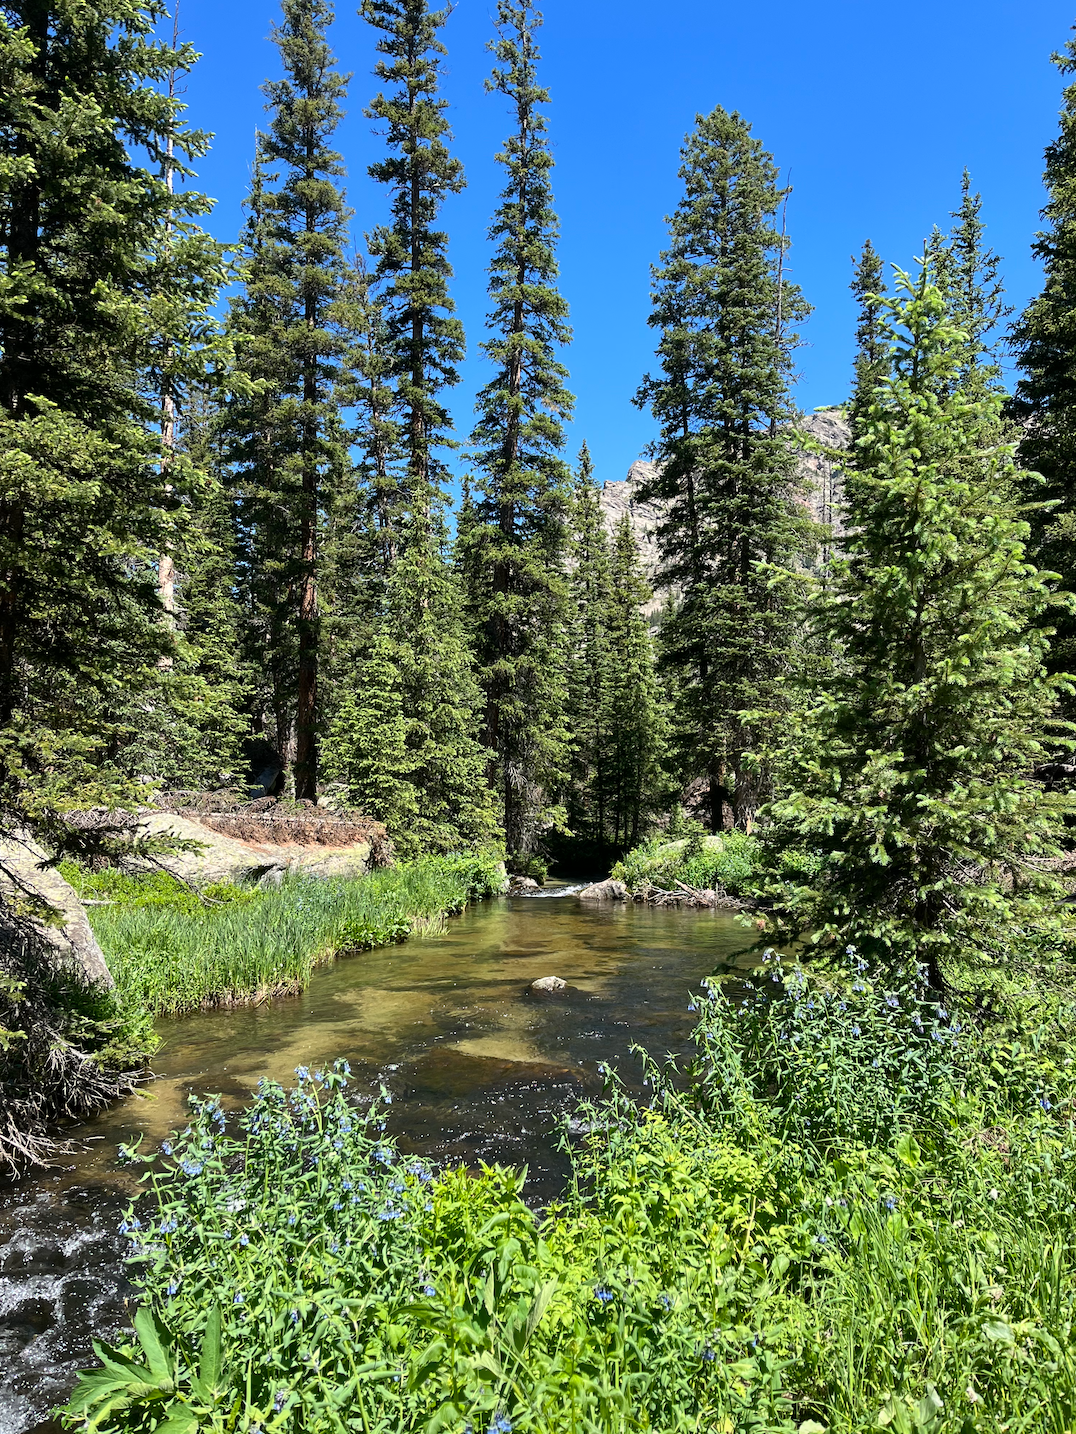
The first 1.5-2 miles are relatively flat and a great warmup for the rest of the trail. You’ll meander through forests as you skirt around Monarch Lake before the trail gradually begins to ascend switchbacks as it follows Cascade Creek. There are a number of river crossings and waterfalls along the trail which made the entire journey super scenic – and our pup loved the constant supply of water!
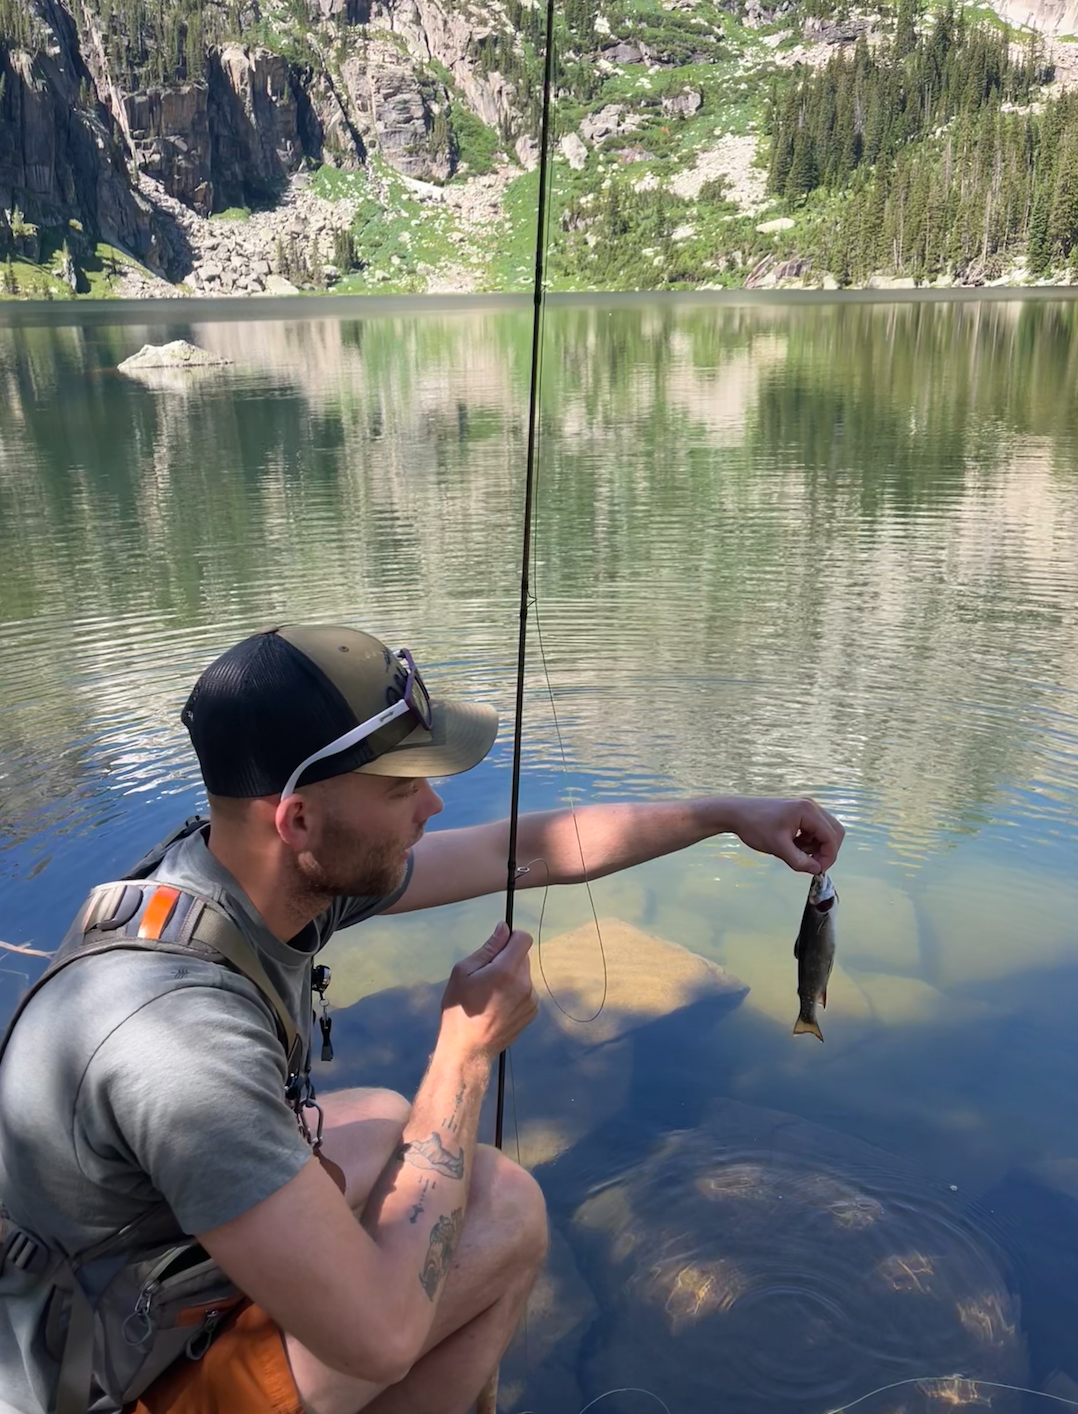
At around 4.5 miles you’ll encounter Cascade Falls, an especially impressive waterfall that is a great place for a quick break. The last 3 miles or so of the trail are a bit more challenging as you alternate hiking through forests and meadows. The last mile to Mirror and Crater Lakes is steep, but so worth it as the lakes and Lone Eagle Peak come into view. The jagged mountains and crystal clear water were so unreal to see in person. There’s even fishing allowed at the lakes, and my husband managed to snag a small trout at Crater Lake!
We made really good time on the hike to Crater Lake, averaging 25-30 minutes per mile. After an hour-long rest at the lake we refueled wth snacks and water, reapplied sunscreen and bug spray (a definite must) and began the journey back. We continued to make great time for the first 5 miles or so on the way back to the car, but the last 3 miles really dragged on because the sun was beating down on us and our feet (and Willie’s paws) were starting to get sore. The last push around the edge of Monarch Lake seemed neverending, and we rejoiced once we finally stumbled upon the trailhead.
All in all, this hike was definitely a challenge, but so worth it. I haven’t done a day hike of this length in several years, so I was really happy that we made such great time. The elevation gain is challenging in some sections of the trail, but overall fairly moderate. I would have definitely loved to experience camping at Crater Lake, but this hike is very popular and permits tend to book up pretty far in advance. If you haven’t checked out Cascade Creek Trail to Mirror Lake and Crater Lake, I highly recommend paying it a visit!
Today I’m really excited to be sharing a review of some RightOnTrek backpacking meals! RightOnTrek was kind enough to reach out to me and send over some of their meals for me to taste-test and review. I got to try the vegan shepherd’s stew, mac and cheese, backcountry chili, and high country pad thai, and I was really impressed wih all of them!
RightOnTrek was founded in 2018 by a group of backpackers after they completed the 200+ mile long John Muir Trail in California. The company is based in Montana and specializes in making the backcountry more accessible for hikers and backpackers. For being a relatively small company, they have an impressive variety of backpacking meal options, with plenty of allergy-friendly meals as well!
The first meal I tried was their mac and cheese, which was actually rated the #1 mac and cheese by Backpacker Magazine! I can definitely see why – the mac and cheese was super creamy and flavorful, and very filling as well.
Next up, I tried their vegan shepherd’s stew meal. I was really happy to see that RightOnTrek offers vegetarian/vegan meals, as many backpacking meal companies aren’t so accommodating. The vegan shepherd’s stew was really hearty and comforting, and my fully carnivore husband enjoyed it too!
The next meal I tried was their backcountry chili. Chili is definitely a staple when it comes to backpacking meals, and RightOnTrek’s version was a great option. Like the other meals, the chili was delicious and filling, especially with the addition of the corn biscuits that came as an optional mix-in.
Finally, I sampled the high country pad thai. I actually didn’t realize the pad thai was vegetarian, and what I thought was chicken was really soy curls! The pad thai was super rich and flavorful, and definitely one of my favorites from the meals I tried. I especiaally enjoyed it with the addition of the peanut butter, sriracha, and salted cashews that RightOnTrek provided.
All in all, I was really impressed with all the RightOnTrek meals I tried. I definitely plan on stocking up next time I embark on a backpacking trip! Thanks again to RightOnTrek for sending over some meals. Let me know in the comments if you’ve ever heard of RightOnTrek, and if you’ll be trying some of their meals for yourself!