Summit Lake to Mount Evans – Colorado 14er

This past weekend I decided, a bit spontaneously, to take on the challenge of summiting a 14er, which is a mountain with a summit at 14,000+ feet in elevation. I’ve already completed three other Colorado 14ers (Mount Sherman, Mount Bierstadt, and Pikes Peak) and wanted to check off another: Mount Evans. While there’s actually a paved road leading all the way to the top of Mount Evans, there are also a variety of routes you can take to hike to the summit. I opted for the Summit Lake to Mount Evans route which is considered a moderate hike, but fairly easy compared to other Colorado 14ers. At around 5.5 miles roundtrip with 2,000′ of elevation gain, the hike is challenging but relatively beginner-friendly. This hike is also rated Class 2 out of 5, meaning it has minimal exposure/risk. Some hikers will argue that you only properly summit a 14er if the route has at least 3,000+ feet of elevation gain, but I say: hike your own hike and be proud of yourself regardless!

The trail begins at Summit Lake in Mount Evans Wilderness. You will need to purchase a $2 timed-entry reservation to park here, but if you arrive before 8am you can just display the printed reservation in your windshield, regardless of what time slot it’s for. There is also a $5/vehicle fee which you self-pay at the parking area, unless you are an interagency pass holder in which case you only have to worry about the reservation fee (display your pass in the windshield as well). More info can be found at Recreation.gov. I arrived around 6:15am and the main parking lot was already full, so I had to park in an overflow spot along the road. Mount Evans is an incredibly popular hike so if you visit on a weekend, plan to arrive as early as possible.
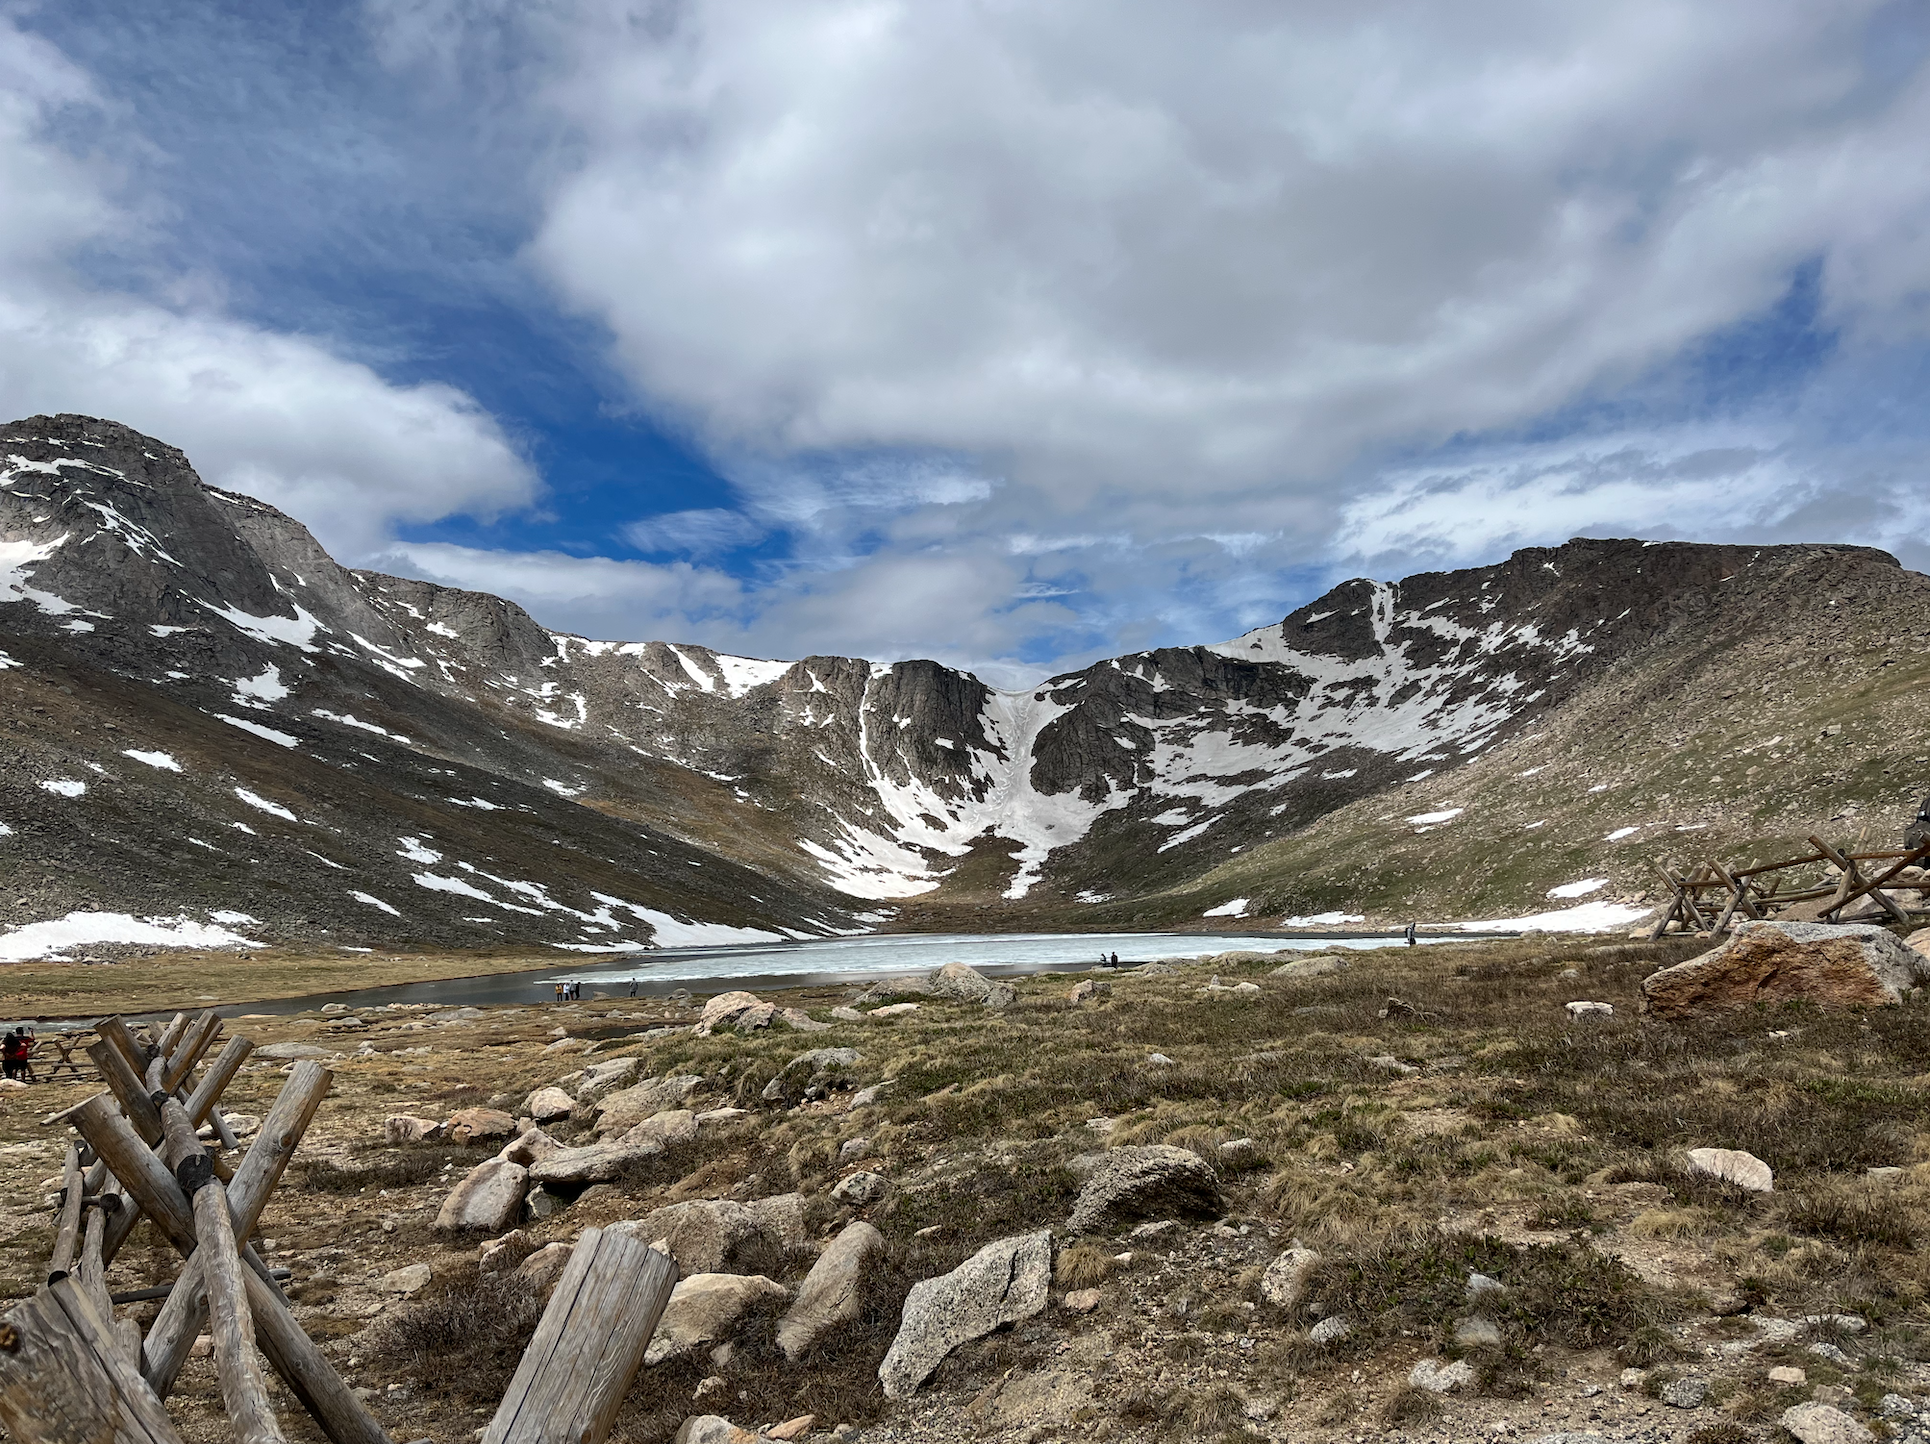
Summit Lake

From the parking area, you’ll begin on a marked trail that leads you around the lake and up to the summit of Mount Spalding, which has an elevation of 13,840′. The initial ascent out of the parking lot is almost entirely uphill, and you’ll gain around 1,000′ of elevation in about a mile. This portion of the trail is well-marked with cairns, and I had no issues sticking to the route. After around 45 minutes I made it to the summit of Mount Spalding where I stopped for a quick snack. From here, you’ll have fantastic views of Mount Evans and the surrounding mountains.

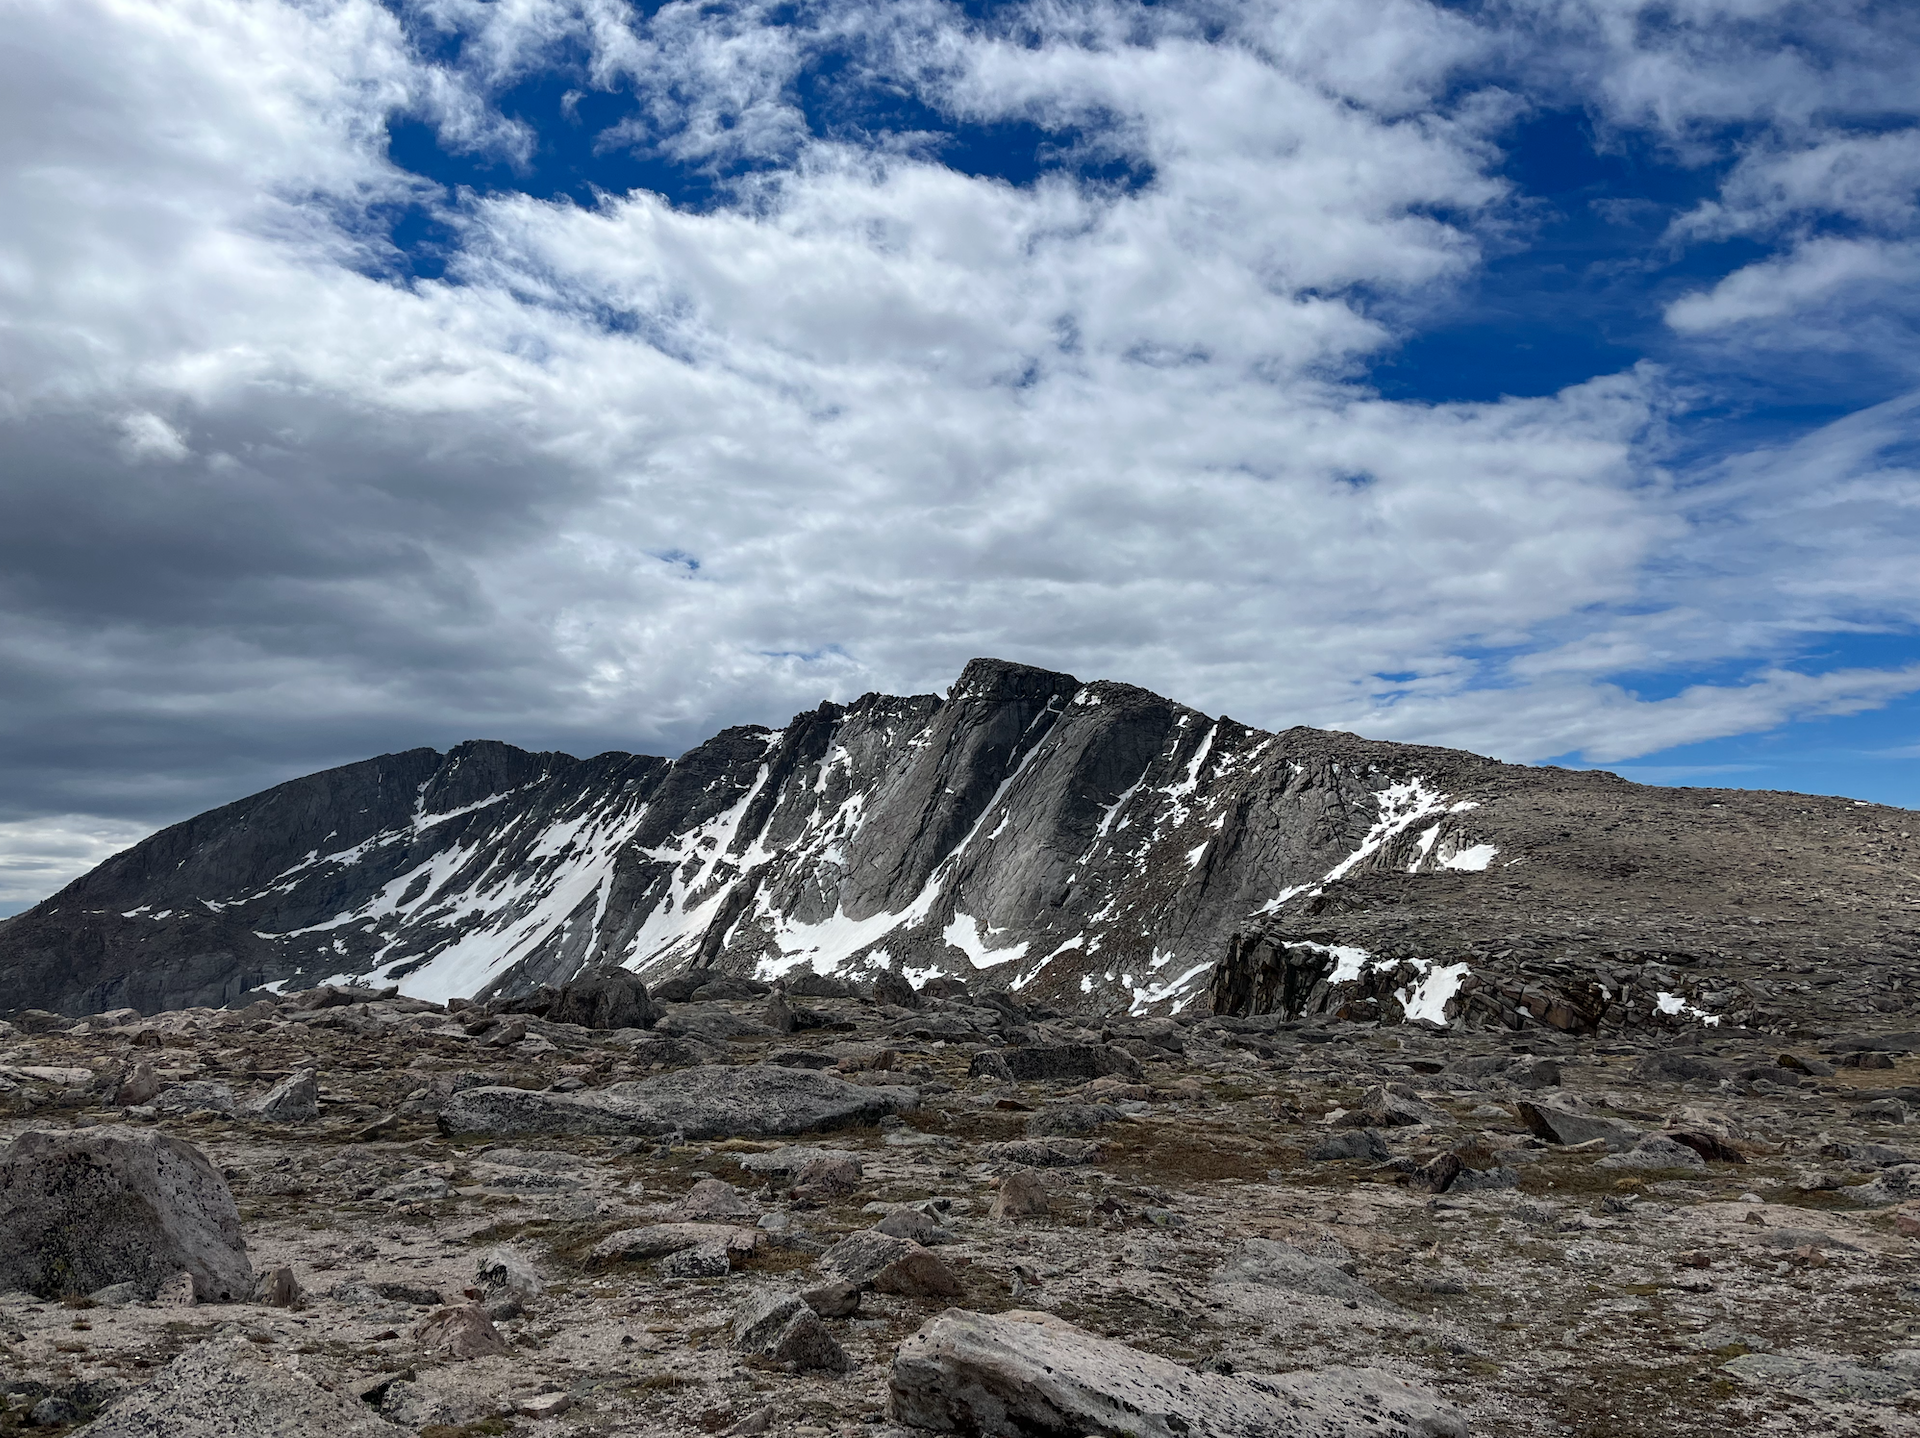
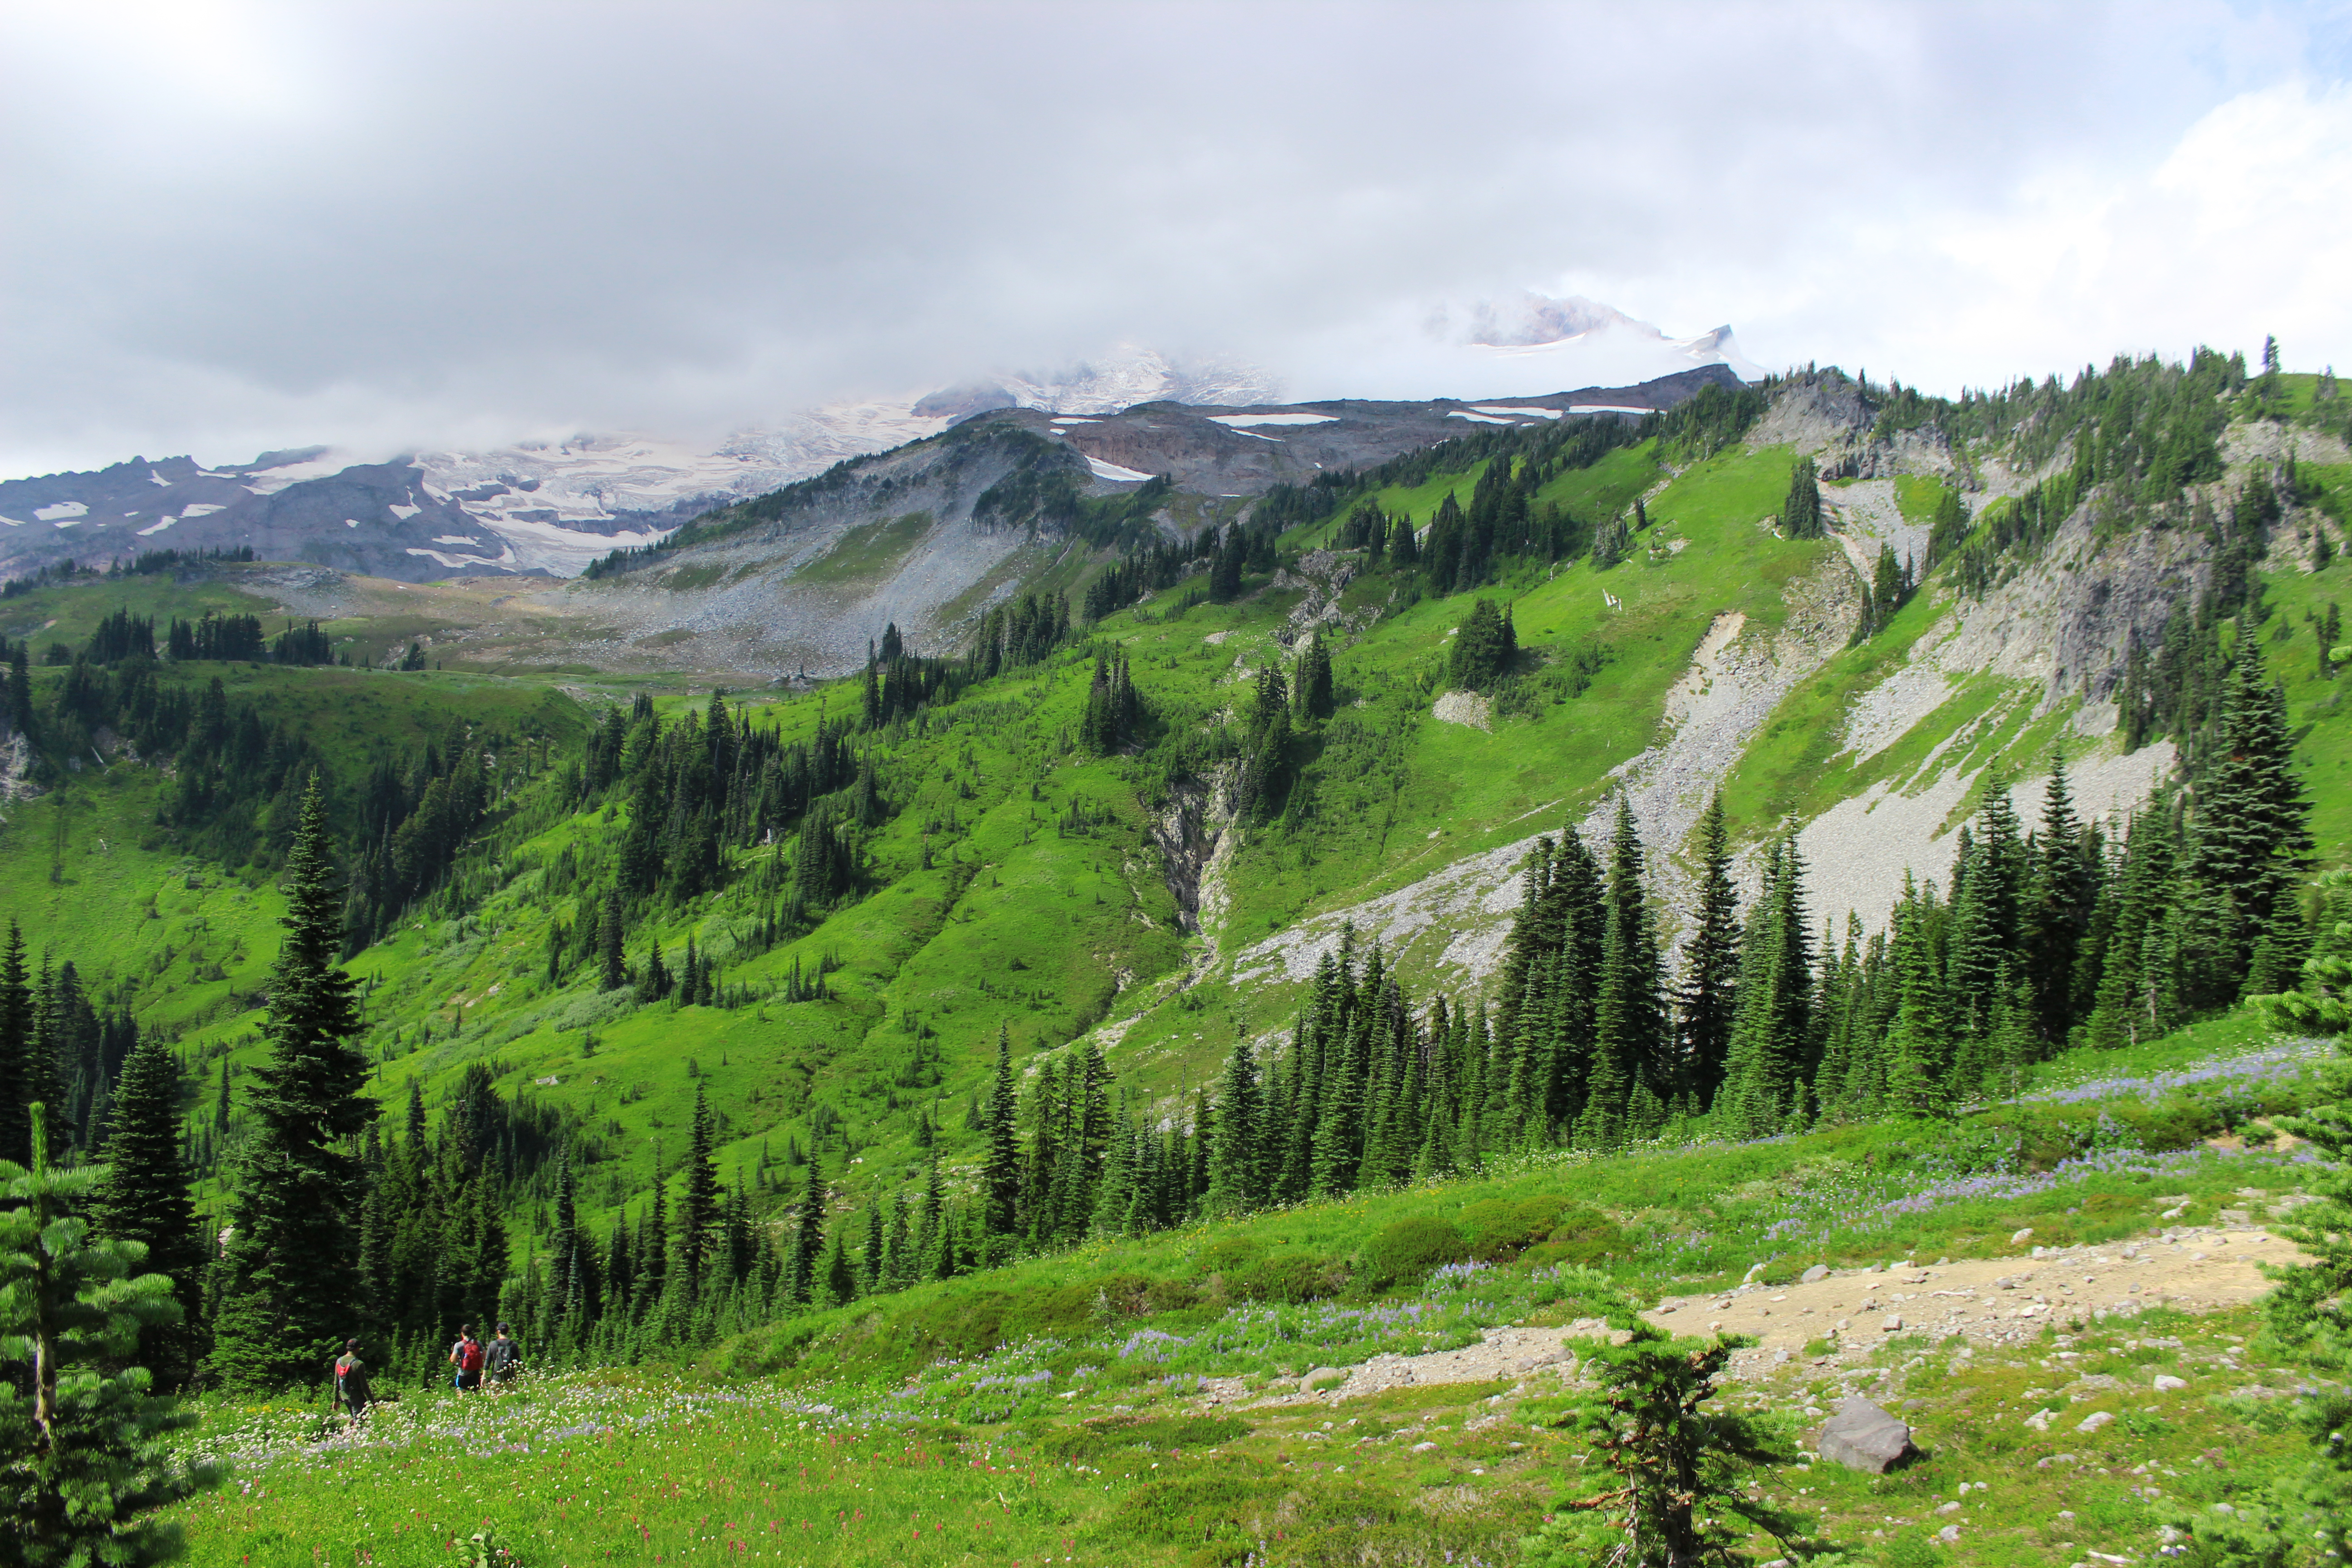
Views from Mount Spalding

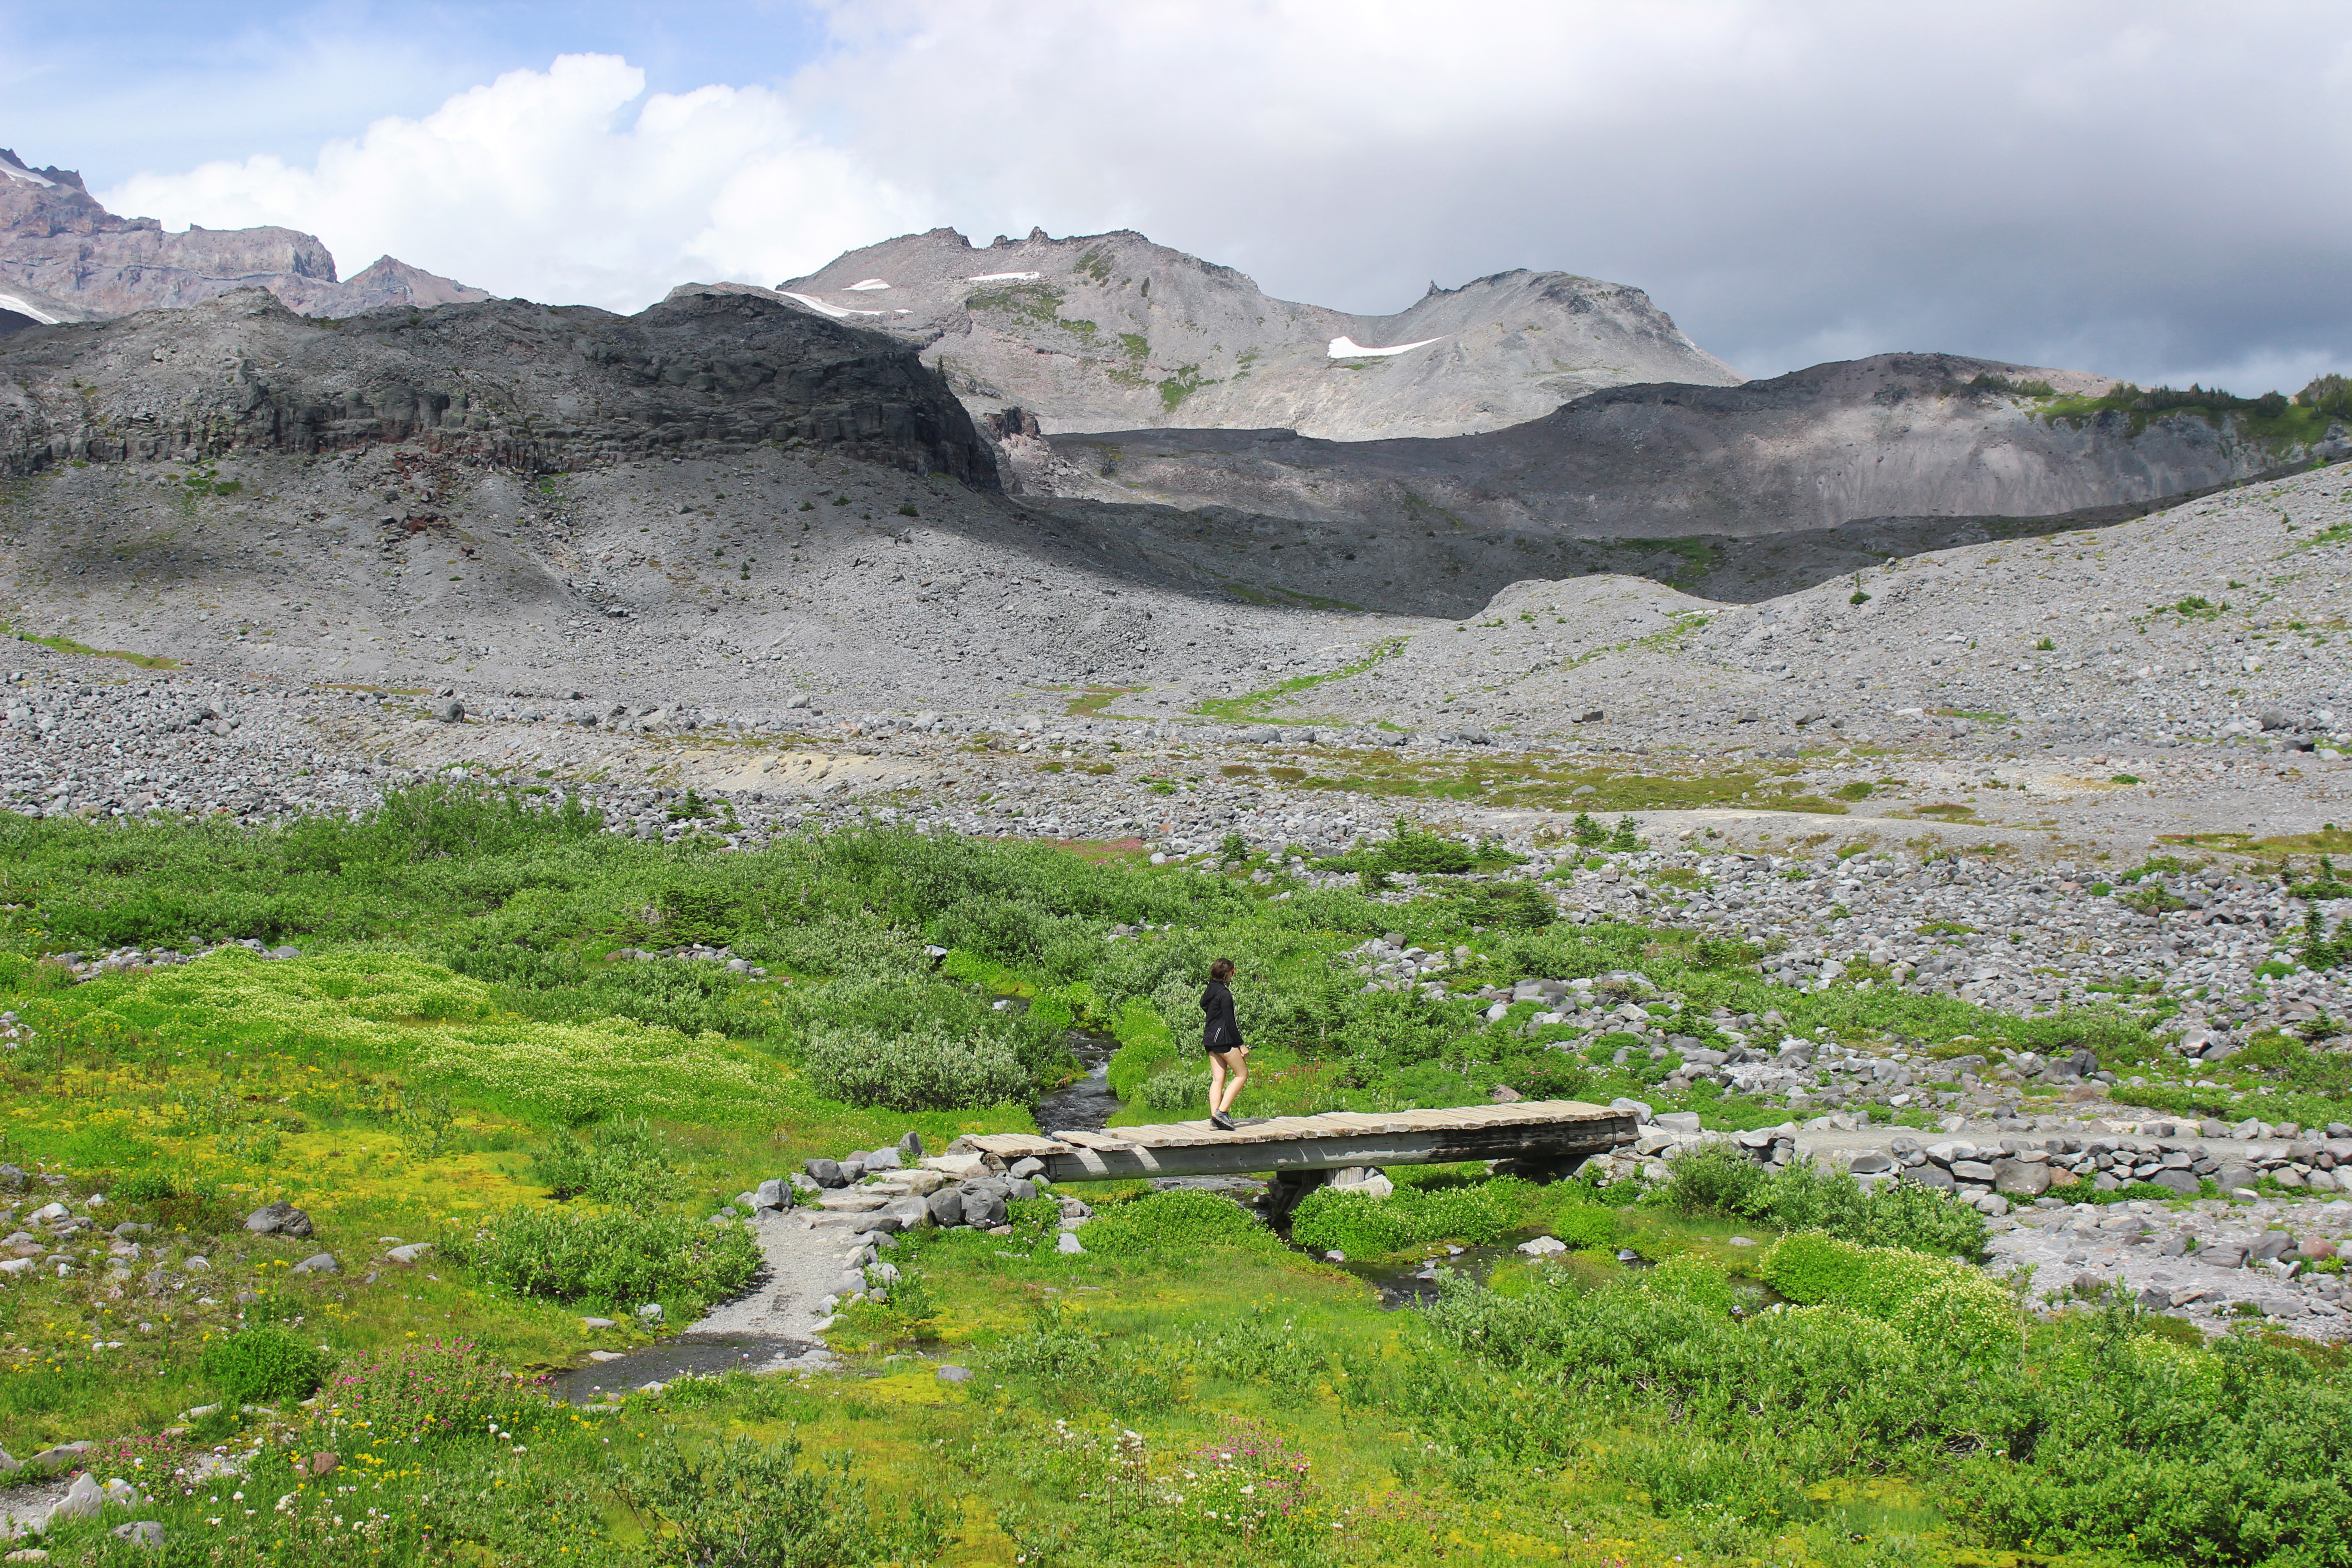
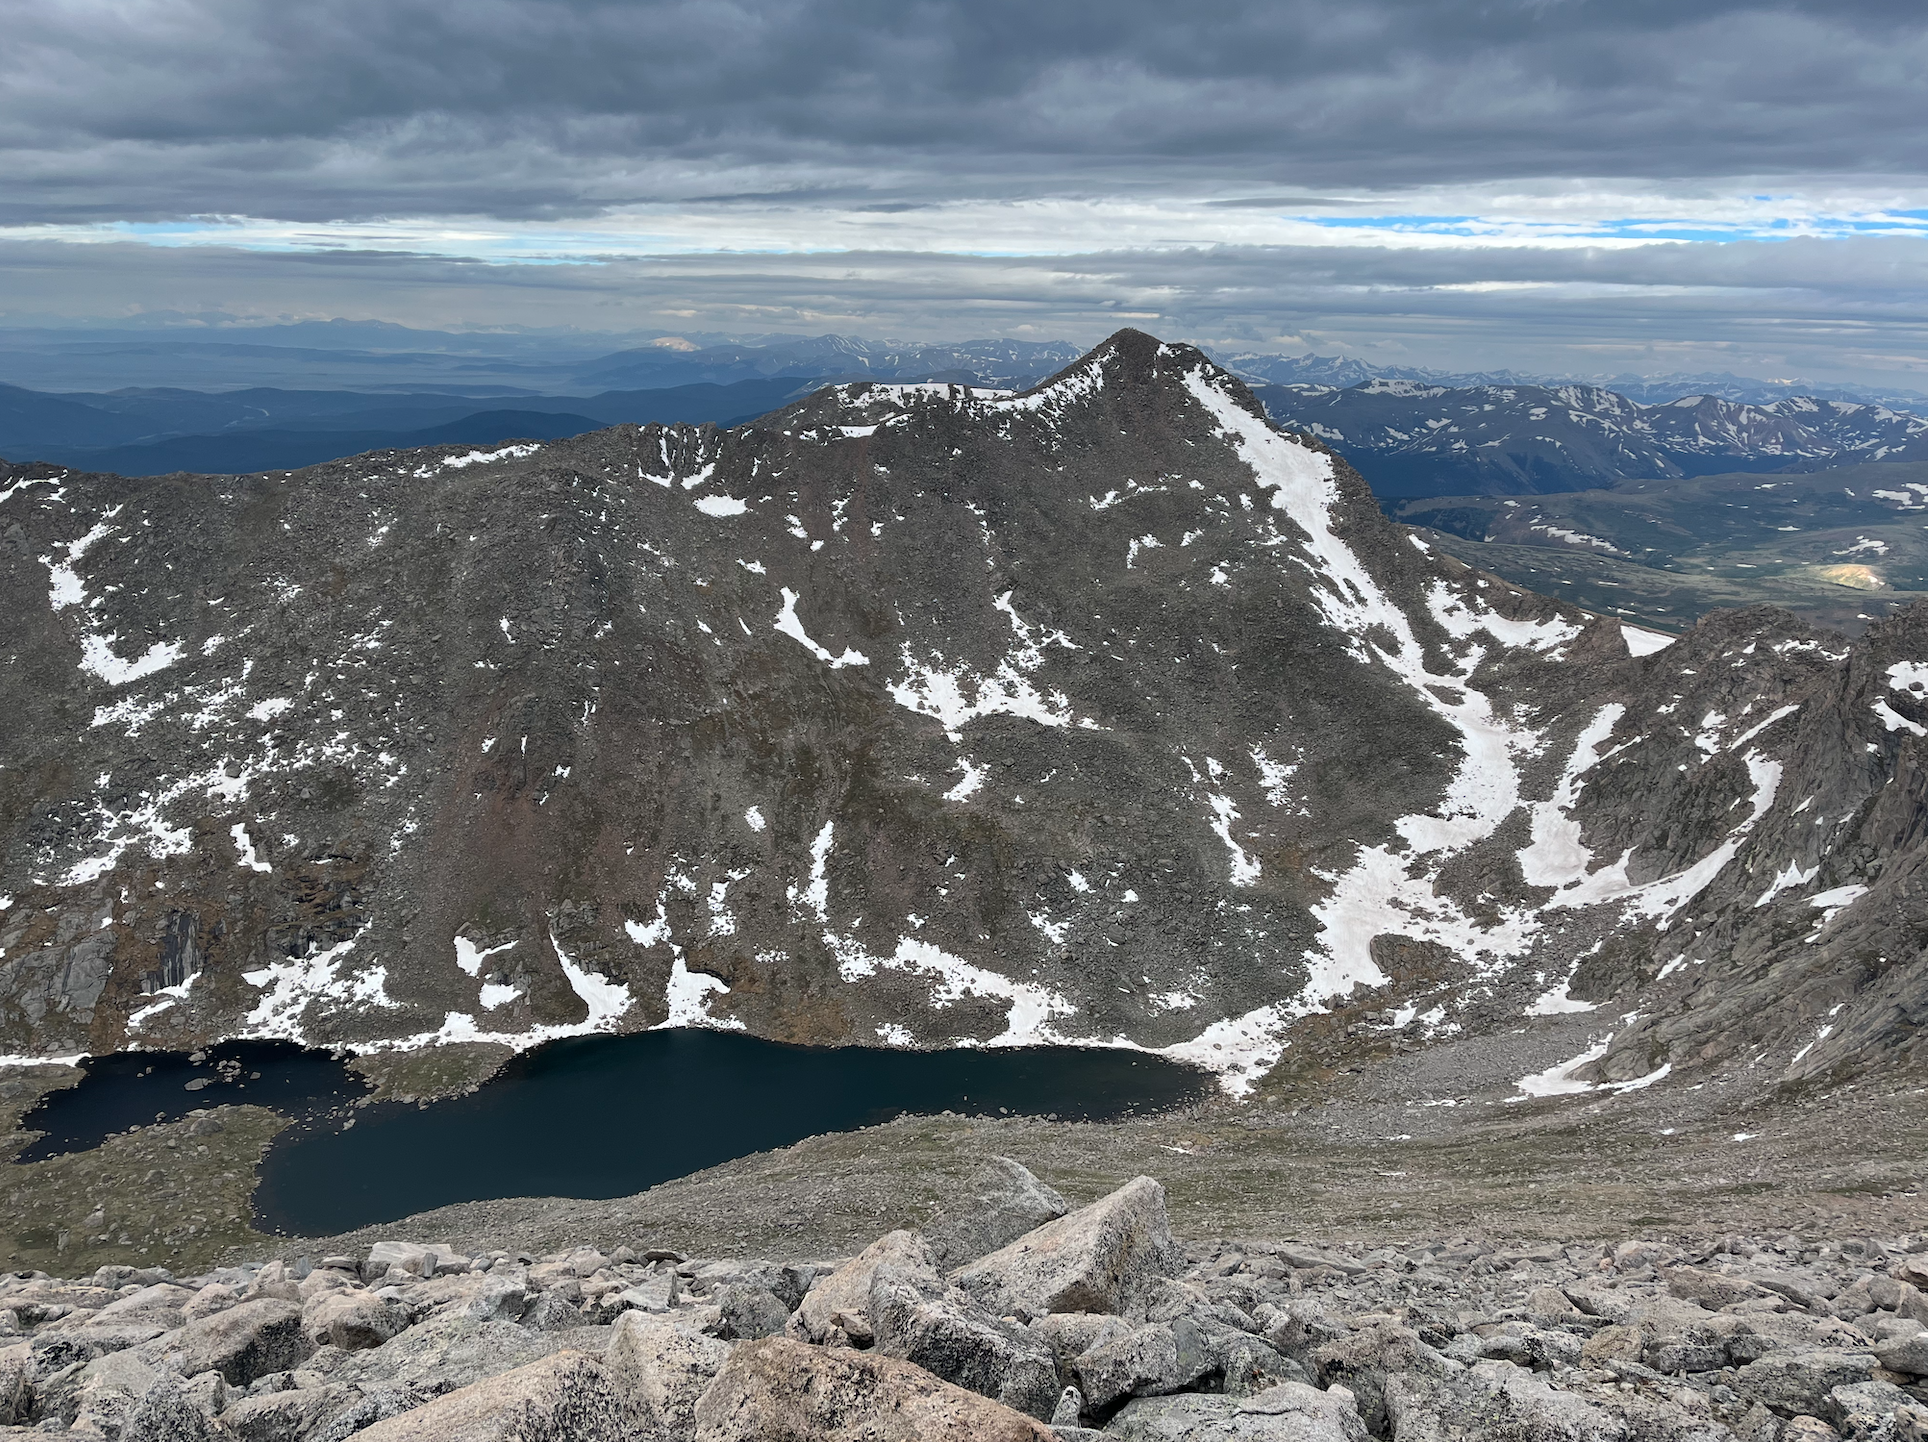
The next portion of the trail leads you down and over a saddle that will connect you with the ridge that eventually leads to the summit of Mount Evans. As of June 18 there was still a little bit of snow on the trail, but nothing too serious. The saddle is a welcome break from the ascent to Mount Spalding, and the trail is very easy to follow.

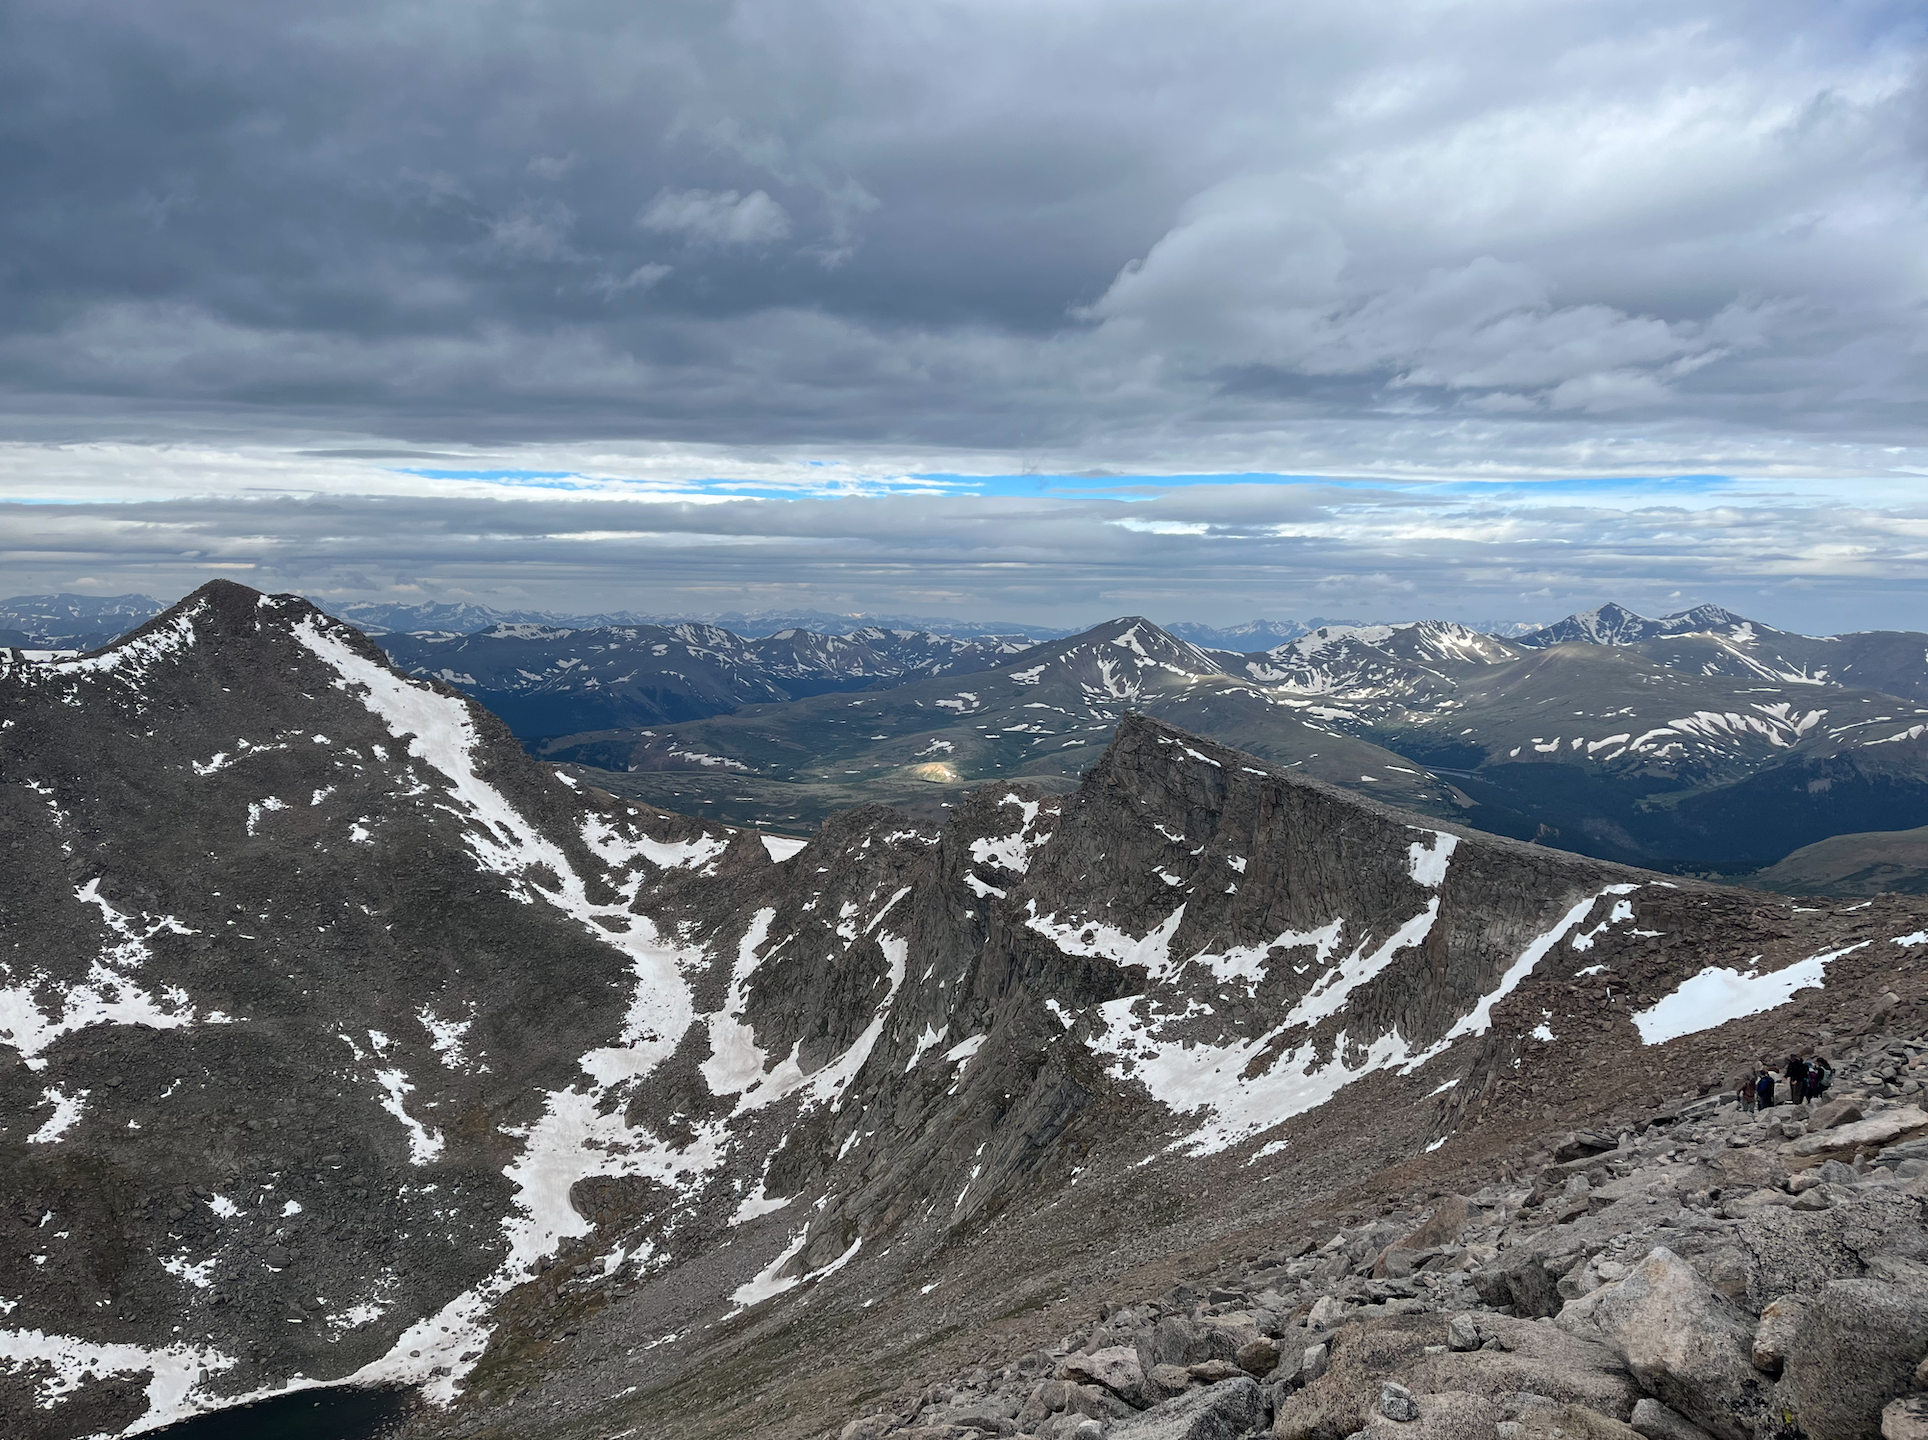
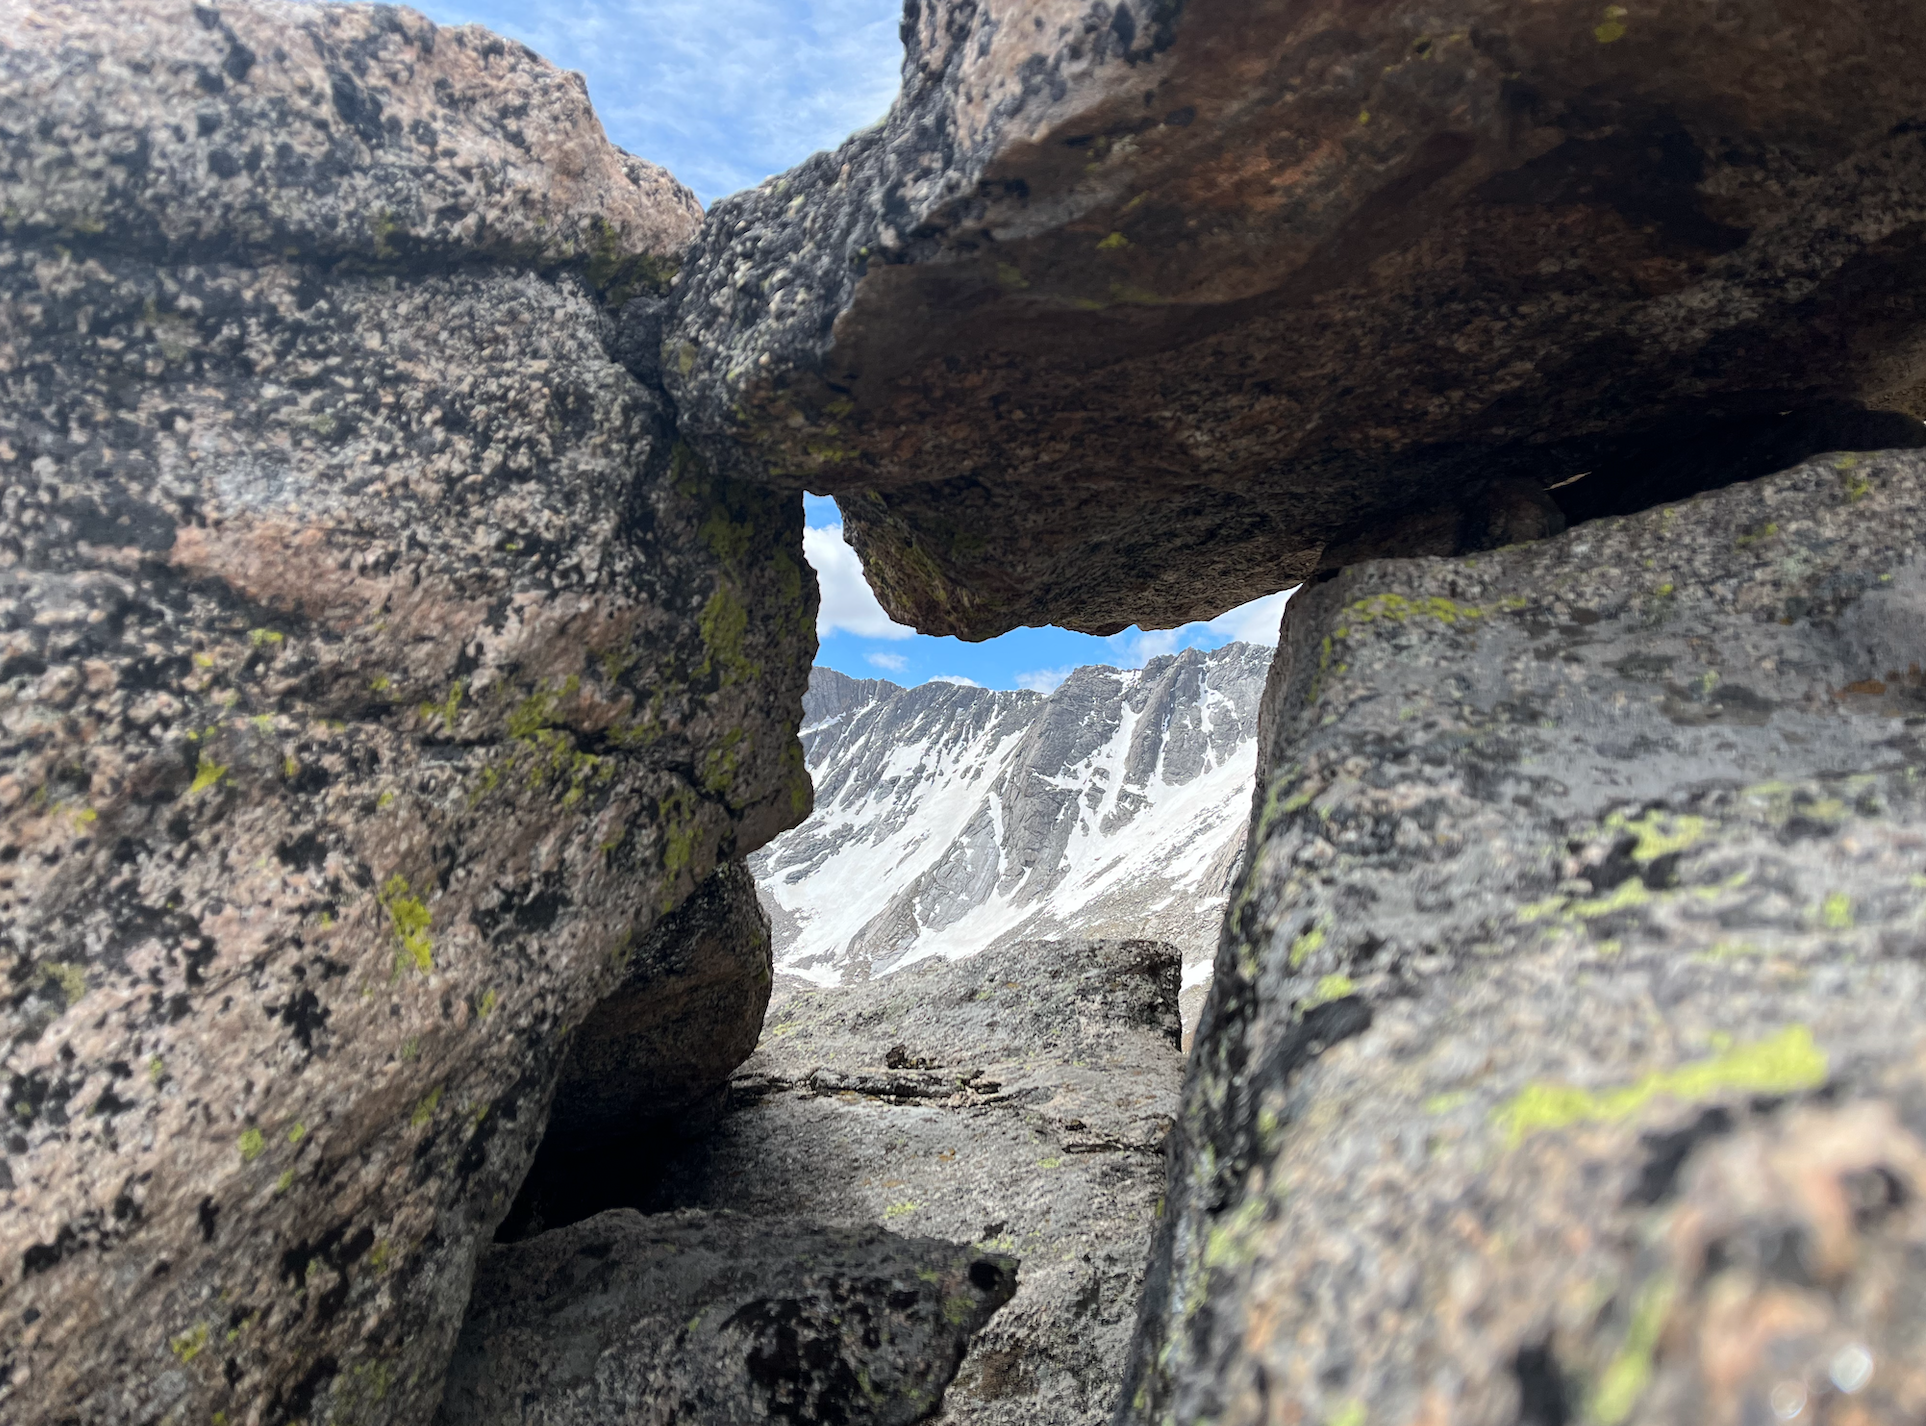
Views from the rocky ridgeline

Once you reach the rocky ridgeline, your pace will likely slow down significantly as you have to step carefully in certain areas and keep a sharp eye out for cairns. I didn’t have any issues sticking to the trail, but I really took my time and didn’t rush through this section. My main priority was to prevent altitude sickness and keep a steady pace. There is a bit of a false summit that you’ll hike around, and the trail stays below the ridgeline for the last mile or so. Eventually, the road and summit complex will come into view and you’ll finish the ascent on some moderate switchbacks that lead you to the summit.

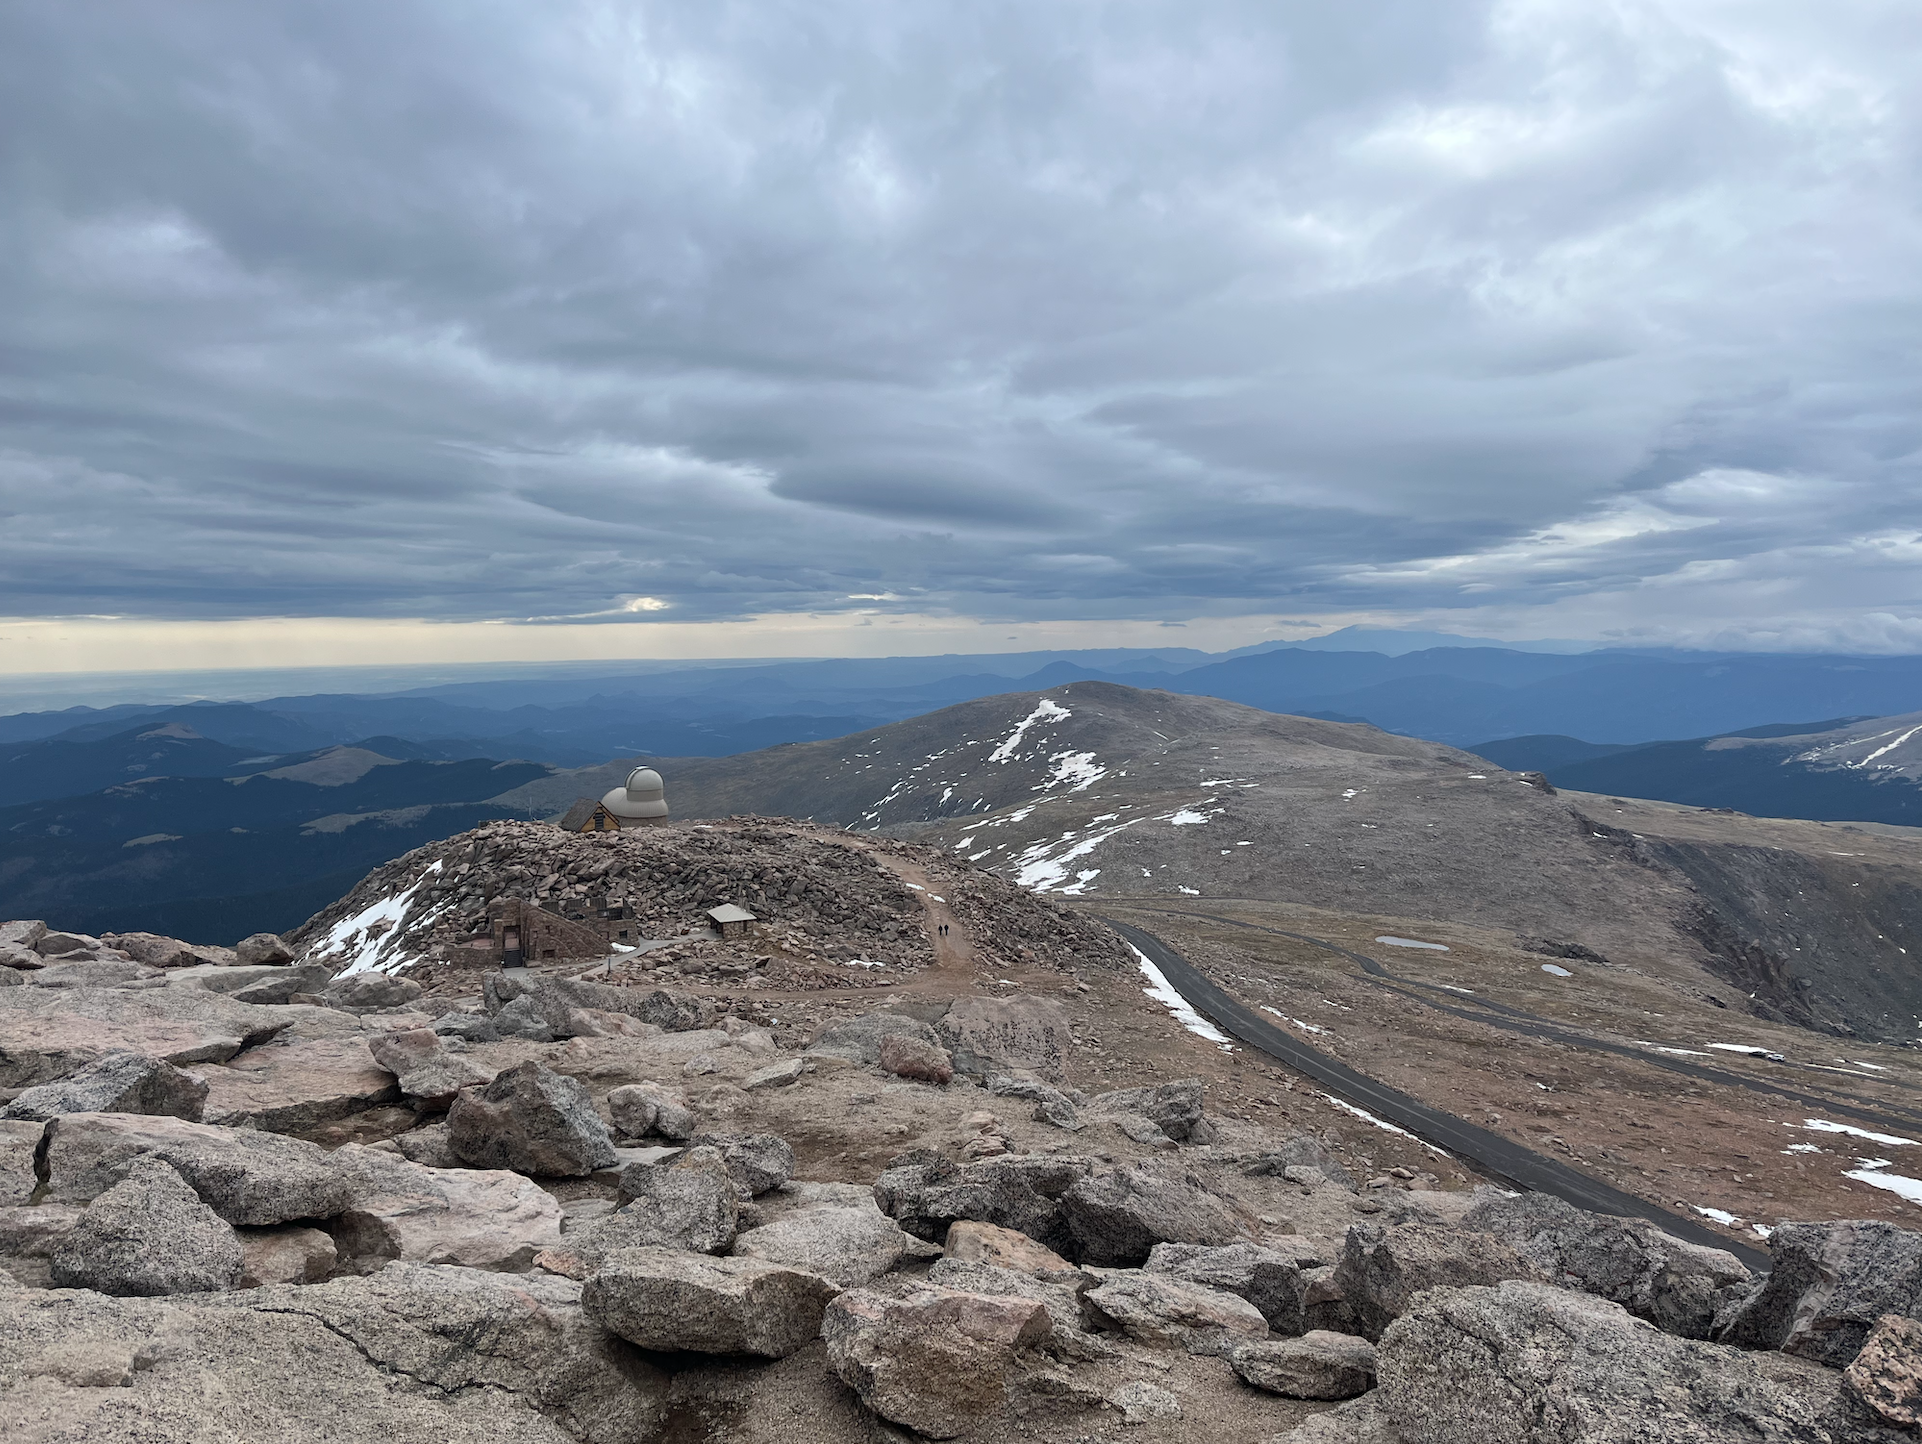
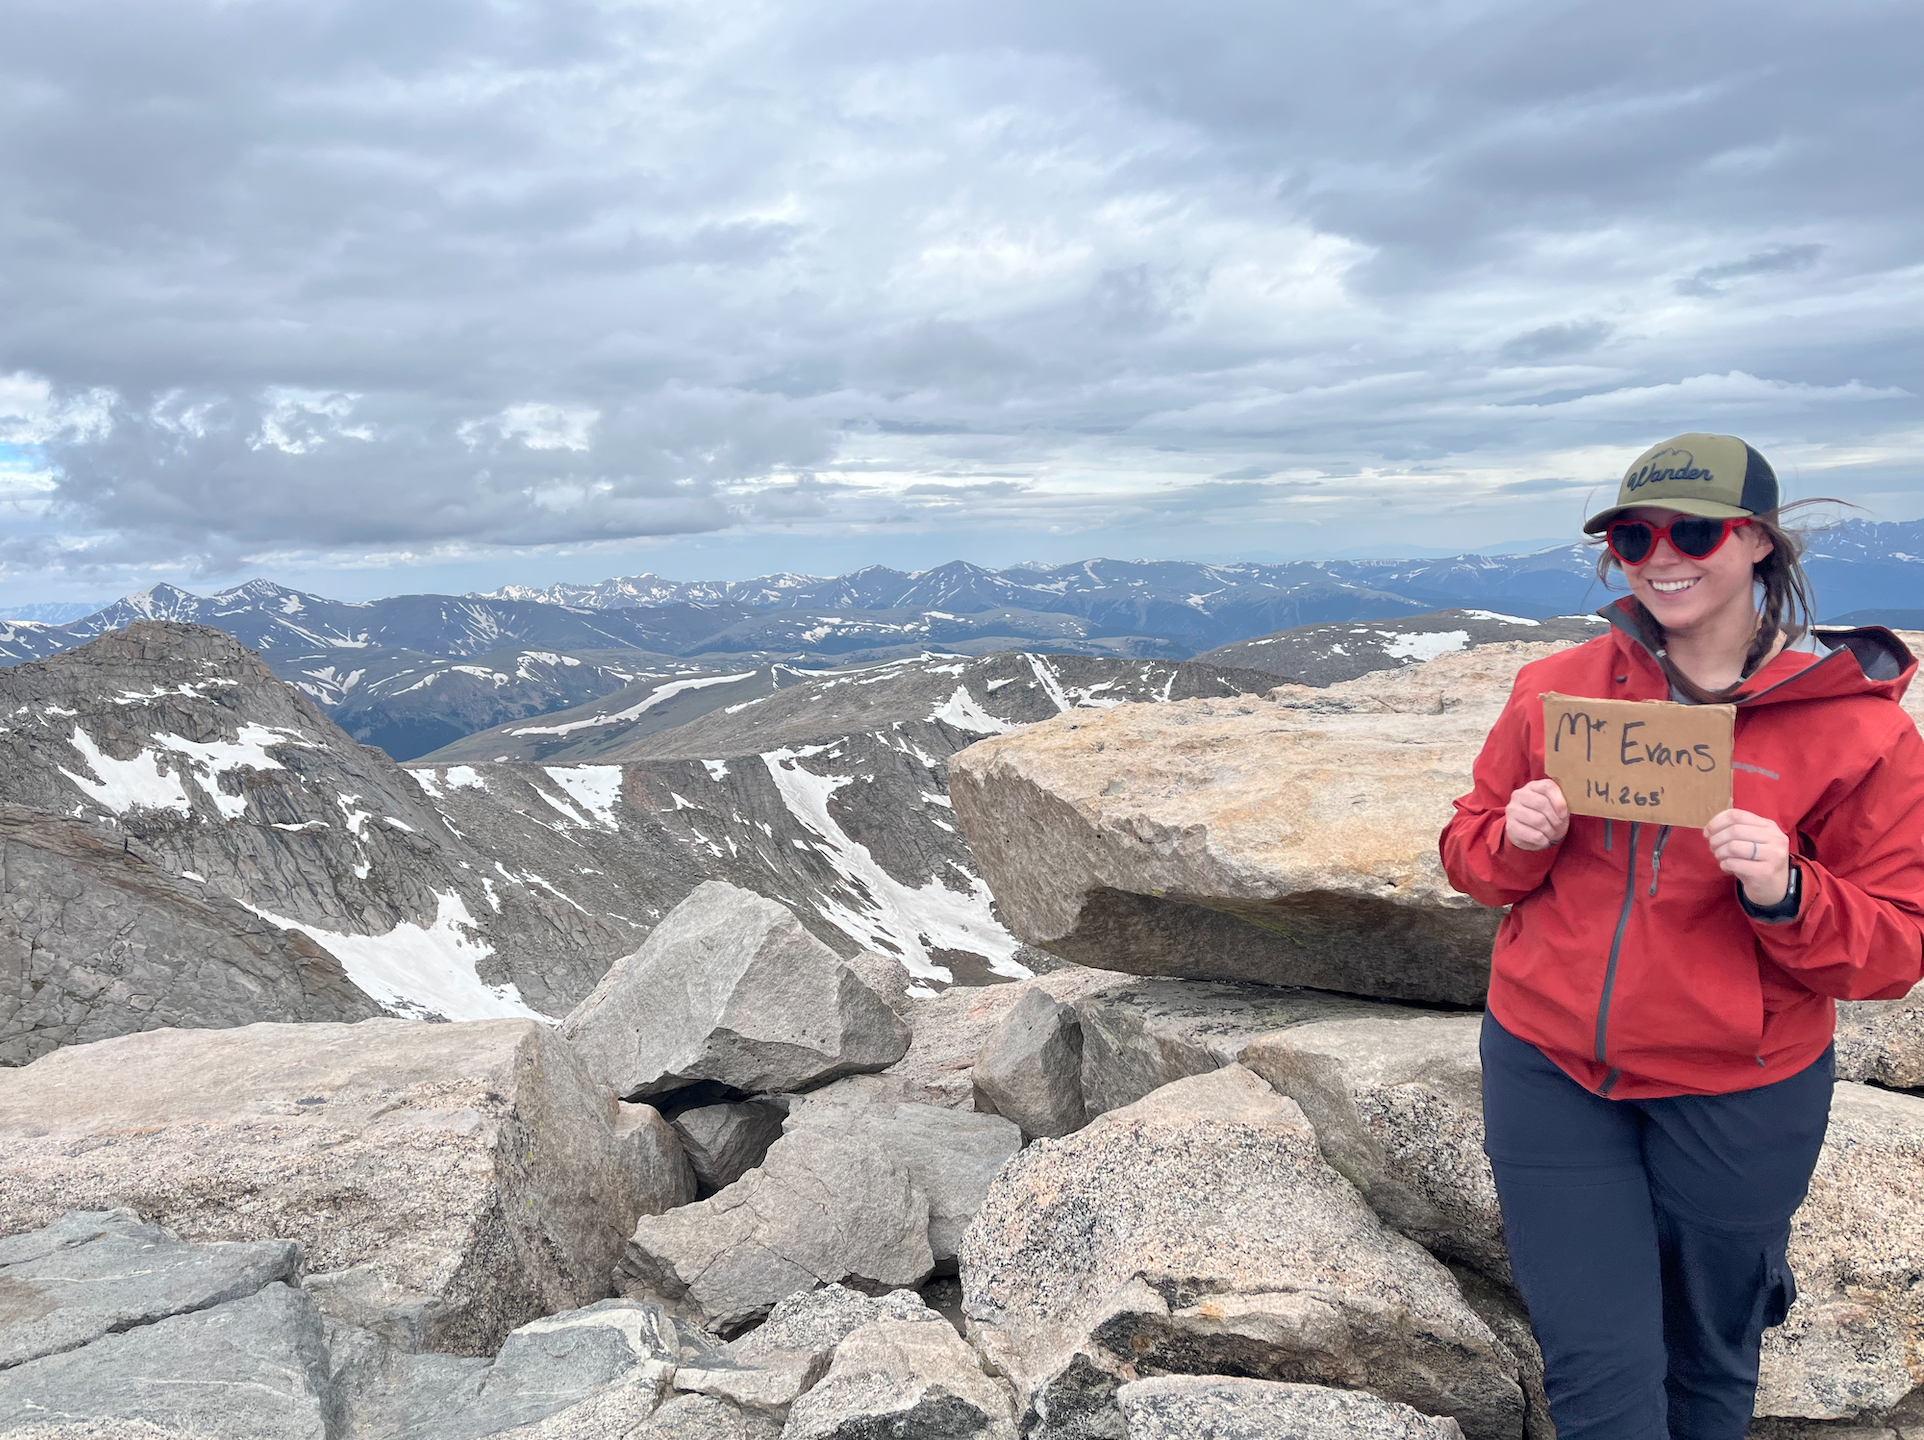
Views of the trail, summit complex, survey marker, and an obligatory summit photo!

After snacking on a sandwich and grabbing some photos at the summit, I began the descent. I would say heading back down the trail almost felt rougher than going up. Going downhill on such rocky terrain was uncomfortable on my knees, and I did stray off-trail once or twice. I believe there are a few routes along the rocky ridgeline and I managed to get off of the main one, which is the easiest. I’ll also note that my watch ended up tracking the hike as closer to 6.75 miles in total. All in all, I was back at my car by 11:30, so I wrapped up the hike in almost exactly 5 hours. I felt totally fine during the hike but was hit with some altitude sickness once I made it back to the car. I definitely recommend staying well-hydrated and bringing plenty of snacks to combat this as much as possible. If you’re visiting from out of town, it’s also important to let yourself acclimate to the elevation before attempting this hike.

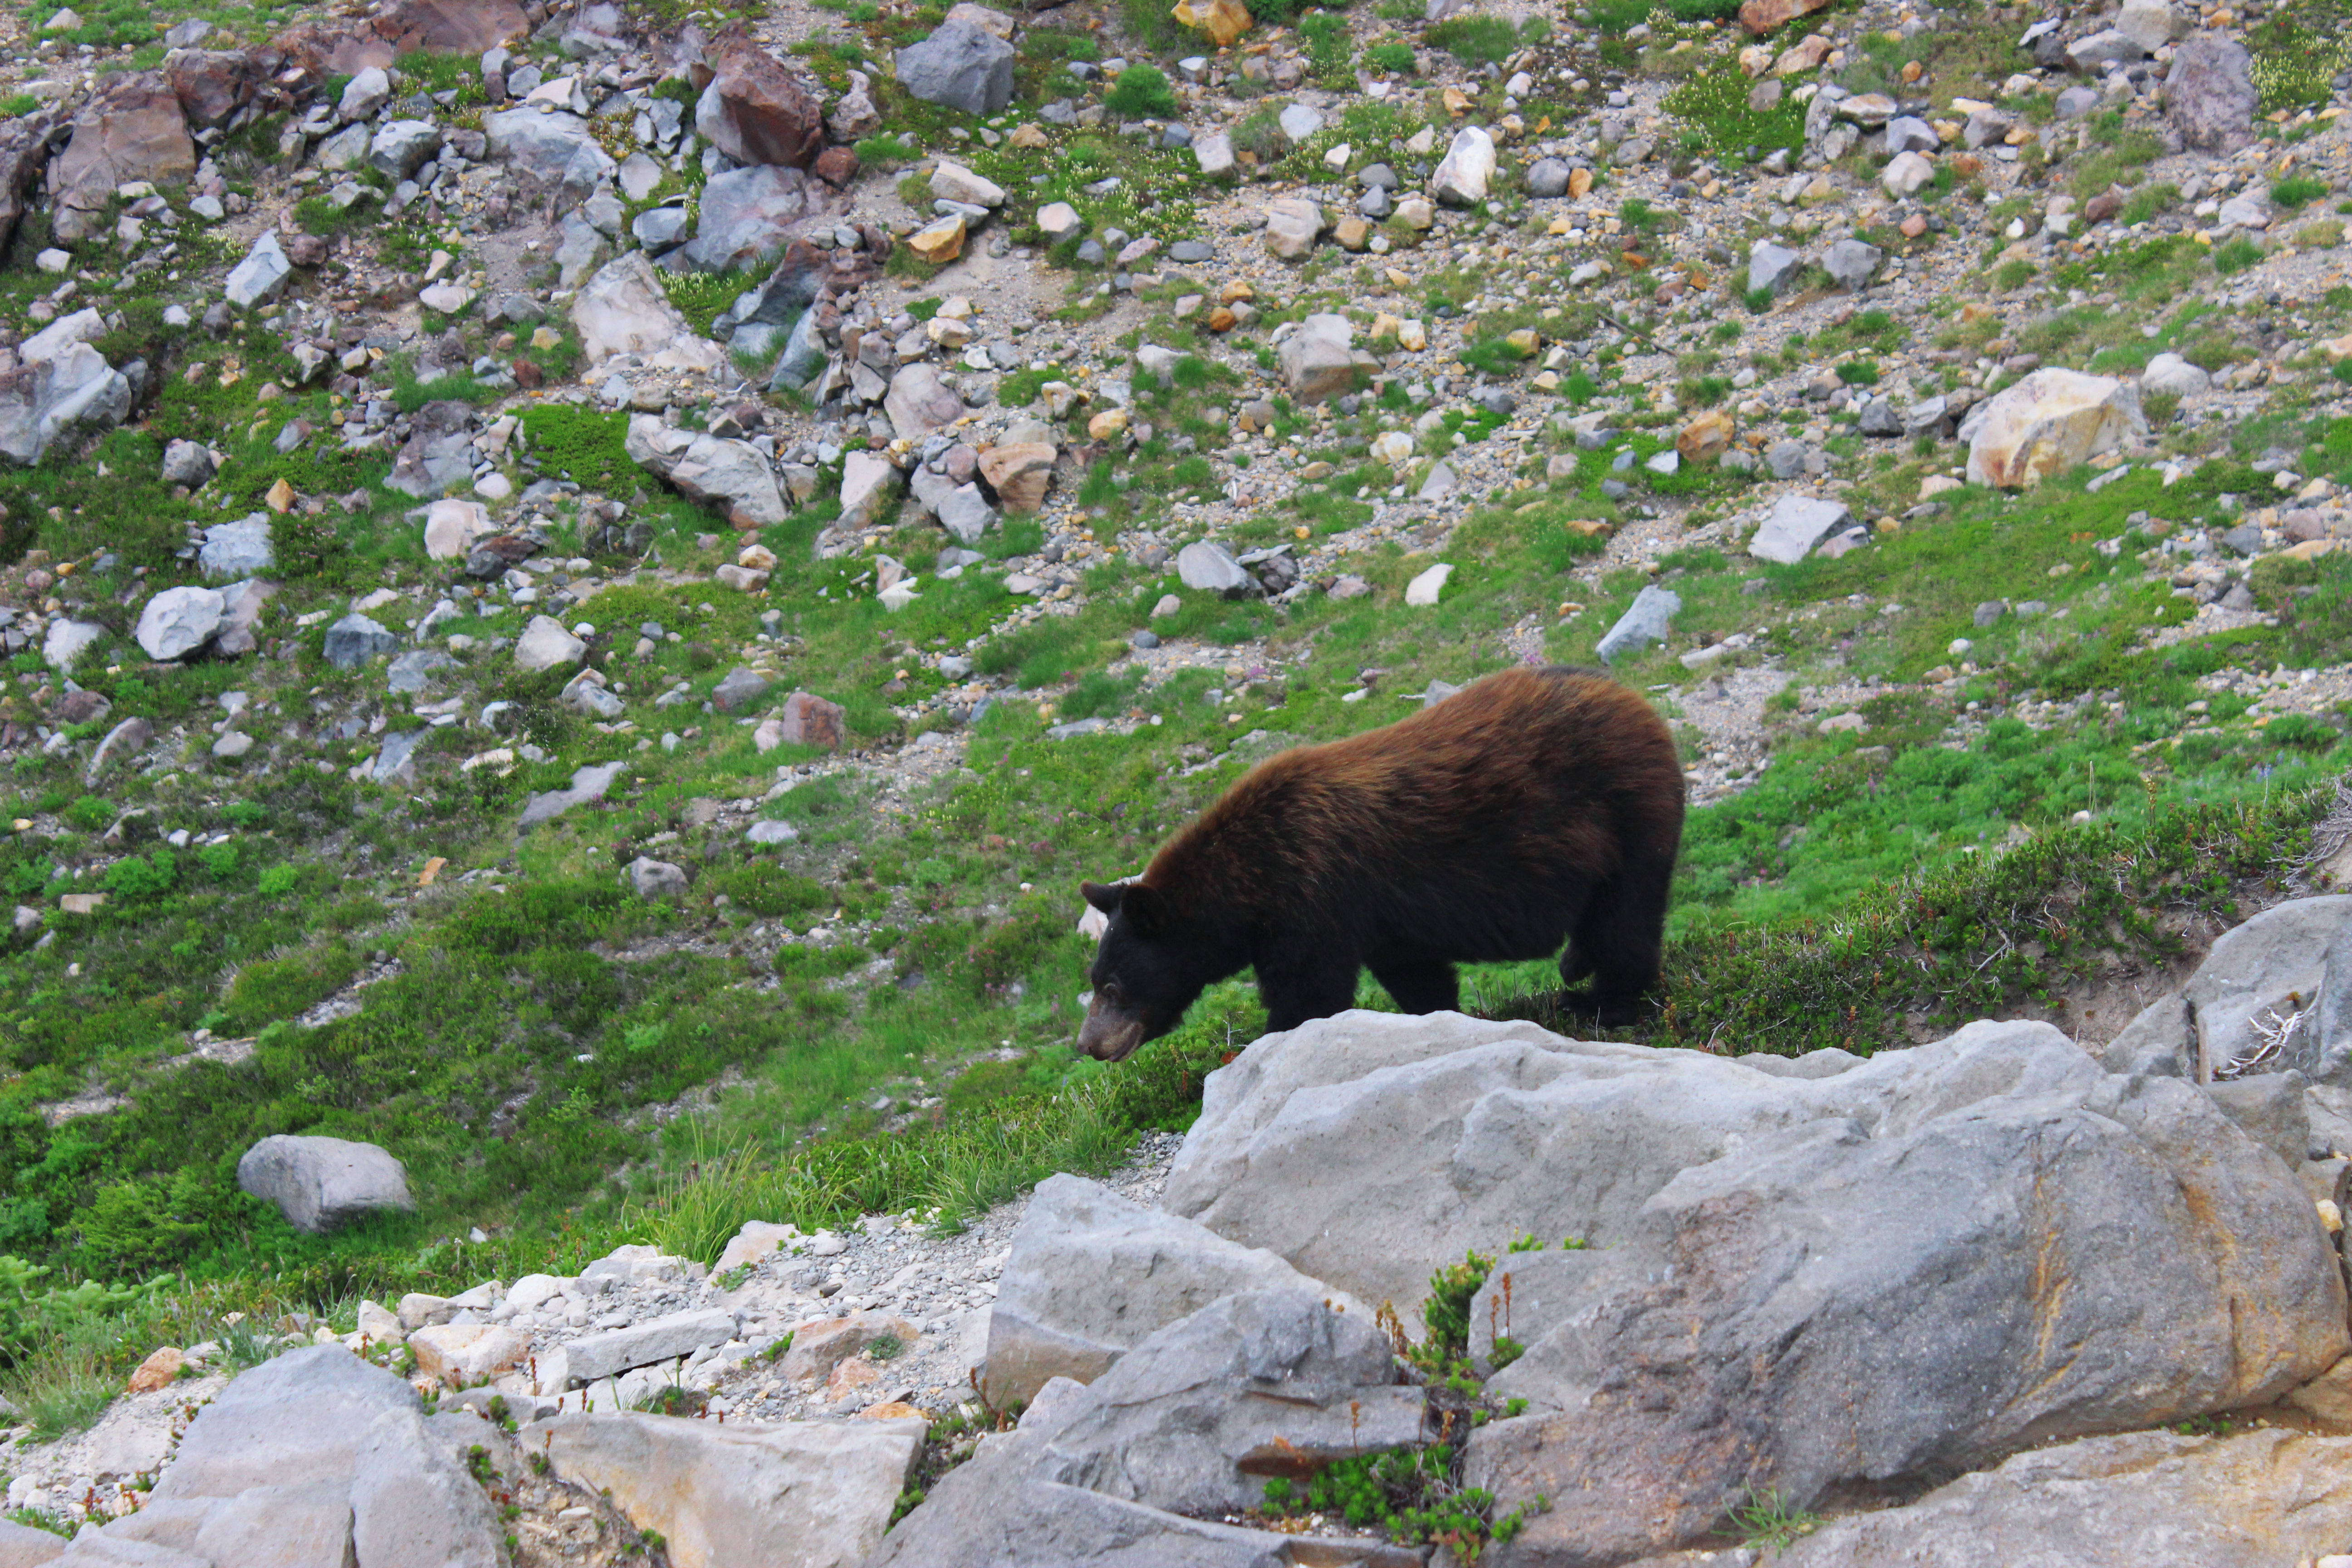
If you squint you can spot a marmot!

I thoroughly enjoyed the hike from Summit Lake to Mount Evans. It was sufficiently challenging that I felt I was pushing myself, but not so hard that I questioned my ability to summit. For locals, I’m sure this hike is a walk in the park! I would definitely recommend this hike if you’re visiting from out of town or looking for a beginner-friendly 14er.

5 Tips for Taking Your First Solo Trip

I’ve always considered myself fairly independent, and traveling solo is a huge extension of that. While I obviously love traveling with my husband, there are a lot of times that work or other outside circumstances make it easier for me to take trips alone. I honestly love traveling alone because you have complete flexibility and freedom as you plan and embark on your trip. I’ve undertaken a number of solo road trips (my most recent was to New Mexico – check out the vlog and blog), camping trips, and cross-country flights, and I’ve learned something new on each adventure. These are my 5 tips for taking your first solo trip!

  1. Consider your destination – do you want to stay fairly close to home, or venture to an entirely different state (or country)? Doing a “staycation” somewhat close to home, or to a city you’ve visited before, is a great way to ease into solo travel. Having a sense of familiarity with your destination makes the whole process a lot less intimidating. If you have your heart set on solo-traveling to a completely new area, do some research into how “solo traveler-friendly” the destination is. A great way to do this is by joining social media groups related to solo travel!
  2. Identify your intentions – maybe you want to solo travel to spend some time with yourself in solitude, or maybe you’re super social and plan to make friends along the way. Having an idea of your expectations and intentions when solo-traveling can help as you plan what to do and see on your trip. Some activites and areas are known for being great places to connect with others, while some destinations are perfect for those who want to keep to themselves. Thinking of what kind of solo-traveler you are makes a world of difference as you plan your trip.
  3. Travel safe and smart – I could do a whole separate blog post on how to stay safe when traveling solo (let me know if you’d like to see that!) but a lot of it comes down to common sense. Some of the biggest ways to travel safe and smart are: tell one or two trusted contacts your itinerary before leaving on your trip, don’t tell strangers you’re traveling alone, and do research on unsafe areas at your destination to avoid. Also make sure to “fake it til you make it”, aka try to project confidence as much as possible, because if you’re looking really confused or lost, you could come across as an easy target. At the end of the day, solo travel should be a fun and rewarding experience, so set yourself up for success by taking the necessary precautions to stay safe so you can truly enjoy your trip.
  4. Don’t feel awkward to do things alone – sure, some activities might be more geared towards couples, but you should never let anyone or anything make you feel awkward or inferior for doing things alone. Some of my favorite solo activities to do on my trips are going out to eat at a restaurant or cafe, going to the movies or a museum, browsing through some shops or local markets, and exploring a public park or hiking area. For some of these activities, I recommend bringing along a book or popping in your headphones to listen to a podcast/audiobook/music to keep you occupied. Besides, most people will be too focused on themselves to even notice you’re there alone, let alone waste time and energy on judging you for it!
  5. Be open to new experiences – obviously, you want to keep your wits about you and not put yourself in a dangerous situation, but go into solo travel with an open mind and a willingness to try new things. Sometimes, the most unexpected adventures end up being the most memorable! Don’t be afraid to try new things, especially if it’s something that will help you learn more about and/or experience the local culture of your destination. This could be anything from trying a new food or activity to spending a whole day with a local guide or tour group doing something you wouldn’t have planned otherwise.

I hope you find these tips helpful as you plan your first solo trip! I’d love to talk more about this topic so please let me know if there’s anything specific you’re curious about or would like me to cover. Thanks for reading, and happy travels!

Pike Place Market: 5 Things to Know Before You Go

When you think of the city of Seattle, a few images probably come to mind: the Space Needle, rain, Starbucks, and, of course, Pike Place Market. Pike Place Market is the most popular tourist attraction in Seattle, and one of the most popular in the entire world! Every year, more than 10 million visitors from all over the world come to Pike Place Market to experience this iconic place for themselves. Pike Place Market is one of the few tourist attractions in Seattle that I actually consider worth the hype, and I think everyone who finds themselves in Seattle should make time to stop by. If you’ve never visited, here are 5 things to know about Pike Place Market before you go.

Pike Place Market is one of the oldest continuously-operated farmer’s markets in the entire country! Pike Place Market has an incredibly rich history dating all the way back to 1907, when the market first opened. The market presents the amazing opportunity for visitors to experience a slice of Seattle history firsthand as they walk through the various levels consisting of local vendors, shops, and restaurants.

The unofficial mascot of Pike Place Market is Rachel, a bronze piggy bank statue! This isn’t your average childhood piggy bank, though: Rachel weighs 550 pounds and receives anywhere from $6,000-$9,000 every year in the form of all different kinds of currency. Rachel can be found under the “Public Market Center” sign where she was first placed in 1986.

Image courtesy of Pike Place Market Foundation

Inside the market you can find Pike Place Fish Market, which is world-famous for its fish-throwing fishmongers! The quirky tradition first began in 1980 when the former owner decided it would be more efficient to toss the seafood rather than walk it over to his employees on busy days. Since then, the fishmongers – who can be identified with their signture orange waders – have become known for this practice which they do when a fish is purchased, a donation is made, or randomly for tourists who may be watching.

Pictured is Jack’s Fish Spot, another fish vendor in Pike Place Market

Just across the street from the market is the “original” Starbucks. Technically, the first Starbucks originally opened in another location before moving to this storefront on Pike Place. There is almost always a massive line out the door of visitors who want to experience the original Starbucks for themselves. I’ll be honest – it’s not too special, and resembles pretty much any other Starbucks you can find in the country. If you’re a lover of Starbucks, I recommend visiting the Starbucks Reserve Roastery, which is right down the street, instead!

Pike Place Market is truly a cornerstone of the Seattle community. For years it has been a place where locals and tourists alike can gather to support the local economy by purchasing from small businesses. Pike Place Market has undergone a number of renovations and restorations over the years, but its original purpose has remained through it all. When you go to Pike Place Market you’re not just visiting any other tourist attraction: you’re supporting the community by putting money directly into the pockets of local business owners!

A Weekend Exploring New Mexico

Happy June everyone! Over Memorial Day Weekend I embarked on a solo road trip to a state I’d never been before: New Mexico! I explored the towns of Santa Fe and Taos and had an amazing time. I was only able to stay for one night, so I’d love to go back to New Mexico and take some more time to see everything it has to offer. This is a little recap of everything I did and saw during my short time in New Mexico. If you haven’t already watched my road trip vlog, you can check that out right here!

Santa Fe

My first destination for my solo road trip to New Mexico was the Santa Fe Farmer’s Market. I arrived around 11:30am and was excited to see that the market was huge! There were a lot of people there because it was a beautiful Saturday morning, but I had a lot of fun wandering around and checking out all the vendors. I didn’t purchase anything this time around, but I highly recommend visiting the market if you want to pick up some local produce, baked goods, or arts and crafts.

After exploring the farmer’s market, I made my way over to REI Santa Fe. REI may not be everyone’s cup of tea, but as a former employee, I find it interesting to visit the different stores when I travel. REI is also typically a great place to buy local goods, and especially souvenir items. While there, I grabbed a few freeze-dried foods and snacks to have for dinner at my campsite.

For lunch, I decided to stop by La Choza because it has amazing reviews, with some people calling it the best Mexican restaurant in the whole city. I had pretty high expectations, and La Choza did not disappoint. To start, I tried their house margarita with prickly pear, which was highly-recommended in reviews. The margarita was incredibly fresh and not too sweet – just my style! I also got an order of their chips and guacamole. While the guacamole wasn’t as chunky as I usually like it, the flavor was amazing and I loved the addition of blue corn chips. For my entree I tried the crisp taco plate with green chile beef. The taco itself was amazing and the green chile beef was super flavorful. The plate also came with beans and posole, a type of pork/hominy soup that I had never tried before and really enjoyed. I chose a sopapilla for my side item which was super simple but surprisingly delicious, even though I totally forgot to try it with honey!

After lunch, I made my way over to Kakawa Chocolate House, which was one of my favorite stops of the whole trip. Kakawa serves up drinking chocolate and all kinds of chocolate creations ranging from truffles to caramels and even brownie sundaes. I got their Mayan drinking chocolate with whipped cream which was the perfect combination of sweet, bitter, spicy, and creamy. I also tried a sampling of their truffles and caramels which were mind-blowingly good. The prickly pear truffle and pinon caramel were my favorites!

Next, I decided to visit the downtown Santa Fe area. I didn’t have a specific destination in mind, so I just wandered through the various streets and popped into a few shops. I stumbled across a beautiful church in the heart of the city that was an amazing find, and I loved the big park in the main square as well. The whole area has a very artsy feel, with lots of galleries, museums, and art vendors around every corner. I didn’t get to spend much time exploring, but would love to come back sometime.

Taos

My next stop on my New Mexico road trip was Taos, where I’d be spending the night. Taos was about an hour and a half drive from Santa Fe, and the ride there went by the Rio Grande which was beautiful. Taos is a pretty small town, and I immediately loved the atmosphere as soon as I arrived. My first stop after checking in to my campsite was the Taos Inn to try their world-famous Cowboy Buddha Margarita. The margarita was very fresh and delicious, and I took my time enjoying it.

As the night came to a close I returned to my campsite at Taos Valley RV Park and settled in for the evening. I had hoped to do some hiking while in New Mexico, but wildfires had sadly closed many of the national forests. All the more reason to plan another visit!

If you’re looking for simple and comfortable camping or RV accommodatioins, I definitely recommend Taos Valley RV Park. All the facilities were very nice and well-maintained, and the park was surprisingly quiet so I got a great night of sleep. There are also beautiful views of the surrounding mountains which made for a beautiful sunset.

The next morning, I started my day with a visit to Michael’s Kitchen for breakfast. The restaurant is clearly a favorite in town because it was very busy, but I was able to grab a table without any wait. I opted for the atole-pinon pancakes which were made of blue corn. I absolutely loved how hearty and almost savory these pancakes were in contrast to your normal buttermilk shortstack. On my way out, I also grabbed a freshly baked loaf of sourdough bread, a chocolate croissant, and an apple empanada. All of their baked goods were amazing!

After breakfast, I took a short stroll through downtown Taos. Like Santa Fe, Taos is full of shops, art galleries, and museums. I picked up some handmade margarita glasses, which I can’t wait to use, and enjoyed my morning walk through town before beginning the journey home.

All in all, I had an amazing trip to New Mexico for the first time! I loved all the art and history that was evident in each town, and would love to return to explore some of the state’s beautiful hiking areas as well. I definitely recommend paying a visit to New Mexico if you’ve never been. What are your favorite things to see and do in New Mexico? Leave your recommendations in the comments so I can be sure to incorporate them during my next trip!

Skyline Trail – Mt. Rainier National Park

With summer quickly approaching, I want to highlight one of my favoite hikes in Mount Rainier National Park: Skyline Tail. Skyline Trail, also know as Skyline Loop Trail, is a 5.5-mile-long loop in the Paradise area of the park. Skyline Trail is a challenging hike, but along the way you’ll experience some of the best features that Mount Rainier National Park has to offer, from glaciers to alpine meadows and waterfalls. If you only have time for one hike in Mount Rainier National Park, and you’re up for the challenge, I highly recommend the Skyline Trail.

The Skyline Trail begins at the Jackson Visitor Center in Paradise. If you choose to hike the loop clockwise, as most do, you’ll immediately begin gaining elevation as you make your way to Panorama Point. Panorama Point is an amazing viewpoint, and some even choose to turn back here after stopping to rest and enjoy the views. It was actually along this section of the trail that we encountered a bear, which was my first ever run-in with a wild bear!

If you choose to continue your hike past Panorama Point, you’ll head east on the Skyline Trail. You’ll soon come across the junction with Golden Gate Trail, which can be used to shorten the hike. To complete the full loop, continue heading east and you’ll eventually reach the Stevens-Van Trump Memorial. You’ll begin to descend into Paradise Valley, with a brief uphill portion taking you Myrtle Falls, before finally arriving back at the Jackson Visitor Center.

All in all, Skyline Trail is an amazing hike that highlights some of the most beautiful natural features of Mount Rainier National Park. I highly recommend adding this hike to your summer bucketlist, and I would do it again in a heartbeat! Let me know in the comments what your favorite hike is in Mount Rainier National Park.

Woody Gap to Preachers Rock

Preachers Rock is a beautiful summit in Georgia located along the Appalachian Trail. There are several options to hike to the viewpoint, but one of the most popular begins at Woody Gap. This 2 mile out-and-back hike is short and relatively easy, making it a great day hike for hikers of all experience levels.

The hike to Preachers Rock begins at the Woody Gap parking area off GA Hwy 60, just outside the town of Dahlonega. White blazes mark the route to Preachers Rock along the Appalachian Trail, which heads northeast through the woods. Spring is a beautiful time to do this hike, as plants will be blooming and conditions won’t be as humid as they become in the summer months. The trail is very easygoing for the first 3/4 mile with minimal elevation change as you make your way to Preachers Rock.

The last 1/4 mile or so is the most challenging part of the hike to Preachers Rock. You’ll begin to head uphill as you approach the summit, and there are a number of switchbacks and stone steps along the trail. It isn’t long before you arrive to Preachers Rock, a rocky viewpoint that overlooks the Blue Ridge Mountains.

Make sure to take your time appreciating the beautiful views from Preachers Rock. This is a great spot to kick back for awhile and enjoy a snack or some lunch (make sure to leave no trace and pack out all your trash). The hike back to the Woody Gap parking area is very easy aand straightforward, though you will want to watch your step on the steeper sections to ensure you don’t trip.

Preachers Rock is one of my favorite hikes along the Georgia section of the Appalachian Trail. It’s also a great hike for beginners, and I’ve taken several friends up it as their first official hike. Have you done this hike before? Let me know in the comments!

Peru Photo Diary – Part 3

Hi everyone! Today I’m wrapping up my Peru Photo Diary series with part three. This may be my favorite installment in the whole series because these photos were taken in Cusco and Machu Picchu!

Cusco is a beautiful town in the Andes where many people stay before continuing on to Machu Picchu. It’s a great place to acclimate to the higher elevation and is so full of incredible history. We only spent one night there, but I loved wandering the streets and watching the sunset.

Of course, the highlight of my whole Peru trip was seeing Machu Picchu. It took a plane, a train, a bus, and a hike to make it there, but it was so worth it. Machu Picchu is just indescribable to see in person, and I’m so thankful I had the opportunity to experience it for myself. It’s incredible to think about the work that went into creating the city and what it must have been like in its prime. And, of course, it was so cool to see the llamas that wander through the ruins! I would love to return and backpack to the city via the Inca Trail.

It’s been so fun for me to reflect on my Peru trip and revisit the memories through this series. I hope you’ve enjoyed my photos and if you’ve ever thought about visiting Peru, I highly encourage you to make it happen!

Camping With Our Dog for the First Time

Hi folks! Today I’m switching up my normal content and sharing our experience camping with our dog for the first time. I thought it would be fun to recap how everything went, offer some suggestions, and reflect on what we might do differently next time.

Our original plan was to spend one night at a local Colorado Springs campground that was pet-friendly. My thinking was if our dog, Willie Nelson, was causing a ruckus, we could easily pack up and head home since the campground was only about a half hour from our house. The campground was nice and the people working there were super friendly, but the sites were very close to each other and there was not a lot of privacy. It was also an RV park/campground, so it was very noisy in general. We decided to pack up and head to another area about an hour away that we were familiar with, Turkey Rocks, to see if there was room for us to pitch a tent. We figured, worst case scenario, we could always come back to that campground since our site was reserved.

The road to Turkey Rocks is incredibly rough and bumpy, so it was already a lot less popular than the campground. We made our way up a massive hill and at the top spotted a beautiful designated parking and campsite area. With no one around and amazing views of the mountains, we pitched our tent! Before our trip, I purchased a pet tether that could either go into the ground or around a tree and would give Willie about 15 feet to run around. We had to make sure there was nothing within his reach (like camp chairs or a water bowl), or he would knock it over, but having the tether made setting up camp and relaxing so much easier. We explored for a bit and settled in as the sun began to set. We made sure to bring a few of Willie’s toys and his food/water bowls from home, and he seemed to be doing really well.

Once it was time for bed, we brought him into the tent where it was, admittedly, a bit squished. Willie did some sniffing and poking around before settling down, and we all fell asleep pretty quickly. Around midnight, Willie managed to open the zipper to the door of the tent just enough to slip out, but thankfully we were able to grab his leash and hook him up to the tether before he wandered off. We definitely learned our lesson to zip the door from bottom to top rather than from top to bottom!
Willie was sniffing and pacing around like crazy, so I wouldn’t be surprised if a few deer had wandered through at some point. From midnight to about three Willie seemed to be pretty on edge. We left him on the tether but opened the door of the tent so we could hear and keep an eye on him. He used the bathroom and played for a bit, but mostly seemed preoccupied with sniffing and digging. Eventually, we brought him back into the tent where he continued to whine for a bit before settling down again for the night.

All in all, the experience went about how I expected. Willie was actually able to settle down in the tent pretty well, except for those three hours in the middle of the night. The tether was a great tool to have so we could be hands-free and know that he wouldn’t escape and run off. As much as we’d love for him to be an off-leash dog, he’s still a bit young and tends to wander away. Definitely something to work on as we bring him on more adventures!

Below is a quick packing list if you plan to go camping with your pup. One big item we need to purchase is a doggy first aid kit. I wasn’t too concerned about it for this trip since we were pretty close to home, and thankfully, we didn’t need one. In my opinion, though, you never know what could happen and should always be prepared for the worst! I also recommend making sure your dog is chipped and wearing a collar with updated contact information in case they happen to escape and run off. I would also suggest having a clear, updated photo of your pup on your phone in case you need to start sharing for people to keep an eye out.

Do you have a furry friend that accompanies you on camping trips? What are your tips and tricks for making sure they’re comfortable and have a good time? Let me know in the comments!

Packing list:

  • Bowl(s) for food/water – since we were able to just drive up to our campsite, we brought Willie’s regular bowls from home. We do also have a collapsible bowl specifically for camping which we’ll likely use on trips where we have to hike in/out.
  • Toys – we only brought two, but I’m glad we had them on hand because he did play with them for a bit throughout our trip.
  • Tether – definitely a must-have in my opinion (unless your dog is used to being off-leash). Having the tether made it very convenient to keep our hands free while also giving Willie plenty of room to explore.
  • Poop bags – another must-have! Remember: leave no trace.
  • Food/treats – obviously, food is a must-have, but I also thought having treats would be helpful in case Willie needed to be distracted or if he happened to wander off and we had to coax him back. We didn’t end up needing them, but he got a few treats anyway for being a good boy!

Peru Photo Diary – Part 2

Hello everyone! Today I’m sharing with you the second part of my Peru Photo Diary series. These photos were primarily taken in Centro Historico and Miraflores. Fun fact: we actually got caught in the middle of a protest while we visited Centro Historico! Thankfully it didn’t turn violent at all, but there was a heavy police presence and we had to barricade inside a restaurant at one point to avoid being tear-gassed. Crazy times! Miraflores was one of the highlights of the trip for me personally. I loved walking through the street markets and seeing all the artists.

Stay tuned for part three where I’ll be sharing some of my favorite photos from the entire time when we had the amazing opportunity to visit Cusco and Machu Picchu.

Peru Photo Diary – Part 1

Hello and happy May everyone! I can’t believe we’re already 5 months into 2022 – it seems like time is flying by faster and faster with every passing minute.
I was recently looking through some of my photography archives and realized I never properly shared photos from my study abroad trip to Peru in May of 2019. I had the most incredible time visiting Peru, and it remains one of my favorite travel experiences to date.
In honor of it being the three year anniversary of my Peru trip, I plan to share three photo diaries in total throughout the month of May. This first photo diary focuses on activities and sights throughout the city of Lima. My fellow students and I had the amazing opportunity to learn about Peru’s incredibly rich history while we were there – we visited lots of museums, toured some historical sites, and walked a countless number of steps exploring every day! Getting to experience a new country in such an immersive way was honestly incredible, and I definitely hope to return to Peru one day. Throughout our trip I was continuously amazed by how vibrant and colorful the country was, and it was seriously a photography dream.
I hope you enjoy these photos and stay tuned for parts two and three!